Replace all connecting rod bearing shells
NOTE:
RISK OF DAMAGE
Engine damage caused by incorrectly installed bearing shells and bearing supports.
Engine damage may result from incorrectly installing bearing shells and bearing supports.
Engine damage caused by incorrectly installed bearing shells and bearing supports.
Engine damage may result from incorrectly installing bearing shells and bearing supports.
- Always install all bearing shells and bearing supports in the same position from which they were removed.
NOTE:
TECHNICAL INFORMATION
Piston, gudgeon pin, connecting rod and connecting rod bearing shells are matched to each other and balanced.
Always install the piston, gudgeon pin, connecting rod and connecting rod bearing shells in the cylinder from which they were removed.
Piston, gudgeon pin, connecting rod and connecting rod bearing shells are matched to each other and balanced.
Always install the piston, gudgeon pin, connecting rod and connecting rod bearing shells in the cylinder from which they were removed.
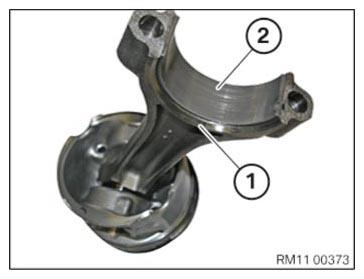
- Thread out and remove connecting rod bearing shell (2) from the connecting rod (1).
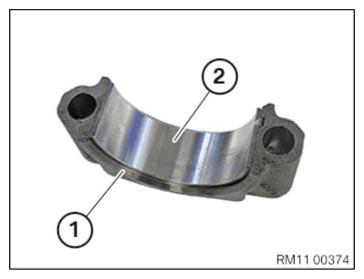
- Feed out the connecting rod bearing shell (2) from the connecting rod bearing cap (1) and remove it.
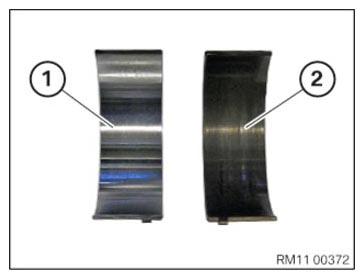
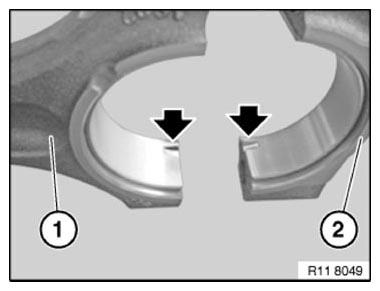
- Take note of different versions of the connecting rod bearing shells (1) and (2).
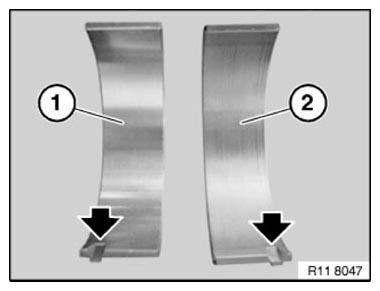
- To avoid incorrect assembly: Pay attention to marks (arrows).
The connecting rod bearing shell (1) and the connecting rod bearing shell (2) are equipped with a fuse each to act against incorrect assembly.
- To avoid incorrect assembly: Pay attention to marks (arrows).
The connecting rod bearing cap (2) and the connecting rod (1) are equipped with a fuse each to act against incorrect assembly.
- Replace the connecting rod bearing shell (2) and insert in the connecting rod (1).
Parts: Connecting rod bearing shell
- Oil the connecting rod bearing shell (2).
- Replace the connecting rod bearing shell (2) and insert into the connecting rod bearing cap (1).
Parts: Connecting rod bearing shell
- Oil the connecting rod bearing shell (2).
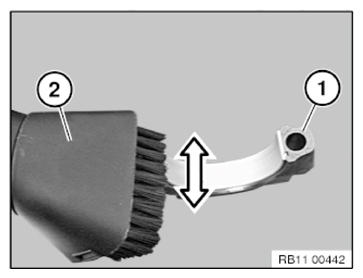
- Vacuum the crack surfaces (1) with a conventional vacuum cleaner (2).
Do not blow off the crack surfaces (1) using compressed air.