Install electric wastegate valve actuator
Repair kit for the electric wastegate valve controller

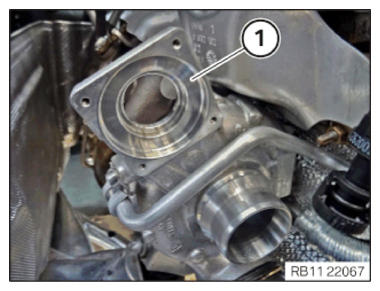
- Check the contact surface (1) on the exhaust turbocharger for contamination and clean if necessary.
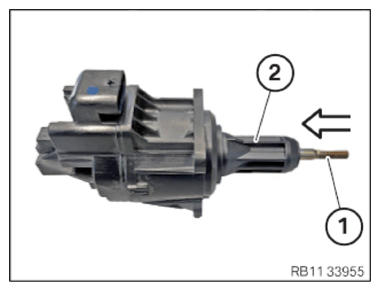
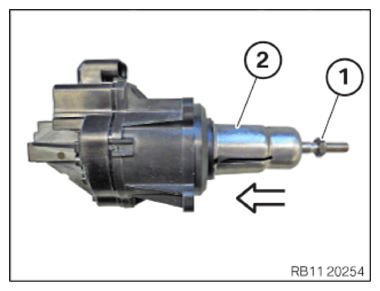
- Slide the control rod (1) carefully
in the arrow direction up to the stop on the electrical wastegate valve controller (2).
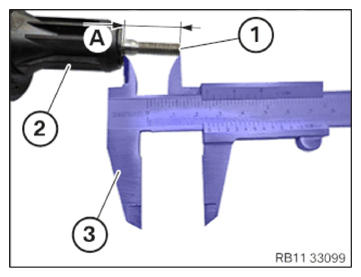
- Determine the dimension (A) of the control rod (1) of the electrical wastegate valve controller (2) with a commercially available caliper gauge (3).
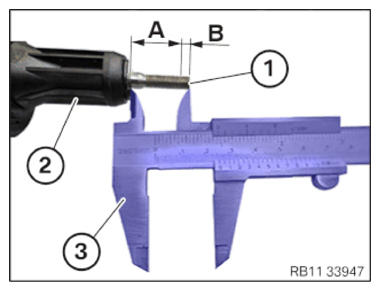
- Supplement dimension (B) on the control rod (1) of the electrical wastegate valve controller (2) with a commercially available caliper gauge (3) to dimension (A).
Dimension (B) = 4.7 mm
- Feed in the heat shield (2) in the arrow direction and install it.
- Replace nut (1).
Parts: Nut
The nut (1) is included in the repair kit.
- Insert and install the nut (1).
- Screw on nut (1) to the stop.
- Feed the electrical wastegate valve controller (1) with the heat shield (2) in the arrow direction into the bore of the compressor housing (3) and position it.
- Ensure that the heat shield (2) is correctly positioned to the groove (4) of the compressor housing (3).
- Replace screws (1).
Parts: Screws
The screws (1) are included in the repair kit.
- Hand-tighten the bolts (1).
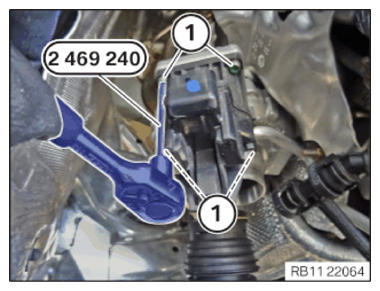
- Tighten the screws (1) crosswise using the special tool 2 469 240. TIGHTENING TORQUES SPECIFICATION
Electrical controller drive to exhaust turbocharger Replace screws.
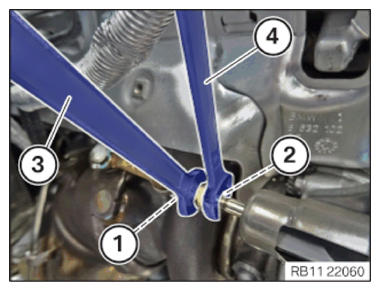
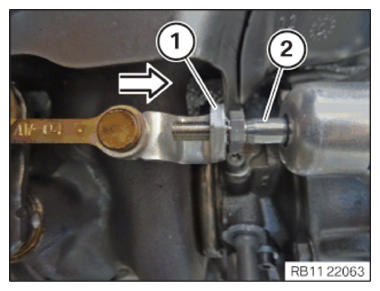
Tighten screws crosswise.Tightening torque 3 ± 0.5 Nm - Slide the lever (1) of the wastegate valve carefully
in arrow direction up to the stop onto the control rod (2).
Avoid any effect of a lateral force on the control rod (1).
- Replace nut (1).
Parts: Nut
The nut (1) is included in the repair kit.
- Bring the nut (1) in to contact on the lever (2) of the wastegate valve.
NOTE:
TECHNICAL INFORMATION
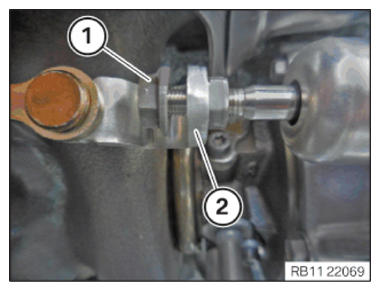
The adjustment nuts must be locked using 2 open-end wrenches. If only one open-end wrench is used, there is a risk of the electrical controller drive being damaged.
The adjustment nuts must be locked using 2 open-end wrenches. If only one open-end wrench is used, there is a risk of the electrical controller drive being damaged.
- Counter-hold the nut (2) with a commercially available open-end spanner (4).
- Tighten the nut (1) with a standard open-end wrench (3).TIGHTENING TORQUES SPECIFICATION
Control rod for electric wastegate valve controller M6
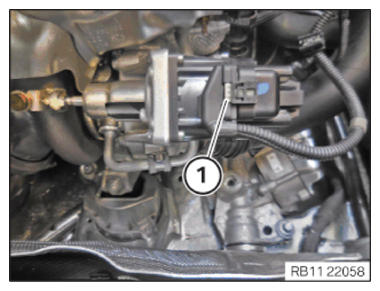
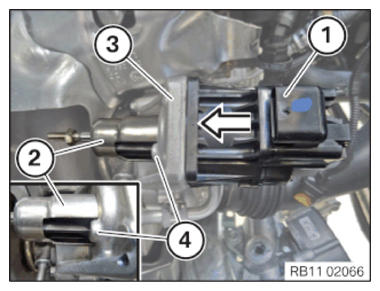
Always use a second open-end wrench (for counter support) to tighten the lock nut!Tightening torque 6 ± 0.3 Nm - Connect and lock connector (1).
The connector (1) must engage audibly.