Removing the servomotor for the eccentric shaft
Preliminary work
- Refer to REMOVING THE ACOUSTIC COVER .
- Refer to REMOVING RESONATOR .
- Refer to REMOVING THE THROTTLE BODY .
WARNING:
Hot surfaces.
Risk of burning!
Risk of burning!
- Perform all work only on components that have cooled down.
NOTE:
RISK OF DAMAGE
Electrostatic discharge.
Damage to or destruction of electrical components.
Electrostatic discharge.
Damage to or destruction of electrical components.
- Leave the electrical components in their original packaging until they are being installed. Only use the original packaging for returning the product. Always package removed components straight away.
- Read and comply with user information on using the associated special tool 12 7 060.
- Only tap the housings of electrical components. Do not tap pins or multi-pin connectors directly.
- Wear electrically conductive clothing and antistatic shoes (with ESD symbol).
- For additional information see: NOTES ON ESD (ELECTROSTATIC DISCHARGE) PROTECTION .
NOTE:
RISK OF DAMAGE
Contaminant or foreign body.
Contamination can result in malfunctions, loss of function or leaks.
Contaminant or foreign body.
Contamination can result in malfunctions, loss of function or leaks.
- Adhere to the utmost cleanliness.
- Protect components from contamination e.g. by covering.
- Close off line connections with seal plugs.
NOTE:
TECHNICAL INFORMATION
Collect and dispose of emerging fluids. Observe country-specific waste disposal regulations.
Collect and dispose of emerging fluids. Observe country-specific waste disposal regulations.
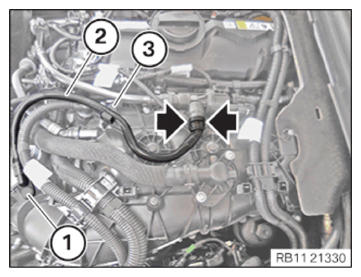
- Unlock the locks (arrows).
- Loosen screw (1).
- Feed out the tank vent line (2) from the clamp (3) and remove it.
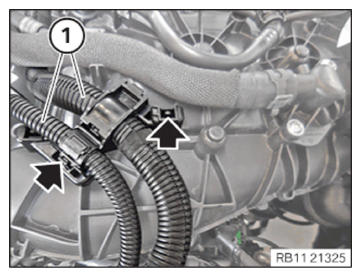
- Unlock and detach the locks (arrows).
- Feed out the wiring harness section (1) for sensor system 2 and place to one side.
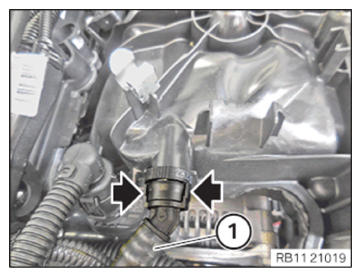
- Unlock the locks (arrows).
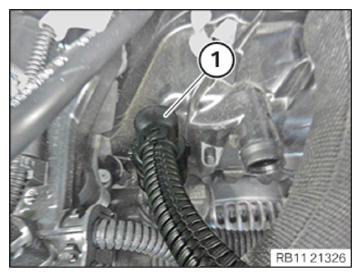
- Slide the tank vent line (1) out and set it aside.
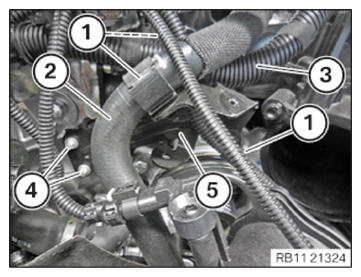
- Unlock and loosen the clamps (1).
- Feed out coolant line (2) and place to one side.
- Feed out the wiring harness section (3) for sensor system 2 and place to one side.
- Loosen screws (4).
- Guide out and remove holder (5).
- Unlock plug connection (1) and disconnect.
- Loosen screws (1).
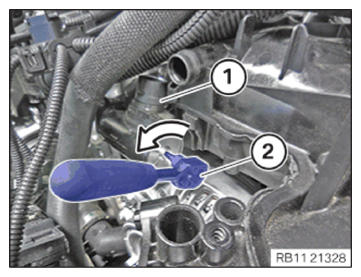
- Turn the drive shaft of the servomotor (1) with a standard tool (2) in the direction of the arrow.
- Make sure that the drive shaft of the servomotor (1) is not turned beyond the end stop of the eccentric shaft.
- Guide out and remove the servomotor (1).
- Catch and dispose of emerging motor oil.