Installing both actuators
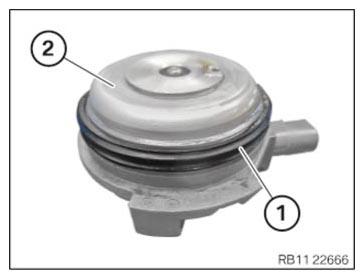
- Check seal (1) for damage and, if necessary, replace actuator (2).NOTE: The figure shows the rear of the engine.
- Position both actuators.
- Connect and lock both connectors (1).
- Make sure the connectors (1) engage audibly.NOTE: The figure shows the rear of the engine.
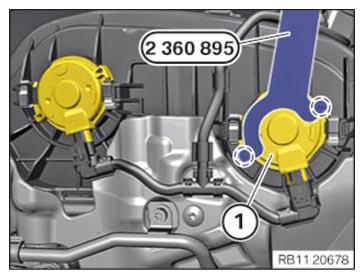
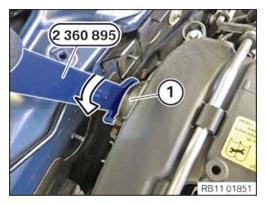
- Position special tool 2 360 895 correctly on the actuator (1) of the exhaust side.
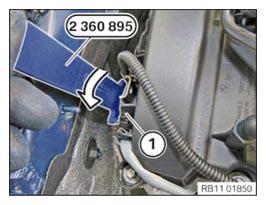
- Position the actuator (1) of the exhaust side and turn in the arrow direction with the special tool 2 360 895 until the limit stops tap the clamps.NOTE: The figure shows the rear of the engine.
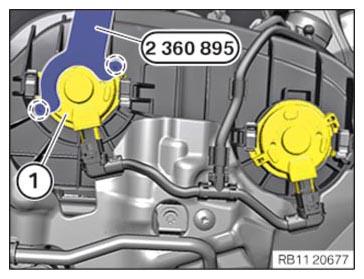
- Position special tool 2 360 895 correctly on the actuator (1) of the intake side.
- Position the actuator (1) of the intake side and turn in the arrow direction with the special tool 2 360 895 until the limit stops tap the clamps.

Follow-up work
- Refer to INSTALLING ACOUSTIC COVER AT REAR .
- Refer to INSTALLING THE CENTER COWL UPPER PART .
- Refer to INSTALLING TENSION STRUT ON SHOCK TOWER .
- Refer to INSTALLING WINDSHIELD PANEL COVER .
- Refer to INSTALLING LEFT AND RIGHT WIPER ARM .
- Refer to INSTALLING THE REAR RIGHT ENGINE COMPARTMENT COVER .
- Refer to INSTALLING THE COVER OF THE ENGINE COMPARTMENT ON THE REAR LEFT .
- Refer to INSTALLING THE FRONT HOOD SEAL AT THE REAR .
- Refer to INSTALLING ACOUSTIC COVER .