Install/mounting the number plate baseplate for the number plate
Incorrect assembly of the number plate leads to a malfunction of the sensors of the driver assistance systems.
- Fix number plate and number plate baseplate only according to the dimensions specified in the repair instructions.
- Secure number plate and number plate baseplate on the bumper panel without pre-drilling , otherwise there is a risk of damage to the underlying cables.
- Only use number plate baseplates that have been approved for the vehicle type.
The number plate must be precisely mounted on the number plate baseplate and must not protrude on the underside.
The number plate carrier must not be installed on the front bumper.
In the European version with basic bumper panel, the number plate is installed without number plate baseplate.
Positioning the number plate
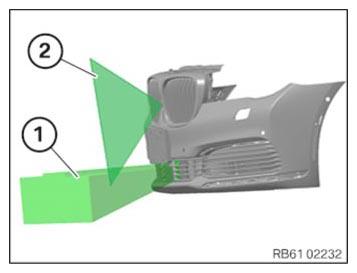
- Position the number plate or number plate baseplate correctly.
- Make sure that the angle of radiation (1) of the ACC sensor is not obstructed.
- Make sure that the angle of radiation (2) of the front camera is not obstructed.
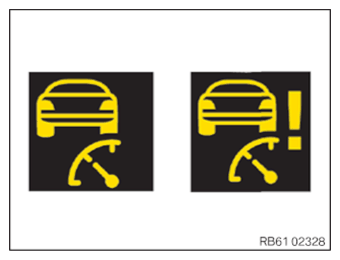
Detect possible fault pattern due to incorrect assembly and rectify
Check
- Check number plate for correct position.
Result
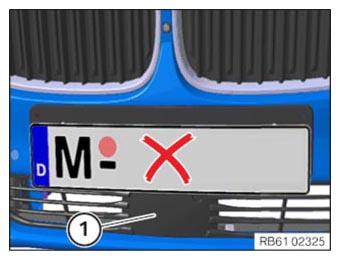
» The number plate is positioned too low.
The angle of radiation of the ACC sensor (1) is partially covered.
Malfunction of the ACC sensor (1) is possible.
Measure
- Position the number plate correctly.
Check
- Check number plate for correct position.

Result
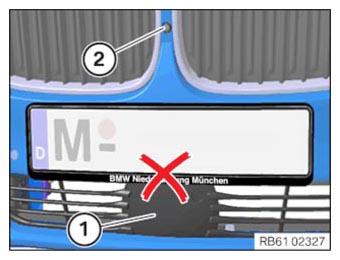
» The number plate is positioned too high.
The angle of radiation of the front camera (1) is partially covered.
Measure
- Position the number plate correctly.
Check
- Check number plate for correct position.
Result
» The angle of radiation of the ACC sensor (1) is partially covered.
Malfunction of the ACC sensor (1) is possible.
The angle of radiation of the front camera (2) is partially covered.
Measure
- Remove the number plate carrier.
- With Check Control messages due to incorrect assembly of the number plate or the number plate baseplate: Position the number plate or the number plate baseplate correctly.
Danger of injury!
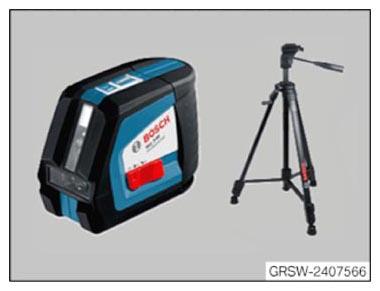
- Do not look into the laser beam.
- Park the vehicle and the special tool 2 407 566 on a flat and even surface.
- Mount the laser on the tripod.
- Switch on laser (Position without automatic level).
- Activate laser horizontally and vertically.
In the European version with basic bumper panel, the number plate is installed without number plate baseplate.
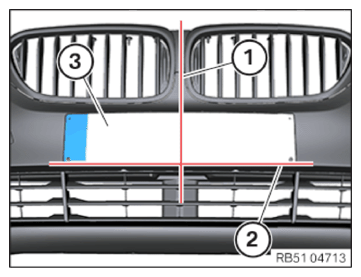
- With European version with bumper panel (Basic):
Mark the center of the number plate (3).
Position the special tool in front and center of the vehicle and.
Align vertical laser beam (1) to center of vehicle (e.g. At the emblem).
Align the horizontal laser beam (2) with the two symmetrical corners on the vehicle.
Align the horizontal laser beam (2) with the edge of the bumper panel.
Align the number plate (3) with both the laser beams (1) and (2) and mark the attachment points in all 4 corners.
Screw down the number plate (3) without predrilling at the marked attachment points.
Use only short screws (TS 5x13).
TIGHTENING TORQUES SPECIFICATIONCar registration number Screw TS 5x13 Tightening torque 0.7 Nm
- With European version with M Aerodynamic package:
Position the special tool in front and center of the vehicle and.
Align vertical laser beam (1) to center of vehicle (e.g. At the emblem).
Align the horizontal laser beam (2) with the 2 symmetrical corners on the vehicle.
Align the horizontal laser beam (2) as shown.
Move the horizontal laser beam (2) vertically down by dimension (A).
TECHNICAL DATA - LICENSE PLATE BASEPLATE SPECIFICATIONLicense plate baseplate Dimension A 10 mm
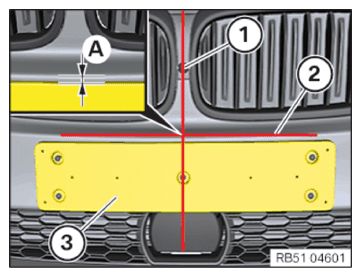
- Align the number plate baseplate (3) on the horizontal laser beam and mark the attachment points.
- Screw down the number plate baseplate (3) without pre-drilling at the marked attachment points.
| License plate baseplate | ||
| Screw TS 5x16 | Tightening torque | 0.7 Nm |
- With US version, Chinese version and Japanese version:
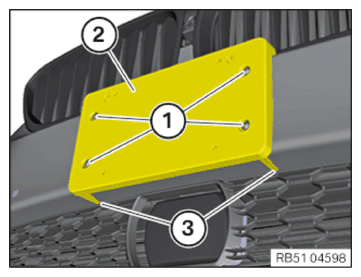
Attach the number plate baseplate (2) with the guides (3) in the bumper panel.
Align the number plate baseplate (3) on the bumper panel.
Screw down the screws (1) without pre-drilling.
| License plate baseplate | ||
| Screw TS 5x16 | Tightening torque | 0.7 Nm |