Installing the oil filter element
NOTE:
RISK OF DAMAGE
Contaminant or foreign body.
Contamination can result in malfunctions, loss of function or leaks.
Contaminant or foreign body.
Contamination can result in malfunctions, loss of function or leaks.
- Adhere to the utmost cleanliness.
- Protect components from contamination e.g. by covering.
- Close off line connections with seal plugs.
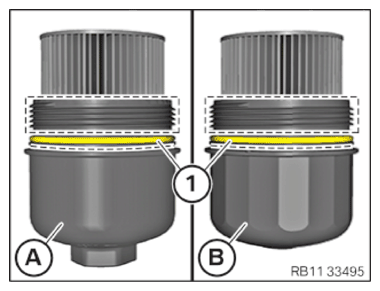
- Version A:
Clean the oil filter in the marked areas using a brake cleaner and a lint-free cloth to remove any oil residue.
- Ensure that sealing ring (1) is coated with engine oil.
- Version B:
Clean the oil filter in the marked areas using a brake cleaner and a lint-free cloth to remove any oil residue.
- Ensure that sealing ring (1) is coated with engine oil.
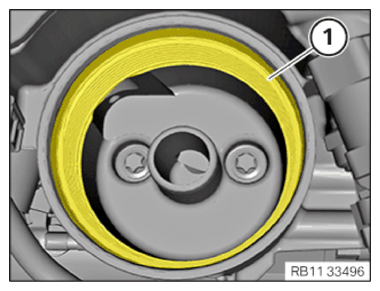
- Clean the oil filter housing in area (1) with a brake cleaner and a lint-free cloth to remove the oil residue.
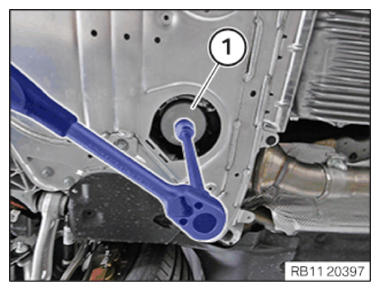
- Position the oil filter housing with the filter and screw it in with a few turns by hand.
- Tighten the oil filter housing using special tool 2 360 126
or 2 455 965
(1).TIGHTENING TORQUES SPECIFICATION
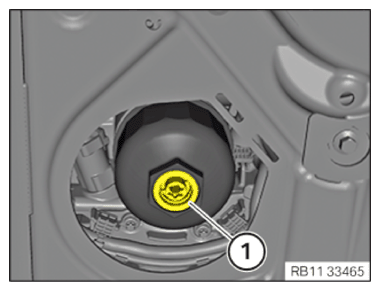
Oil filter housing/special tool S88.5x3 Joining torque 40 Nm Release oil filter housing/special tool. 180° tightening torque 40 Nm - Version with an oil drain plug:
Tighten oil drain plug (1).
TIGHTENING TORQUES SPECIFICATIONOil drain plug Oil drain plug Tightening torque 5 Nm