When replacing the glove box lid
- The closure of the glove box lid and the lock barrel cannot be removed without destroying them and must always be replaced.
Assembling the lock barrel
NOTE:
Schematic diagram is for example purposes. Some parts may differ in certain details.
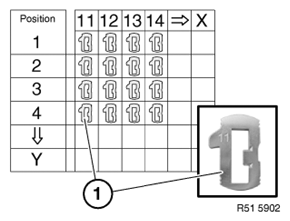
- Sort the enclosed retainers (1) as per the graphic.
(X) = number embossed on the retainer (1)
(Y) = installation position in the lock barrel
NOTE:
The description is for one component only. The procedure is identical for all further components.
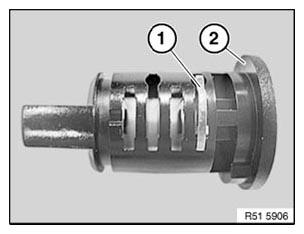
- Insert the spring (1) into the lock barrel (2).
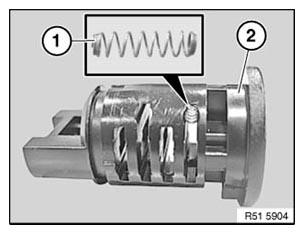
- Insert and engage the retainer (1) with the lowest embossed number X into position Y of the lock barrel (2).
The retainer engages audibly.
Check
- Insert the ignition key (1) into the lock barrel (3).
- Check whether the retainer (2) is flush with the housing.
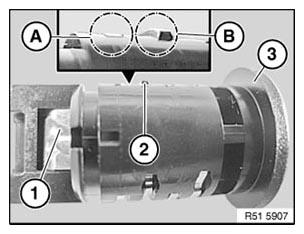
Result
» The retainer (2) is not flush with the housing (B).
Measure
- Press out the retainer (2) from the lock barrel (3) using a suitable tool.
Measure
- Repeat the operations using the retainer with the next higher number X, until the retainer is flush with the housing (A).
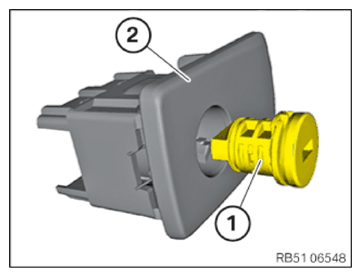
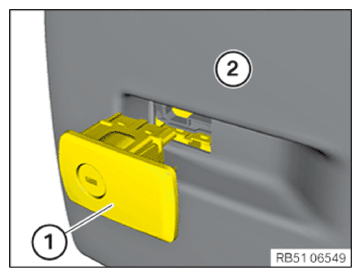
- Insert the lock barrel (1) with the ignition key in the glove box lock (2) and engage via pressure.
- Carefully insert the glove box lock (1) in the glove box lid (2) and lock.