Removing all ignition coils
NOTE:
The description is for one component only. The procedure is identical for all further components.
Removing the ignition coil
WARNING:
Hot surfaces.
Risk of burning!
Risk of burning!
- Perform all work only on components that have cooled down.
NOTE:
RISK OF DAMAGE
Damage to the ignition coil.
The silicone hose of the ignition coil must not be contaminated by fuel as this can lead to failure of the ignition coil.
Damage to the ignition coil.
The silicone hose of the ignition coil must not be contaminated by fuel as this can lead to failure of the ignition coil.
- When working on the fuel system, cover the ignition coils with suitable materials and remove where required.
- Do not oil or grease the silicone tube of the spark plug socket. Do not use any protection or maintenance products (e.g. silicone spray, rubber care products, rust remover, etc.).
NOTE:
RISK OF DAMAGE
Electrostatic discharge.
Damage to or destruction of electrical components.
Electrostatic discharge.
Damage to or destruction of electrical components.
- Leave the electrical components in their original packaging until they are being installed. Only use the original packaging for returning the product.
- Always package removed components straight away.
- Read and comply with user information on using the associated special tool 12 7 060.
- Only tap the housings of electrical components. Do not tap pins or multi-pin connectors directly.
- Wear electrically conductive clothing and antistatic shoes (with ESD symbol).
- For additional information see: 61 35... NOTES ON ESD (ELECTROSTATIC DISCHARGE) PROTECTION .
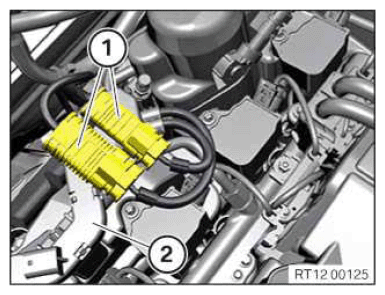
- Release the connector (1) of the Lambda oxygen sensor and the oxygen sensor monitor from the cable duct (2) and put aside.
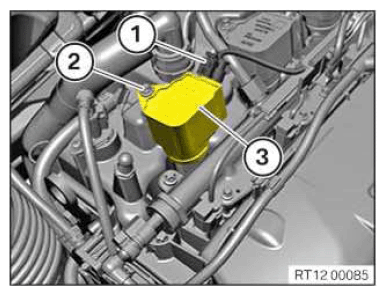
- Unlock plug connection (1) and disconnect.
- Loosen screw (2).
- Remove ignition coil (3).