Remount rain-light-solar-condensation sensor
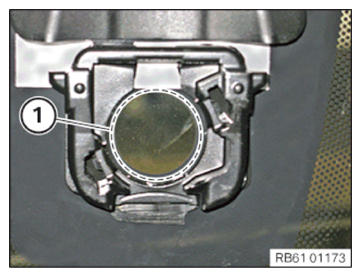
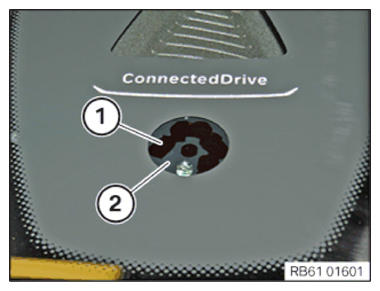
- Carefully clean the new windscreen in contact area (1) of the rain-light-solar-condensation sensor.NOTE: RISK OF DAMAGE
Damage to silicone surface.
A damaged silicone surface can lead to malfunctioning of the rain-light-solar condensation sensor.- Do not touch or damage the silicone coated surface on the rain-light-solar condensation sensor.
- After releasing lock, wait approx. 30 min. at 20°C for silicone surface to relax.
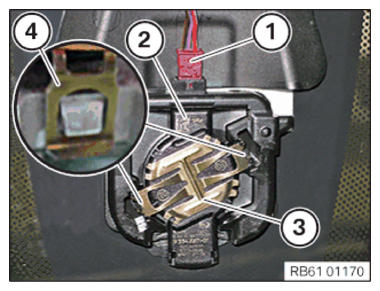
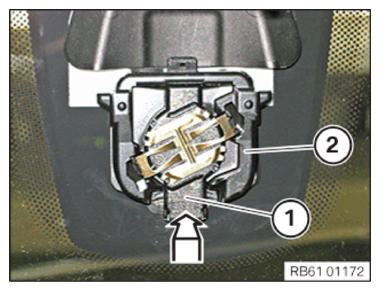
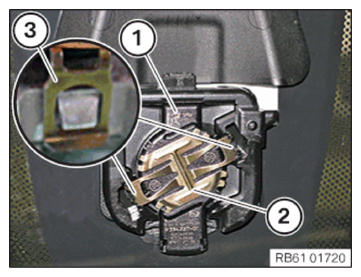
- Disconnect the connector (1).
- Push in retaining spring (3) on both sides and unlock the lock (4) by means of a screwdriver.
- Release the rain-light-solar-condensation sensor (2).
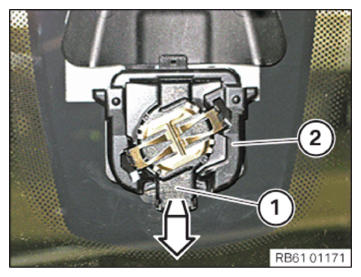
- Slowly pull off rain-light-solar-condensation sensor (1) from the holder in the direction of the arrow (2). At the same time, monitor the release of the silicone surface from the outside.
The silicone surface must be released uniformly from the windscreen, lower the speed at which it is released if necessary.
Checking the gel pad
Check
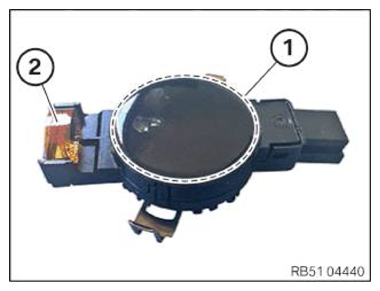
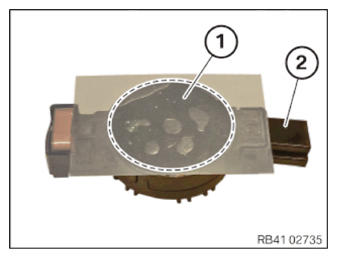
- Check the silicone-coated surface (1) and the printed circuit board (2) for damage.
Result
» Silicone-coated surface (1) is damaged.
Measure
- Replace the gel pad.
Result
» The printed circuit board (2) is damaged.
Measure
- Replace the rain-light-solar-condensation sensor.
Replacing the gel pad
NOTE: RISK OF DAMAGE
Damage to the surface.
The use of sharp-edged tools may damage the surface.- Use only microfiber cloths.
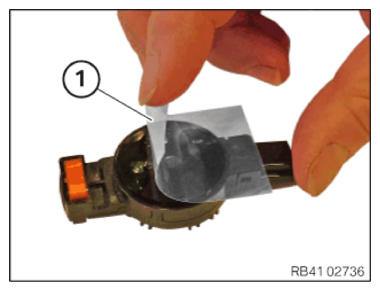
- Remove the gel pad (1) by hand.
Do not touch or damage the printed circuit (2).
- If necessary, remove any gel residue using a microfiber cloth.
- Clean the surface of the rain-light-solar-fogging sensor using a microfiber cloth R2 soaked in cleaning agent.
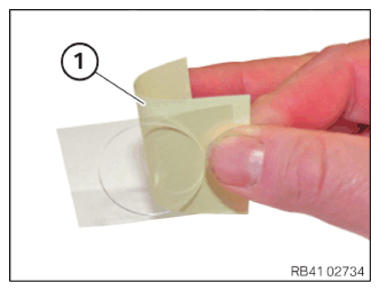
EXPENDABLE MATERIALS - CLEANING AGENT DESCRIPTIONCleaning agent R2 500 ml 83190417324 - Remove the yellow protective film (1).
- Place the gel pad (1) in the center of the surface of the rain-light-solar-fogging sensor (2).
Do not eliminate existing air bubbles.
Air pockets disappear within 30 min after mounting the sensor on the windscreen.
- Remove transparent protective film (1).
- Feed the rain-light-solar and condensation sensor (1) into the holder (2) on the new windscreen in the direction of the arrow.
- Centrally press on the solar rain/light sensor and condensation sensor (2) onto the metal spring (3).
To lock, consecutively press down both sheet metal tabs (4) on every side.
- Check field of view for air pockets.
Visible shading (1) and (2) do not represent air pockets, but indicate the optical element of the sensor. This is not a functional limitation.