Replacing (reverting) the Car Pad Module (CPM)
WARNING:
High-voltage system.
The high-voltage system operates on the basis of hazardous, electrical voltage and high currents. Mortal hazard through electric shock!
The high-voltage system operates on the basis of hazardous, electrical voltage and high currents. Mortal hazard through electric shock!
- All work on the high-voltage system may only be carried out by specially trained and technically experienced personnel.
- For additional information see: 61 00... SAFETY INSTRUCTIONS on handling hybrid cars
- For additional information see: 61 25... NOTES on repair of high-voltage battery unit
NOTE:
TECHNICAL INFORMATION
Zero voltage (high-voltage system switched-off) is only displayed with in PAD mode.
Zero voltage (high-voltage system switched-off) is only displayed with in PAD mode.
Preliminary work
- Remove luggage compartment right flap TRIM PANEL .
- De-energize the HIGH-VOLTAGE SYSTEM .
- CHECK that no voltage is applied.
- Disconnect all battery GROUND LEADS .
- Remove rear UNDERBODY PROTECTION .
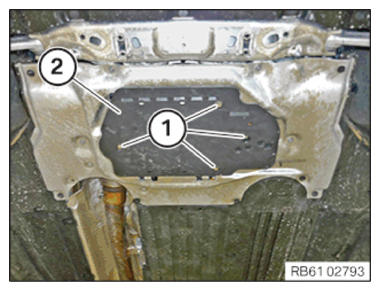
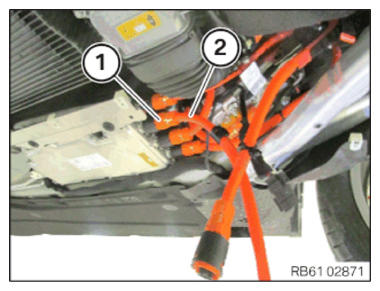
- Loosen screws (1).
- Flip down lid (2) with the CPM.
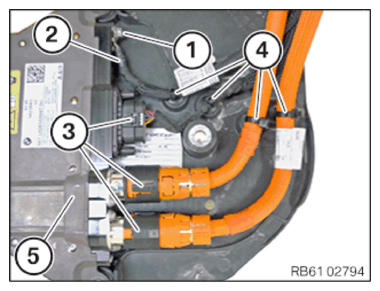
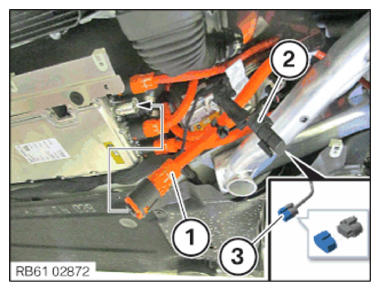
- Loosen screw (1).
- Set potential equalization (2) to one side.
- Unlock and disconnect plug connections (3) from the CPM (5).
- Unclip cable ties (4).
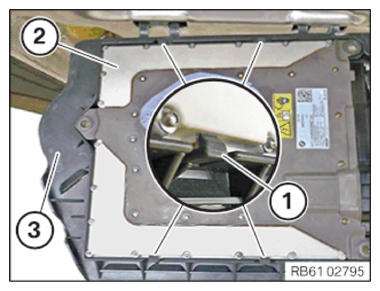
- Loosen the detents (1).
- Pull out and remove CPM (2) from the lid (3).
NOTE:
TECHNICAL INFORMATION
Secure component against falling.
Secure component against falling.
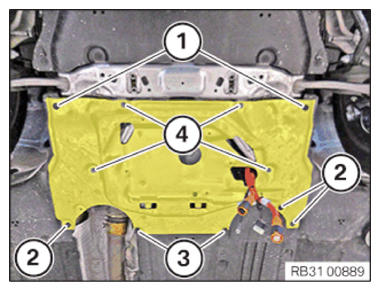
- Loosen screws (1) to (3).
- Loosen screws (4).
- Fold down the thrust field a little at the front with a support person.NOTE: Do not leave the thrust field hanging on the lines!
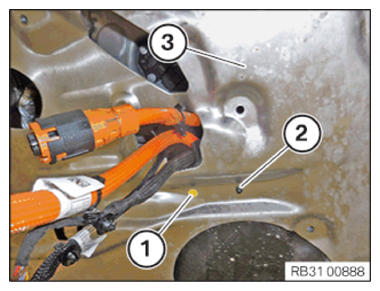
- Remove the expanding rivet (1) upwards.
- Release the clip (2) with the bracket from the thrust field (3).
- Feed out and remove the thrust field (3) at the lines.
- Disconnect high-voltage connector (1).
- Remove (2) high-voltage cable.
The high-voltage cable (2) is no longer needed after the removal.
- Connect the high-voltage cable (1) to the slot that has become available.
- Close the connector (2) with the cover (3).
Parts: Cover (6 820 609)
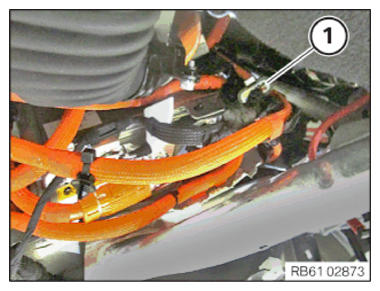
- Release the nut (1).
- Feed out the line for the potential equalization (2) from the Car Pad Module (CPM).
The line for the potential equalization from the Car Pad Module (CPM) is no longer needed after the removal.
- Replace nut (1).
Parts: Nut

WARNING:
Potential equalization in high-voltage system.
Mortal hazard if the potential equalization screw connection is not correct!
Mortal hazard if the potential equalization screw connection is not correct!
- Observe the safety requirements for the potential equalization screw connection.
- Clean contact faces and have then checked by a second person.
- Tighten the screws/nuts for potential equalization with torque; have a second person check the torque.
- Correct execution of these tasks must be documented in the vehicle records by both persons.
- Tighten nut (1).TIGHTENING TORQUES SPECIFICATION
Potential equalization (CPM) Nut M6 Replace nut Tightening torque 8 Nm - Bind back the wiring harness (1).
Follow-up work
- Install the STIFFENING PLATE
- Install rear UNDERBODY PROTECTION .
- Reconnect all battery GROUND LEADS .
- Activate HIGH-VOLTAGE SYSTEM .
- Install flap in right luggage compartment TRIM PANEL .
- ENCODE/PROGRAM control unit(s)