Installing the electrical steering column
NOTE:
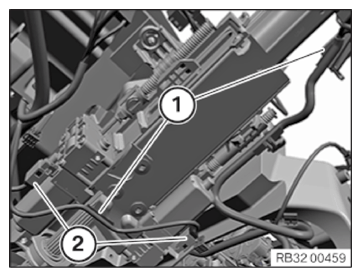
To provide a better overview:
Schematic diagram with partially hidden components.
- Carefully feed in the steering column from the top.
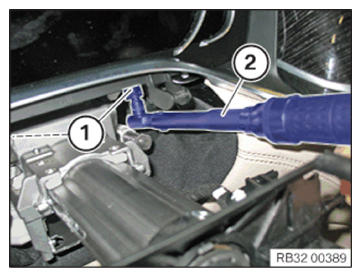
- Connect connectors (2) and lock.NOTE: To reach the plug connections, shift the steering column downward in driving direction.
- Secure cable (1) on the steering column.
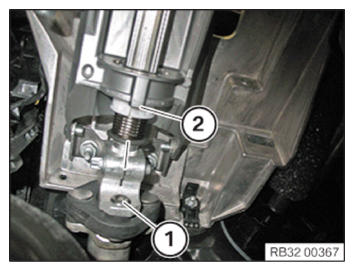
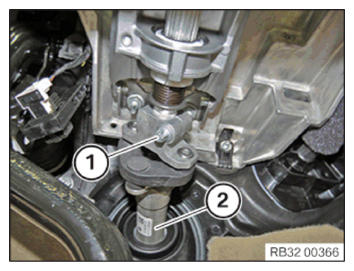
- Observe the marking made at removal for positioning lower steering shaft (1) on steering column (2).
Non-compliance will lead to inclination of the steering wheel.
- Slide the steering column (1) approx. 10 mm into the bottom steering shaft (2).
- Position the steering column on the support of the instrument panel.
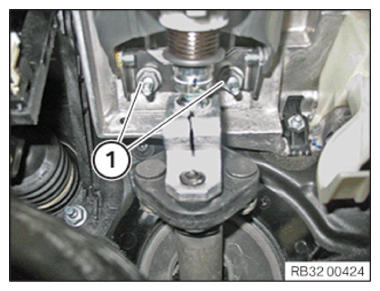
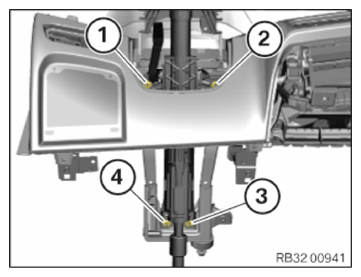
- Fit the nuts (1).NOTE: Do not fully tighten the nuts yet.
- Fit the nuts (1).NOTE: Tightening with the torque wrench (2) follows in the next work step in the sequence.
- It is mandatory
to tighten the nuts in sequence (1) to (4).TIGHTENING TORQUES SPECIFICATION
Steering column to dashboard support M8
Observe tightening sequence.Tightening torque 21.4 Nm - Fully slide the steering shaft bottom (2) onto the steering column.
- Replace the clamping bolt (1).
Parts: Clamping bolt
- Tighten the clamping bolt (1).
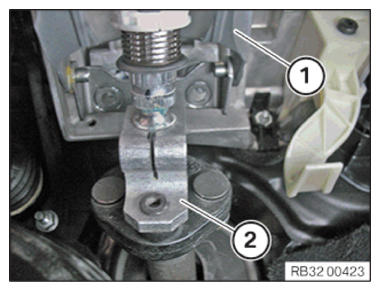
TIGHTENING TORQUES SPECIFICATION
| Lower steering shaft to steering column | ||
| Clamping bolt M8 Recut screw thread. Replace clamping bolt. No retorque permitted! |
Tightening torque | 28 Nm |
Follow-up work
- Install KNEE AIRBAG .
- Install the pedal assembly TRIM PANEL .
- Install the steering column SWITCH CLUSTER (SZL).
- Install steering lower section column SHROUD .
- Fit steering upper section column SHROUD .
- Install STEERING WHEEL .
- Install the steering wheel or sports steering wheel AIRBAG UNIT .
- Disconnect all battery GROUND LEADS .
- ACTIVATE the 48 v electrical system.
- PERFORM steering column adjustment standardization.
- Check the steering wheel STRAIGHT-AHEAD DRIVING POSITION .
- CHECK the airbag for function.