Installing headlining (with SA403 glass roof)
Prerequisite
Glass roof is open.
The front seats have been fully adjusted towards the bottom.
The front seat backrests have been fully adjusted towards the rear.
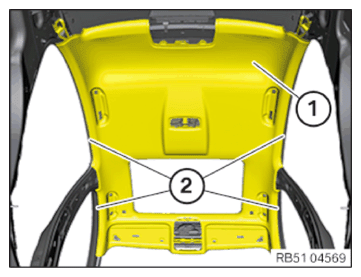
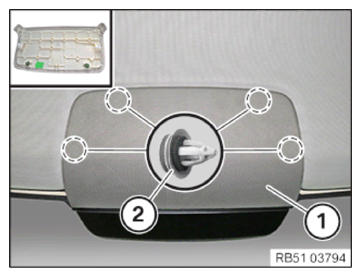
- Guide the headlining (1) into the relevant edge protection (2) with the help of an auxiliary person.
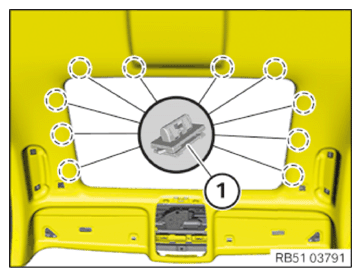
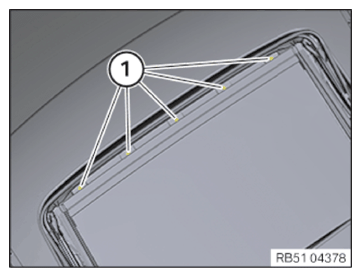
- Clip in the headlining using the clips (1).
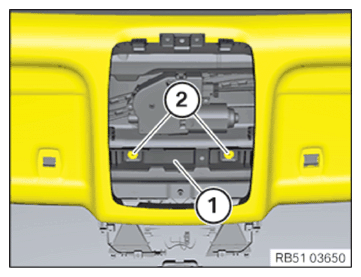
- Secure the frame (1) to the roof using the clips (2).
- If necessary, clip in the cable clip into the frame (1).
- Secure the frame (1) to the roof using the clips (2).
- Clip in trim (1) using clips (2).
- Tighten down screw (1).
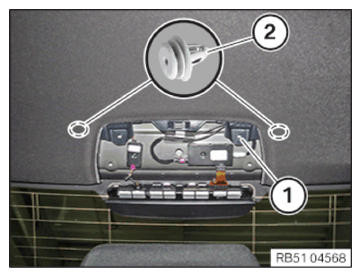
TIGHTENING TORQUES SPECIFICATION
| Headlining | ||
|---|---|---|
| Tightening torque | 2.5 Nm | |

- Tighten the screws (1).
TIGHTENING TORQUES SPECIFICATION
| Headlining to panorama glass roof | ||
|---|---|---|
| Tightening torque | 1.2 Nm | |
Follow-up Work
- Install all GRAB HANDLES .
- Install both c-pillar TRIM PANELS .
- Partially install top left and right b-pillar TRIM PANELS
- Install rear interior ROOF LIGHT .
- Install the INTERIOR MIRROR .
- Install the interior mirror COVERS .
- Install roof FUNCTION CENTER (FZD).
- Install the left and right SUN VISORS
- Install both vanity MIRROR LIGHTS .
- Install left and right sun visor COUNTER SUPPORTS .
- Install the right hands-free MICROPHONE .
- Install left hands-free MICROPHONE .
- Install the left and right a-pillar TRIM PANEL .