Install front seat
WARNING:
Pyrotechnic components.
Danger! Life-threatening injuries!
Danger! Life-threatening injuries!
- All work on pyrotechnic parts may be carried out by technically experienced and appropriately trained personnel only.
- Replace any damaged part or ones that have been dropped.
- For additional information see: 72 00 SAFETY REGULATIONS on handling components with gas generators.
NOTE:
RISK OF DAMAGE
Careless handling of tools and sharp-edged components.
Scratch, surface damage.
Careless handling of tools and sharp-edged components.
Scratch, surface damage.
- Protect working area.
- Handle tools and components carefully.
- Cover the door sill using protective covers.NOTE: RISK OF DAMAGE
Heavy component.
Heavy components can lead to injury or damage.- Remove and install heavy components with the aid of another person/other persons.
- Lift front seat (1) into the vehicle with the assistance of a second person.
- Place front seat (1) to the rear.
- Connect connectors (2) and lock.
- Check all plug connections for completeness, correct fit and locking where required.
- Attach the cable clip (3).
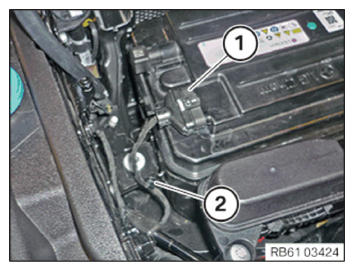
Connecting all battery earth leads
- See ADDITIONAL INFORMATION.
.
Activating the 48 V electrical system
Prerequisite
Ignition is switched off.
NOTE:
RISK OF DAMAGE
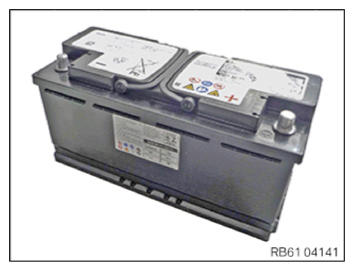
Damage to 48-V battery
If a 48-V battery that is disconnected from the electrical system is activated, the battery electronics will be damaged.
Damage to 48-V battery
If a 48-V battery that is disconnected from the electrical system is activated, the battery electronics will be damaged.
- Only carry out activation of the 48V electrical system with a completely connected 48-V battery.
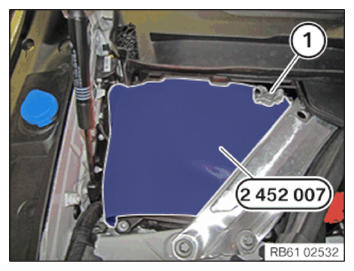
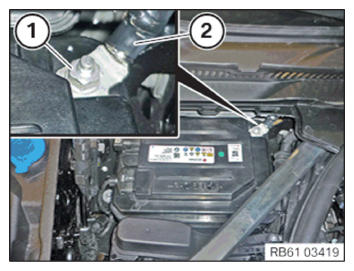
- Lift battery earth lead (1).
- Remove special tool 2 452 007
.
- Release the negative battery cable (2) of the 48-V battery from the mounting.
- Position the negative battery cable (2) of the 48-V battery on the negative battery terminal.
- Tighten nut (1).TIGHTENING TORQUES SPECIFICATION
Negative battery cable to 48-V battery Nut M8 Tightening torque 19 Nm - Connect the connector (1) of the CAN bus and lock it.
- Clip in clip (2).
- Activate the 48V electrical system by closing the bonnet.
The activation takes place automatically.
- Move front seat rearwards.
- Replace screws (1).
Parts: Screws
- Tighten the screws (1).TIGHTENING TORQUES SPECIFICATION
Seat to body Cheese head screw with collar Replace screw. Tightening torque 42 Nm
Installing the front seat rail trim
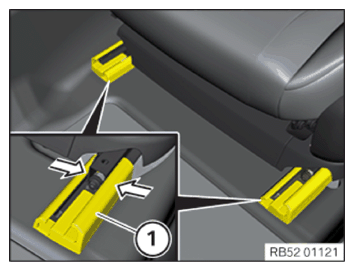
- Move the front seat to the rear.
- Push on the front seat rail trims (1) from the front in the direction of arrow and clip in at the side.
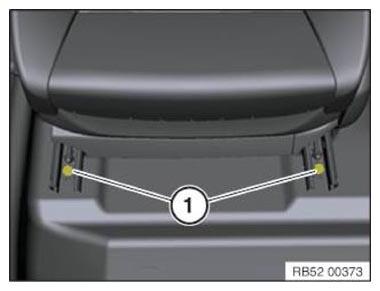
Installing rear seat rail trims
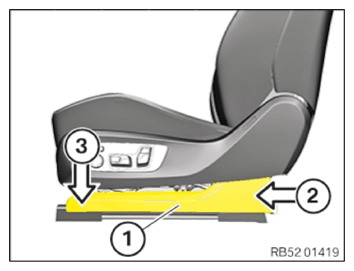
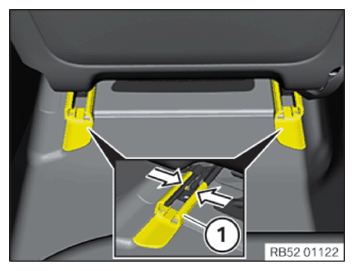
- Move the front seat to the front.
- Push rear seat rail trims (1) from rear in arrow direction and clip them in at the side.
- Move front seat forwards.
- Replace screws (1).
Parts: Screws
- Tighten the screws (1).TIGHTENING TORQUES SPECIFICATION
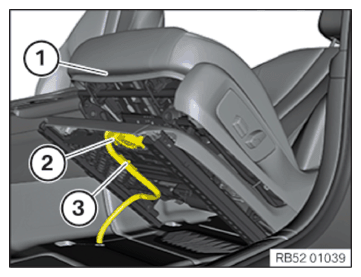
Seat to body Cheese head screw with collar Replace screw. Tightening torque 42 Nm - Fully adjust the front seat to the front and top.
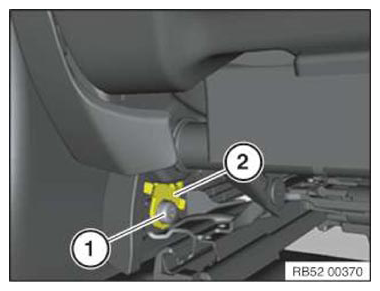
- Insert the end fitting (2).
- Replace the screw (1).
Parts: Screw
- Tighten down screw (1).TIGHTENING TORQUES SPECIFICATION
End fitting to seat mechanism M10 Replace screw. Tightening torque 42 Nm

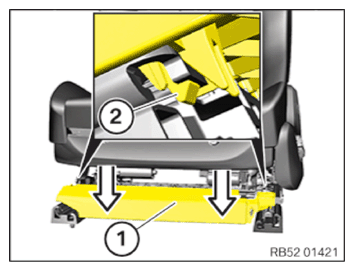
Installing front seat rail cover
- Position the front seat rail cover (1) in the direction of the arrow.
The latch mechanisms (2) must engage audibly.
Installing the outer seat rail cover