When replacing the seat frame: Remount mounted parts
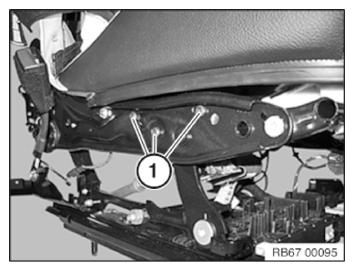
Removing the adjuster for the thigh support
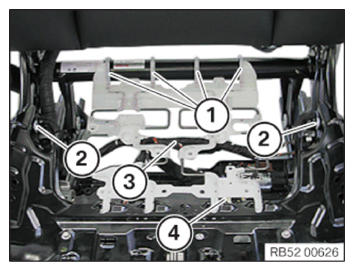
- Detach spring package (1).
- Loosen screws (2) with nuts.
- Unclip wiring harness (3).
- Unlock plug connection (4) and disconnect.
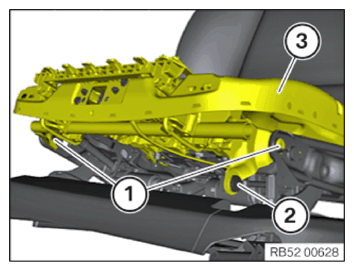
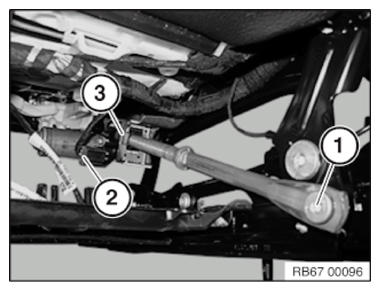
- Loosen screws (1) and (2).
- Remove adjuster (3).
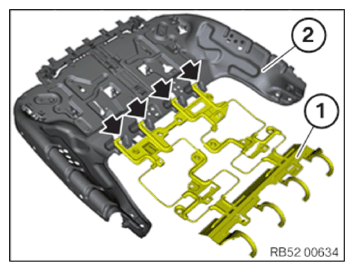
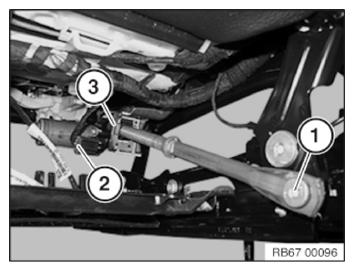
- Detach spring package (1) from the adjuster (2).
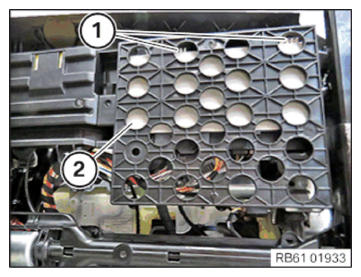
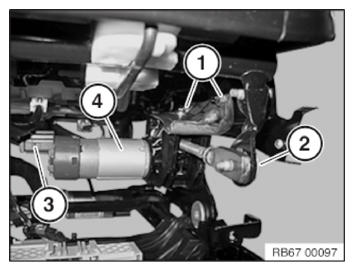
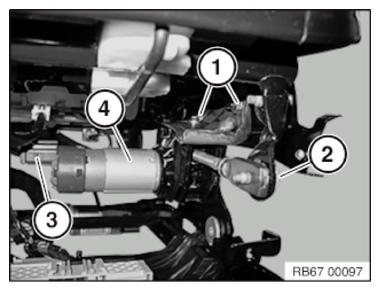
- Unlock the retaining lugs (1).
- Pull the SMFA control unit (2) forward.
Remove the seat height adjustment drive
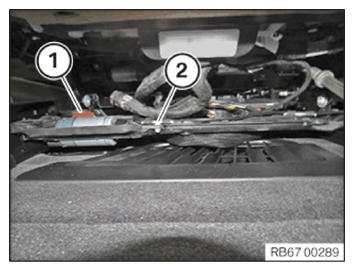
- Loosen screws (1).
- Loosen screw (1).
- Unlock plug connection (2) and disconnect.
- Remove the seat height adjustment (3) drive.
Remove drive for the forward/back seat adjustment
Prerequisite
The front seat is adjusted completely to the top.
- Unlock plug connection (1) and disconnect.
- Unclip the cable clip (2) from the carrier plate.
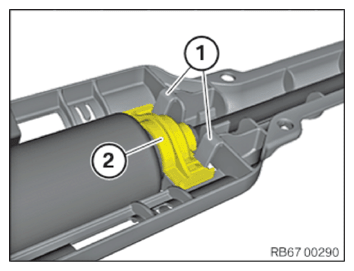
- Unlock the retaining tabs (1) and remove the holder (2).
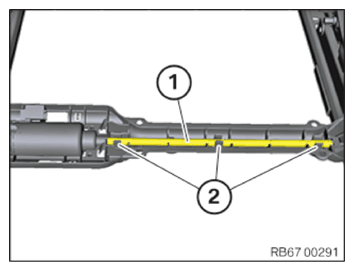
- Unclip the guide tube (1) from the carrier plate (2).
- Carefully bend the guide tube (1) up until you can pull the guide tube out of the drive (2).
Do not bend the drive (2) too far up; otherwise, the guide pins in the carrier plate (3) may be damaged.
- Feed the guide tube (1) and the drive (2) out of the carrier plate (3).
Remove the drive for the seat angle adjustment
Prerequisite
Front seat is fully upwards.
- Loosen nuts (1).
- Loosen screw (2).
- Unlock plug connection (3) and disconnect.
- Remove the drive for the seat angle adjustment (4).
- If necessary, remount the small parts.
Installing the drive for the seat angle adjustment
Prerequisite
The front seat is adjusted completely to the top.
- Correctly position the drive for the seat angle adjustment (4).
- Tighten the nuts (1) and bolts (2).TIGHTENING TORQUES SPECIFICATION
Drive for seat cushion tilt adjustment to seat Nut M6 Tightening torque 14 Nm Stud Tightening torque 8 Nm - Connect connector (3).
Installing forward/back seat adjustment drive unit
Prerequisite
The front seat is adjusted completely to the top.
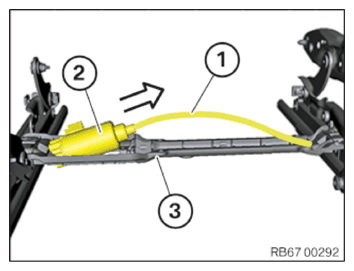
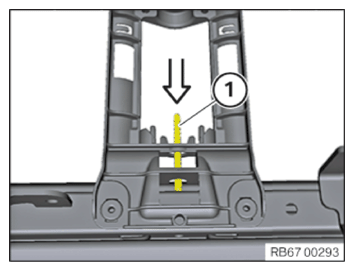
- Insert the connecting shaft (1) into the transmission of the forward/back adjustment.
- Insert the drive (1) in the direction of the arrow and align it to the guide pins.
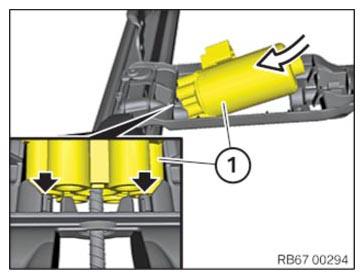
- Slice the drive (1) onto the short connecting shaft (2) without great effort and position it.
- Press the short connecting shaft slightly up from the bottom and align it to the drive (1).
- Insert the drive (1) completely.
- If necessary, use the long connecting shaft (3) to turn the drive (1) somewhat until it can be aligned and moved to the short connecting shaft (2).
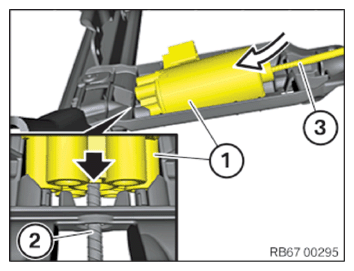
- Insert the long connecting shaft (1) with the guide tube (2) into the transmission of the forward/back adjustment.
- Raise the drive (1) slightly.
Do not lift the drive (1) too far up; otherwise, the guide pins in the carrier plate may be damaged.
- Bend the guide tube (2) carefully and insert with the sleeve (3) into the drive (1).
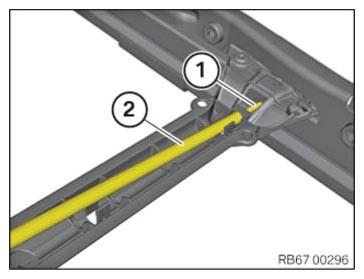
- Clip the guide tube (1) and drive into the carrier plate (2).
- Insert holder (2).
- Make sure the retaining tabs (1) are correctly fitted in the holder (2).
- Connect connector (1).
- Clip cable clip (2) into the carrier plate.
Installing the drive for the seat height adjustment
- Correctly position the drive for the seat height adjustment (3).
- Tighten down screw (1).TIGHTENING TORQUES SPECIFICATION
Drive for seat height adjustment to seat M6 Tightening torque 14 Nm M8 Tightening torque 18 Nm - Connect connector (2).
- Tighten the screws (1).TIGHTENING TORQUES SPECIFICATION
Drive for seat height adjustment to seat M6 Tightening torque 14 Nm M8 Tightening torque 18 Nm - Press the SMFA control unit (2) into the holder until the retaining lugs (1) engage.
Installing the adjuster for the thigh support
- Attach spring packet (1) to adjuster (2).
- Position adjuster (3).
- Tighten threaded bolt (2).TIGHTENING TORQUES SPECIFICATION
Drive for seat cushion tilt adjustment to seat Nut M6 Tightening torque 14 Nm Stud Tightening torque 8 Nm - Tighten threaded bolt (1).TIGHTENING TORQUES SPECIFICATION
Exhaust camshaft adjuster for thigh support Nut M6 Tightening torque 7 Nm Stud Tightening torque 15 Nm - Counter support bolts (2) and tighten the associated nuts.TIGHTENING TORQUES SPECIFICATION
Exhaust camshaft adjuster for thigh support Nut M6 Tightening torque 7 Nm Stud Tightening torque 15 Nm - Connect connector (4).
- Clip in wiring harness (3).
- Attach spring packet (1).