Installing left intake filter housing with left front-end strut
Prerequisite
Acoustic cover removed
- For replacement:
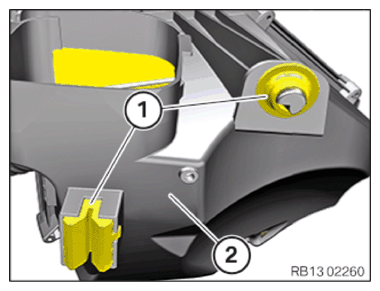
Remount front-end strut (1) to intake filter housing (2).
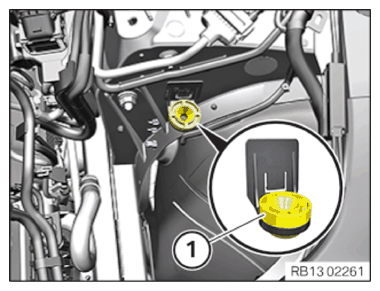
- Check the rubber mount (1) on the lower section of intake filter housing (2) for correct fit.
- Check rubber mount (1) for correct fit.
- Insert and install the intake filter housing (4) at left.
- Make sure that the locking mechanisms (3) lock correctly.
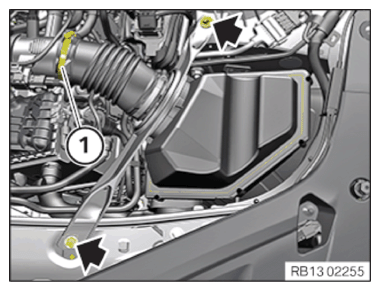
- Connect the upper section (1) of the clean air pipe with the lower section (2) of the clean air pipe.NOTE: RISK OF DAMAGE
Use of an incorrect tool (impact screwdriver) to release and tighten the screws.
Damaged thread.- Only use a standard tool (e.g. reversible ratchet) to release/tighten the screws.
- Clean the thread at shock tower.
- Replace the bolts (arrows).
Parts: Screws
- Tighten the screws (arrows).TIGHTENING TORQUES SPECIFICATION
Tension strut/Front-end strut to shock tower External Torx socket
M10X45
Replace screws.Joining torque
Angle of rotation56 Nm
90°TIGHTENING TORQUES SPECIFICATIONTension strut/Front-end strut, front Hexagon screw
M8X35
Replace screws.Joining torque
Angle of rotation28 Nm
90° - Tighten clamp (1).TIGHTENING TORQUES SPECIFICATION
Upper clean air pipe to lower clean air pipe Hose clamp Tightening torque 3 Nm - Repair the damaged thread on the shock tower with a Helicoil insert.CONSUMABLE - HELICOIL THREAD DESCRIPTION
Helicoil thread insert M10x30 mm 07129909659 - Install the strut (2).
- Tighten the screws (1).


Follow-up work