Removing belt tensioner of alternator
WARNING:
Hot surfaces.
Risk of burning!
Risk of burning!
- Perform all work only on components that have cooled down.
Preliminary work
- Refer to REMOVING THE ACOUSTIC COVER .
- Refer to REMOVING THE COVER ON LEFT AND RIGHT IN THE ENGINE COMPARTMENT AT THE TOP .
- Refer to REMOVING BOTH FRONT-END STRUTS .
- Refer to REMOVING FRONT CROSS CONNECTION .
- Refer to REMOVING THE REAR TOP CROSS CONNECTION .
- Refer to REMOVING THE FAN COWL .
- Refer to REMOVING THE INTAKE FILTER HOUSING (TENSION STRUT ON SHOCK TOWER REMOVED) .
- Refer to REMOVING TOP CLEAN AIR PIPE .
- Refer to REMOVING BOTTOM CLEAN AIR PIPE .
- Refer to REMOVING CHARGE AIR LINE .
- Refer to REMOVING THE DRIVE BELT FOR ALTERNATOR .
CAUTION:
Component with preload.
Injury hazard!
Injury hazard!
- Reduce preload as far as possible before disassembly. Relieve component.
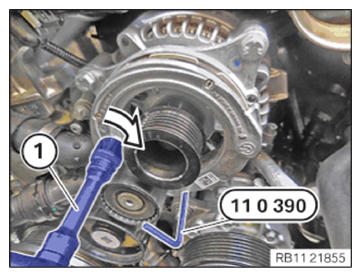
- Using a standard tool (1), increase the preload on the alternator belt tensioner by turning it in the direction of the arrow.
- Guide the special tool 0 496 268 (11 0 390)
out and remove.
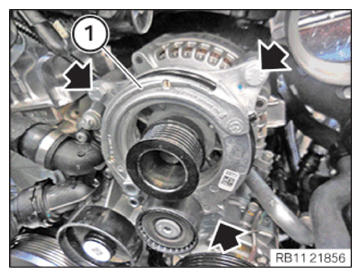
- Remove screws (arrows).
- Remove belt tensioner of the alternator (1).