Replace the oil filter element (engine oil service)
NOTE:
RISK OF DAMAGE Contaminant or foreign body. Contamination can result in malfunctions, loss of function or leaks.
- Adhere to the utmost cleanliness.
- Protect components from contamination e.g. by covering.
- Close off line connections with seal plugs.
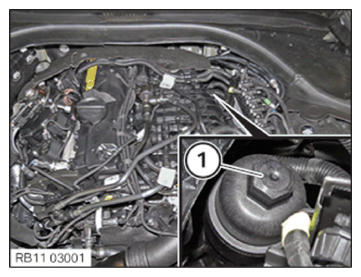
- Loosen the oil filter cover (1).
NOTE:
TECHNICAL INFORMATION
Collect and dispose of emerging fluids.
Observe country-specific waste disposal regulations.
Collect and dispose of emerging fluids.
Observe country-specific waste disposal regulations.
- If applicable, open the service cap.
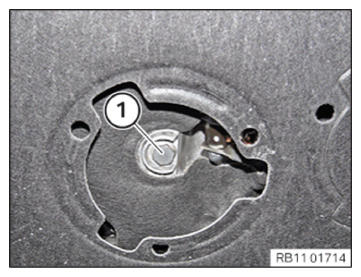
- Release oil drain plug (1).
- Allow the motor oil to drain out fully.
- Replace the sealing ring.
Parts: Sealing ring
- Tighten oil drain plug (1).
TIGHTENING TORQUES SPECIFICATION
| Oil drain plug | ||
| M12x16 Replace the sealing ring. |
Tightening torque | 25 Nm |
- If applicable, mount the service cap.
- Collect the leakage motor oil using a cloth as needed.
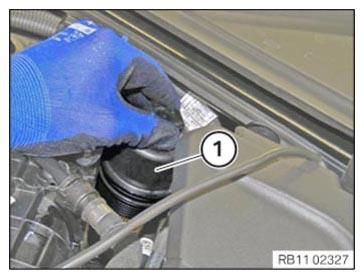
- Remove the oil filter cover (1) with the oil filter insert upwards.
- Guide out and remove oil filter element (1) from oil filter cover (2) in the arrow direction .
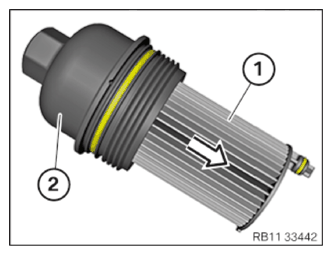
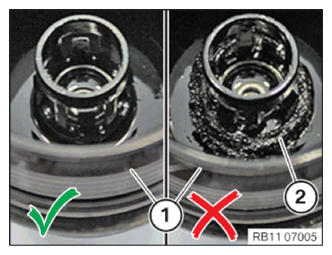
- Check if there is any filter residue (2) of the previous oil filter on the inside of oil filter cover (1) and, if necessary, remove any oil filter residue (2).
- Replace the O-ring (1) and the oil filter element (2).
Parts: O-ring, oil filter element
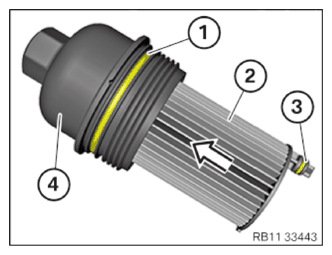
- Make sure that the O-rings (1) and (3) are installed correctly.
- Coat the O-rings (1) and (3) with motor oil.
- Guide in and install oil filter element (2) on oil filter cover (4) in the arrow direction.
The oil filter element (2) must engage audibly.
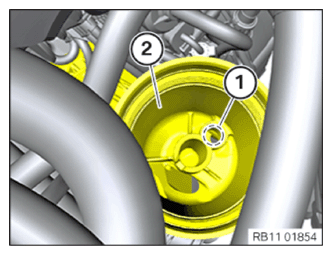
- Observe the guide bore hole (1) for the oil filter element in the oil filter housing (2).
TIGHTENING TORQUES SPECIFICATION
| Oil filter cover to oil filter module | ||
| Apply light coating of oil to O-ring. | Initial tightening torque | 25 Nm |
| Release | 180° | |
| Tightening torque | 25 Nm | |