Installing the rubber mount for the transmission bearing (all-wheel drive)
NOTE:
TECHNICAL INFORMATION
Rubber mounts in the A and B variants can be installed.
Rubber mounts in the A and B variants can be installed.
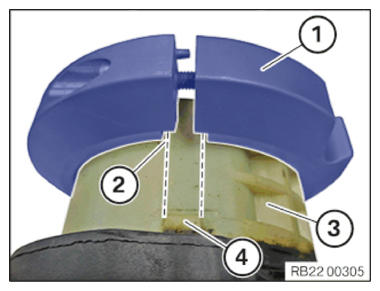
- Version A:
Use special tools 2 445 327 and 0 496 552 (33 3 010).
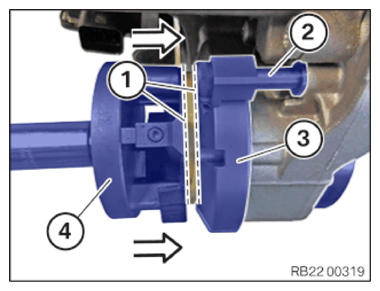
Align pliers (1) centrally on the guide lug (4) of the rubber mount (3) and the recess (2).
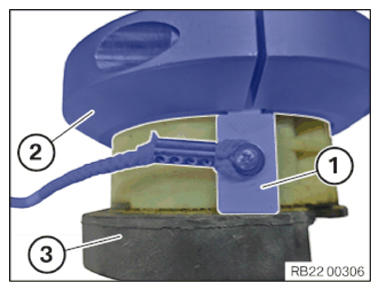
- Version A:
Install the shaped part (1) between the pliers (2) and the rubber mount (3).
Screw pliers (2) tightly on rubber mount (3) remove shaped part (1).
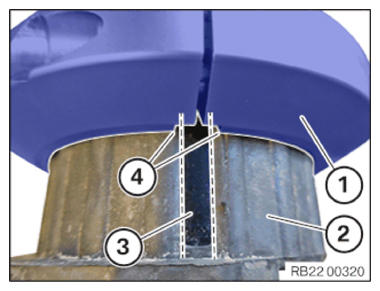
- Version B:
Use special tools 2 445 327 and 0 496 552 (33 3 010).
Align pliers (1) centrally on the mark (3) on the rubber mount (2) and the recess (4) on the pliers (1).
Screw pliers (1) tightly on rubber mount (2).
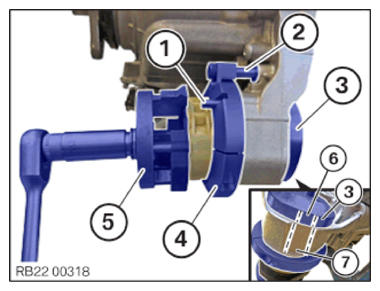
- Determine and use the respective pressure disc (3) according to the rubber mount.
There are version A and B pressure discs.
Rubber mount Thrust washer A A F A G A H B M B Y B - Position pliers (4) over the pin (1).
- Using the screw connection (2), attach the pliers (4) to the rubber mount on the transfer box.
- Remove the pin (1).
- Align the surface (6) of the pressure disc (3) centrally with the surface (7) of the transfer box.
- Pull in the rubber mount to a distance (1) of approx. 10 mm.
- Release the screw connection of the pliers (3) along with the screw connection (2).
- Remove pliers (3).
- Pull the rubber mount with the thrust piece (4) up to the stop on the transfer box.
- Remove special tools 2 445 327 and 0 496 552 (33 3 010).
Follow-up work
- Refer to CONNECTING THE CONNECTOR WITH THE VTG CONTROL UNIT .
- Refer to INSTALLING TRANSMISSION CROSS MEMBER .
- Refer to INSTALL REAR UNDERBODY PROTECTION .