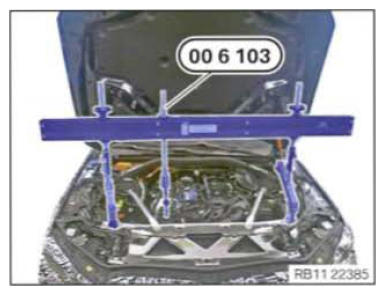
Take engine out of installation orientation
- Lower the engine by turning the spindle 2 361 506 (00 6 103)
until the engine is completely in contact with the engine mounts.
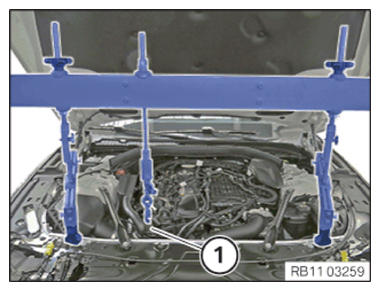
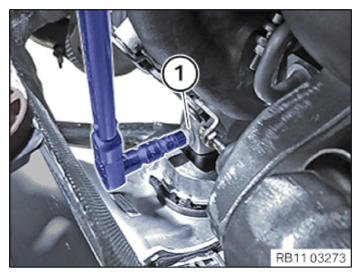
- Feed out the hook (1) and set it aside.
NOTE:
TECHNICAL INFORMATION
Conduct the following operation with the assistance of a second person.
Conduct the following operation with the assistance of a second person.
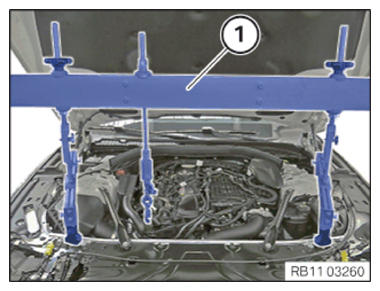
- Remove the engine bridge (1) with the help from another person.
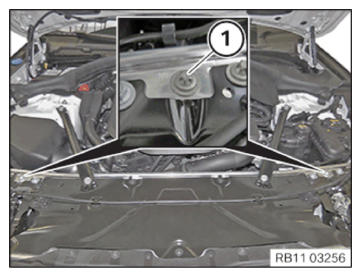
- Tighten screws (1) on the left and right.
TIGHTENING TORQUES SPECIFICATION
| Top rear connection to body | ||
| Torx screw M8x30 | tightening torque | 19 Nm |
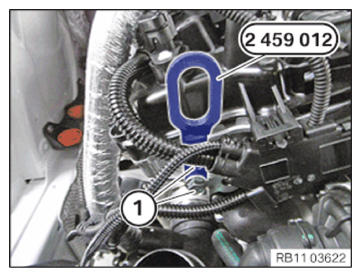
- Loosen the screws (1) from the special tool 2 459 012 .
- Guide out and remove the special tool 2 459 012
on the cylinder head.
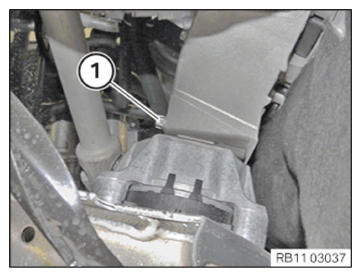
- Tighten screw (1) on right engine support bracket from the top.
TIGHTENING TORQUES SPECIFICATION
| Engine mount to engine support bracket | ||
| M12 | tightening torque | 100 Nm |
- Tighten screw (1) on left engine support bracket from the bottom.
TIGHTENING TORQUES SPECIFICATION
| Engine mount to engine support bracket | ||
| M12 | tightening torque | 100 Nm |
Follow-up work:
- Refer to ATTACHING THE UNIVERSAL JOINT TO STEERING GEAR .
- Refer to INSTALLING THE SIDE HOOD SEAL ON THE LEFT AND RIGHT .
- Refer to INSTALLING THE REAR SECTION OF THE FRONT WHEEL ARCH COVER .
- Refer to INSTALLING THE COVER OF THE STEERING ASSEMBLY .
- Refer to ATTACHING THE FRONT LEFT WHEEL .
- Refer to INSTALLING REAR UNDERBODY PROTECTION .
- Refer to INSTALLING THE CENTER UNDERBODY PROTECTION .
- Refer to INSTALLING THE UNDERBODY PROTECTION OF THE STEERING GEAR OR THE FRONT THRUST FIELD .
- Refer to INSTALLING THE REAR RIGHT ENGINE COMPARTMENT COVER .
- Refer to INSTALLING THE COVER OF THE ENGINE COMPARTMENT ON THE REAR LEFT .
- Refer to INSTALLING THE COVER ON THE LEFT AND RIGHT IN THE ENGINE COMPARTMENT AT THE TOP
- Refer to INSTALLING CLEAN AIR PIPE, TOP .
- Refer to INSTALLING INTAKE SILENCER HOUSING .
- Refer to INSTALLING ACOUSTIC COVER .
- Refer to TAKING HOOD OUT OF THE SERVICE POSITION .
- Refer to RESETTING THE TIRE PRESSURE MONITOR .