Removing automatic transmission (all-wheel drive vehicle) (GA8HP75HZ)
NOTE:
DANGER
High-voltage system.
The high-voltage system operates on the basis of hazardous, electrical voltage and high currents. Mortal hazard through electric shock!
High-voltage system.
The high-voltage system operates on the basis of hazardous, electrical voltage and high currents. Mortal hazard through electric shock!
- All work on the high-voltage system may only be carried out by specially trained and technically experienced personnel.
- For additional information see: 61 00... SAFETY INSTRUCTIONS on handling hybrid cars
- For additional information see: 61 25... NOTES on repair of high-voltage battery unit
NOTE:
TECHNICAL INFORMATION
With the ignition off and the high-voltage safety plug disconnected, the Check Control message "High voltage system faulty" is displayed by default.
The message "High-voltage system switched off" (absence of voltage) is only displayed when the ignition is switched on.
With the ignition off and the high-voltage safety plug disconnected, the Check Control message "High voltage system faulty" is displayed by default.
The message "High-voltage system switched off" (absence of voltage) is only displayed when the ignition is switched on.
Preliminary work
- Remove right flap in luggage compartment TRIM PANEL .
- De-energize the HIGH-VOLTAGE SYSTEM .
- CHECK that no voltage is applied.
- Disconnect all battery GROUND LEADS .
- Remove rear UNDERBODY PROTECTION .
- Remove the transmission side UNDERBODY PLANKING
- Remove the tunnel connecting SUPPORT
- Remove the rear axle COVER .
- If installed: remove the right and left TORSION STRUT where required.
- Remove complete EXHAUST SYSTEM .
- Remove the HEAT SHIELDS .
- Remove transmission CROSS-MEMBER .
- Partially loosen the PROP SHAFT
- Release the front axle transmission front PROP SHAFT .
CAUTION:
Materials harmful to health.
Contact with fluids harmful to health!
Contact with fluids harmful to health!
- Note and follow safety instructions on containers.
- Conduct all work in appropriate personal protective equipment only.
NOTE:
RISK OF DAMAGE
Damage to the engine block.
Serious damage to the engine block and transmission due to damaged and corroded screws.
Damage to the engine block.
Serious damage to the engine block and transmission due to damaged and corroded screws.
- It is imperative that protruding threads of the transmission bolts are checked for corrosion and damage prior to removal.
- It is imperative that all rust is removed from corroded threads and that they are cleaned prior to removal.
- Replace rusted and damaged bolts.
NOTE:
RISK OF DAMAGE
Damage of components in the engine compartment.
When removing the transmission, the tilting of the engine may cause damage to components in the engine compartment.
Damage of components in the engine compartment.
When removing the transmission, the tilting of the engine may cause damage to components in the engine compartment.
- Before removing the transmission: Support the engine.
- Protect engine from tipping movements.
- Follow the specifications in the repair instructions.
NOTE:
RISK OF DAMAGE
Damage to the transmission.
Damage to the transmission due to unapproved transmission oil.
Damage to the transmission.
Damage to the transmission due to unapproved transmission oil.
- Use only the approved TRANSMISSION OIL .
- Check the transmission OIL LEVEL after completing the repair.
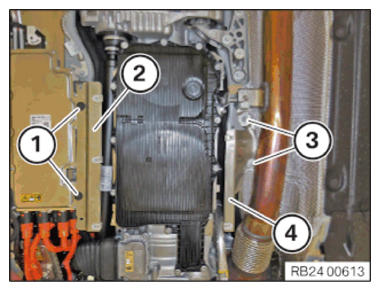
- Loosen screws (1).
- Remove holder (2).
- Loosen screws (3).
- Remove holder (4).
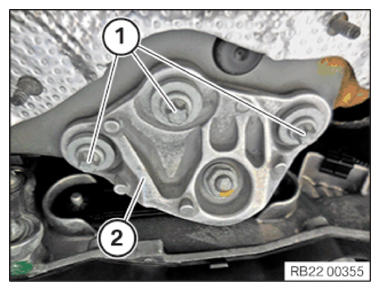
- Unscrew the bolts (1) on the transmission bearing support (2).
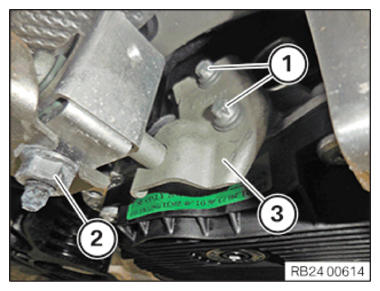
- Unscrew the bolts (1) and the nut (2).
- Remove holder (3).NOTE: DANGER
Potential equalization in high-voltage system.
Mortal hazard if the potential equalization screw connection is not correct!- Observe the safety requirements for the potential equalization screw connection.
- Clean contact faces and have then checked by a second person.
- Tighten the screws/nuts for potential equalization with torque; have a second person check the torque.
- Correct execution of these tasks must be documented in the vehicle records by both persons.
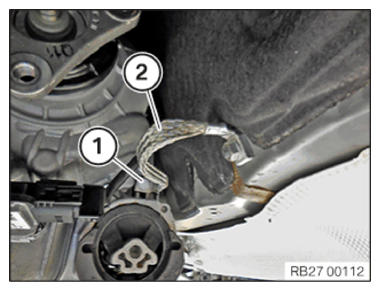
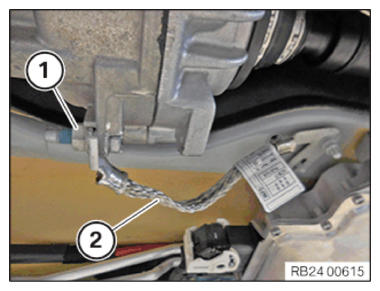
- Unscrew the bolt (1) and disconnect the ground strap (2).NOTE: DANGER
Potential equalization in high-voltage system.
Mortal hazard if the potential equalization screw connection is not correct!- Observe the safety requirements for the potential equalization screw connection.
- Clean contact faces and have then checked by a second person.
- Tighten the screws/nuts for potential equalization with torque; have a second person check the torque.
- Correct execution of these tasks must be documented in the vehicle records by both persons.
- Unscrew the bolt (1) and disconnect the ground strap (2).
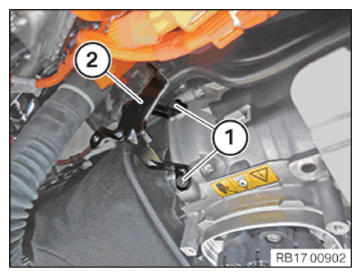
- Loosen screw (1).
- Guide out and remove holder (2).NOTE: TECHNICAL INFORMATION
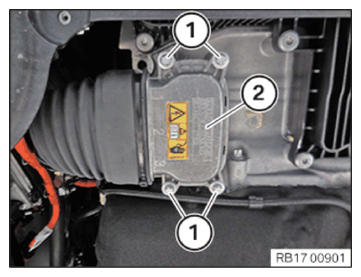
Observe the ADDITIONAL INFORMATION for unlocking and disconnecting various plug connections in electrical and hybrid vehicles! - Loosen screws (1).
- Feed the high-voltage connector (2) out and set it aside.
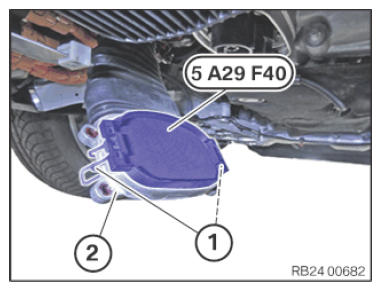
- Lock the high-voltage connector (2) with special tool 5 A29 F40 .
- Lock the clamps (1).
- Loosen screws (1).
- Guide out and remove holder (2).
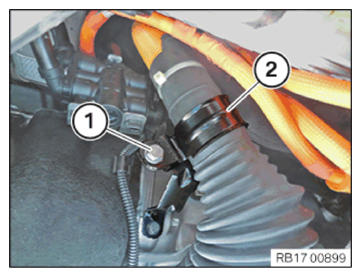
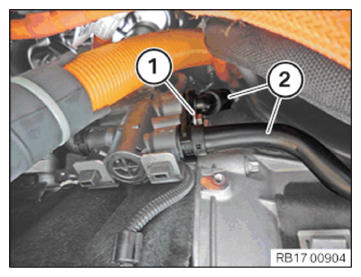
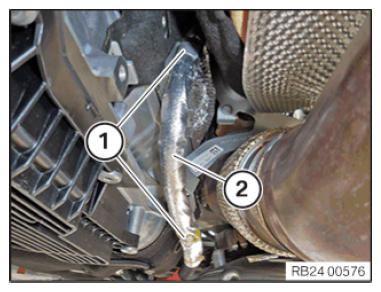
- Loosen screw (1).
- Feed out transmission oil lines (2) and put to one side.
- Catch and dispose of escaping transmission oil.
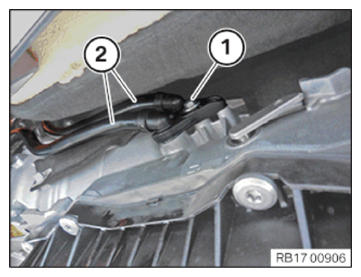
- Loosen screw (1).
- Feed out transmission oil lines (2) and put to one side.
- Catch and dispose of escaping transmission oil.
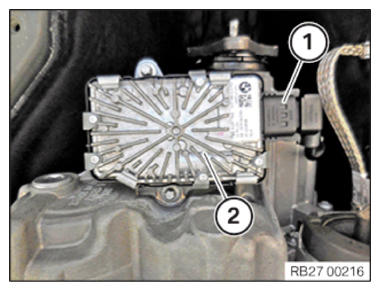
- Disconnect connector (1) from transfer box control unit (longitudinal torque distribution) (2).
- Remove positive battery cable (2) from clamps (1).
- Put the positive battery cable (2) to one side.
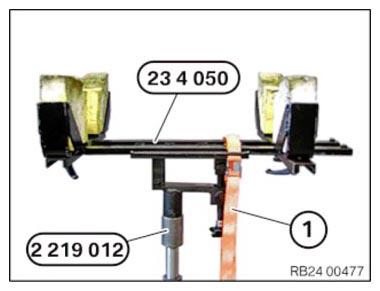
- Support the transmission with special tools 0 495 498 (23 4 050) and 2 219 012 .
- Secure transmission to mounting with tensioning strap (1).
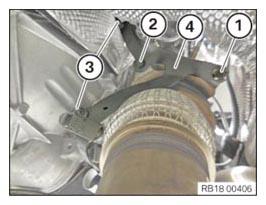
- Loosen nut (1).
- Loosen screw (2).
- Loosen screws (3).
- Remove holder (4).
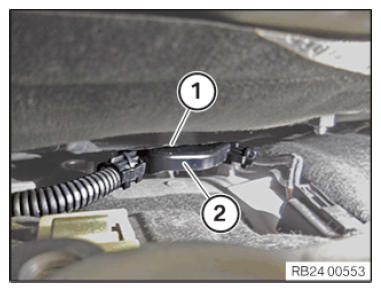
- Detach connectors (1).
- Loosen screw (1).
- Remove connector (2).
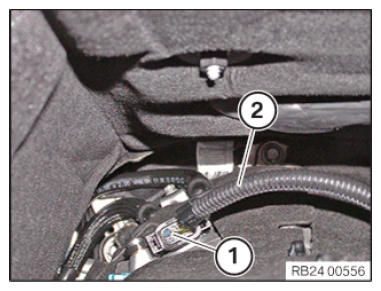
- Detach connectors (1).
- Put the cable (2) to one side.
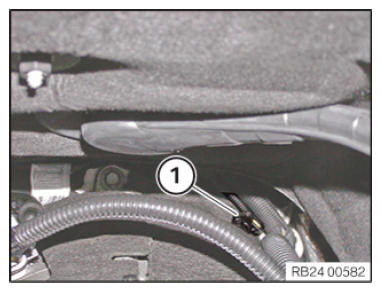
- Detach connectors (1).
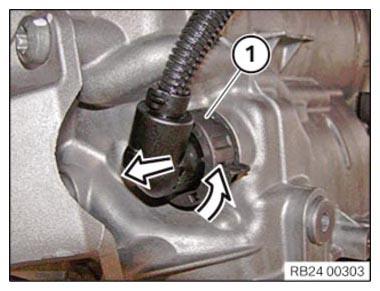
- Turn the connector (1) in the arrow direction, unlock and remove.
- Be careful not to touch the pins.
- Loosen all cable clips.
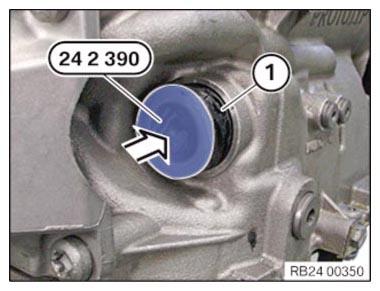
- Insert the special tool 0 494 213 (24 2 390)
into the sealing sleeve (1).
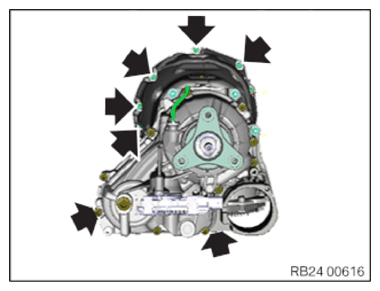
- Remove remaining bolts (arrows).
- Pull the transmission with transfer box off the front prop shaft.
- Tie the front prop shaft to the underbody.