Install all valve springs
CAUTION:
Spring preload.
Injury hazard!
Injury hazard!
- The use of the specified special tool (tool) is mandatory.
- Carry out the described steps properly.
NOTE:
The description is for one component only. The procedure is identical for all further components.
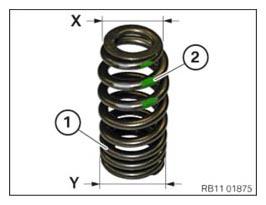
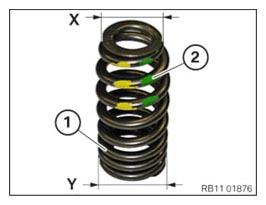
- Note the installation position of the valve spring.
NOTE:
The valve spring must be installed so that the larger diameter (Y) points towards the lower spring plate.
- Make sure that the intake valves and the exhaust valve are not interchanged.
NOTE:
The valve springs (1) are color-coded (2). Color for the intake valves: Green
- Note the installation position of the valve spring.
NOTE:
The valve spring must be installed so that the larger diameter (Y) points towards the lower spring plate.
- Make sure that the intake valves and the exhaust valve are not interchanged.
NOTE:
The valve springs (1) are color-coded (2). Color for the exhaust valves: Green/Yellow
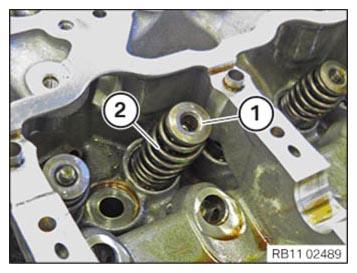
- Install valve spring (2) and the spring plate (1).
NOTE:
TECHNICAL INFORMATION
Wear safety goggles.
Wear safety goggles.
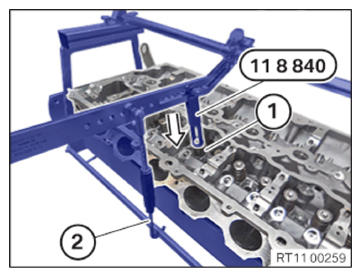
- Press down the valve spring (1) on the top spring plate with the special tool 0 496 143 (11 8 840) in arrow direction.
- Keep the valve spring (1) pressed down
with the help of the hook (2).
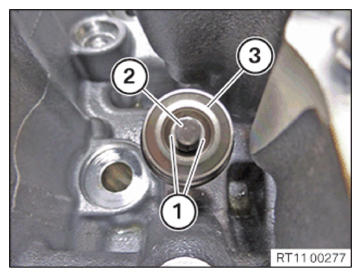
- Position the valve shims (1) on the valve (2).
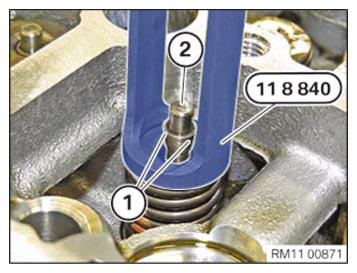
- Press down the valve spring (1) on the top spring plate with the special tool 0 496 143 (11 8 840) in arrow direction .
- Feed out the hook (2) and set it aside.
- Relieve the valve spring (1) carefully
.
- Make sure that the valve shims (1) are positioned correctly on the valve (2) and the valve spring (3).