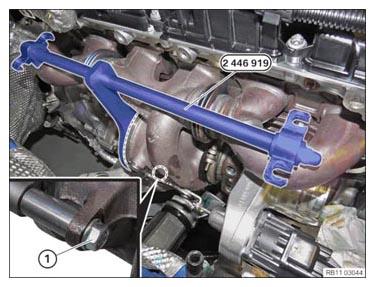
- Install the special tool 2 446 919
on the exhaust turbocharger and secure it with the bolt (1).
- Make sure that the special tool 2 446 919
is flush with the exhaust turbocharger in the marked area.
 Courtesy of BMW OF NORTH AMERICA, INC. Courtesy of BMW OF NORTH AMERICA, INC.
|
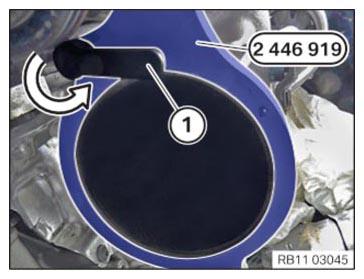
- Secure the special tool 2 446 919
by turning the clamping lever (1) in the direction of the arrow.
NOTE:
The clamping lever shown in the graphic is already in its end position.
 Courtesy of BMW OF NORTH AMERICA, INC. Courtesy of BMW OF NORTH AMERICA, INC.
|
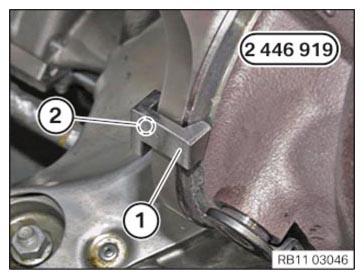
- Position the holder (1) and fasten it with the bolt (2).
NOTE:
Bracket 1 is used for the final mounting of the special tool 2 446 919.
 Courtesy of BMW OF NORTH AMERICA, INC. Courtesy of BMW OF NORTH AMERICA, INC.
|
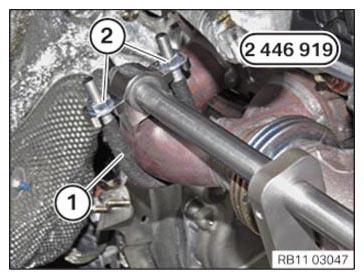
- Position the retainer (1) and secure it with the nuts (2).
TIGHTENING TORQUES SPECIFICATION
| U bolt to special tool 2 919 (446) |
The tightening torque must be observed!
Risk of damage to the exhaust manifold! |
Tightening torque |
1 Nm |
 Courtesy of BMW OF NORTH AMERICA, INC. Courtesy of BMW OF NORTH AMERICA, INC.
|
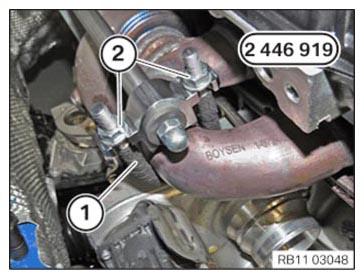
- Position the retainer (1) and secure it with the nuts (2).
TIGHTENING TORQUES SPECIFICATION
| U bolt to special tool 2 919 (446) |
The tightening torque must be observed!
Risk of damage to the exhaust manifold! |
Tightening torque |
1 Nm |
 Courtesy of BMW OF NORTH AMERICA, INC. Courtesy of BMW OF NORTH AMERICA, INC.
|
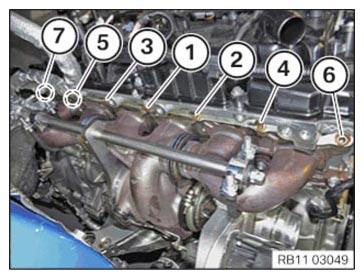
- Release nuts in the order (7) till (1) in semicircular pattern.
- Secure exhaust turbocharger against falling down.
 Courtesy of BMW OF NORTH AMERICA, INC.
NOTE:
TECHNICAL INFORMATION
Do not damage the thermal compensating elements. Disassembly and installation including intermediate storage of the exhaust turbocharger is only permitted with mounted special tool 2 466 919.
- Remove the sliding rail (1).
- Remove the exhaust turbocharger/exhaust manifold.