Installing The Outer Wheel Arch Section With The Reinforcement
Further information is available.
NOTE:
TECHNICAL INFORMATION
Use only approved spot welder for repair.
For additional information see: WORKSHOP EQUIPMENT (BMW AND MINI VEHICLES) - (530I 2017-2022, 530I XDRIVE 2017-2022, 530E PHEV 2018-2022, 530E XDRIVE PHEV 2018-2022, 540I 2017-2022, 540I XDRIVE 2017-2022, M550I XDRIVE 2018-2022) .
Use only approved spot welder for repair.
For additional information see: WORKSHOP EQUIPMENT (BMW AND MINI VEHICLES) - (530I 2017-2022, 530I XDRIVE 2017-2022, 530E PHEV 2018-2022, 530E XDRIVE PHEV 2018-2022, 540I 2017-2022, 540I XDRIVE 2017-2022, M550I XDRIVE 2018-2022) .
- Pre-clean the bonding surfaces (1) on the new part and on the vehicle with cleaning agent R2.CONSUMABLE - CLEANING AGENT DESCRIPTION
Cleaning agent R2 500 ml 83190417324 - (1) Clean bonding surfaces on vehicle and on new part with cleaning agent R1.CONSUMABLE - CLEANING AGENT DESCRIPTION
Cleaning agent R1 100 ml, Bottle 83192211217 - Apply adhesive K1 to the bonding surfaces (1).ADHESIVE DESCRIPTION
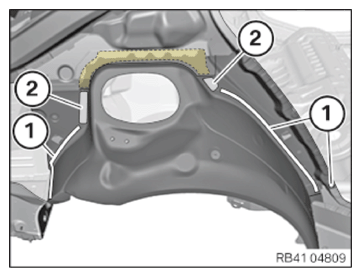
Body adhesive K1 195 ml 83190413015 - Install new part outer wheel arch section in the areas (1) using blind rivet N1.CONSUMABLE - BLIND RIVET DESCRIPTION
Blind rivet N1 83190301414 ø 6.5 mm; clamping area 2.8-4.8 mm NOTE: TECHNICAL INFORMATION
Avoid applying excessive heat to neighboring adhesive areas. - Weld the new part in areas (2).
Avoid excessive heat input at the beading adhesive areas (1) and (3). Cool the bonded rivet areas with compressed air as needed.
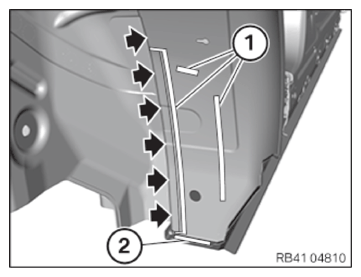
- Weld new part in the areas (1).
Avoid excessive heat input on the adjacent adhesive areas (2).
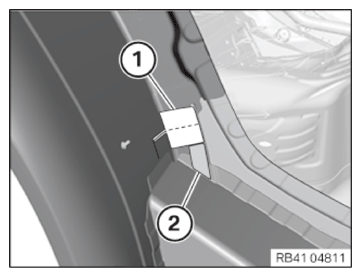
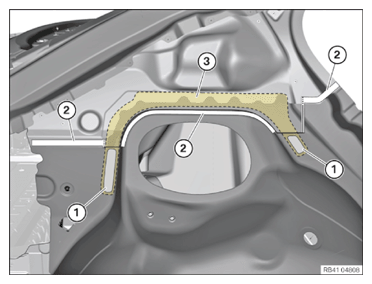
- Weld the new part in the areas (1) and (2). In this process, avoid excessively high heat input in the adjacent adhesive area (arrows).
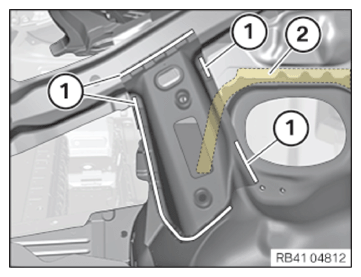
- Weld the new part and the reinforcement plate in the area (1). Avoid applying too much heat to the adjacent adhesive area (2).
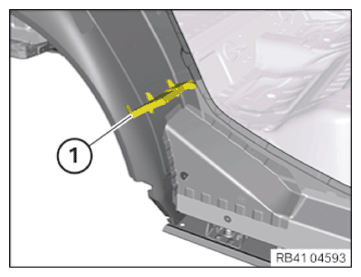
- Install the new part luggage strap and weld it in the areas (1). In this process, avoid excessively high heat input at the adjacent bonded rivet areas (2).
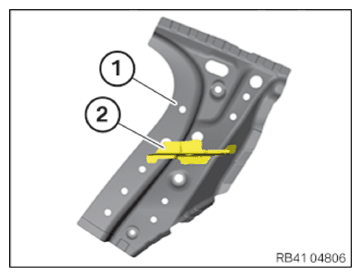
- Weld the new parts C-pillar reinforcement (1) and the C-pillar insert (2).
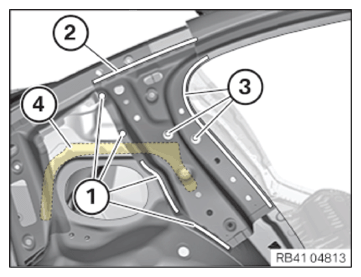
- Install the new part C-pillar reinforcement and weld it in the areas (3) to (1). Avoid applying too much heat to the adjacent adhesive area (4).NOTE: TECHNICAL INFORMATION
For additional information see: INSTALLING CAVITY SEALING (NOT EXPANDED) (530I 2017-2022, 530I XDRIVE 2017-2022, 530E PHEV 2018-2022, 530E XDRIVE PHEV 2018-2022, 540I 2017-2022, 540I XDRIVE 2017-2022, M550I XDRIVE 2018-2022) . - Apply sealant to the cavity sealing (1) and install the cavity sealing (1).