Removing the radial shaft seal of the drive flange
- Secure the vehicle hoist against lowering and lifting.
- Make sure that the vehicle does not lift off the mounting plates on the vehicle lift.
Damage to rear axle differential. Failure to comply with the oil specifications can result in serious damage to the rear axle differential.
- After completion of repair work, check the transmission OIL LEVEL in the rear axle differential.
- Use only the APPROVED FINAL DRIVE transmission oil.
Preliminary work
- Remove EXHAUST SYSTEM
- Remove the HEAT SHIELD at the rear
- Release the PROP SHAFT from the rear axle differential
- Remove the RADIAL SHAFT SEAL of the drive flange
Failure to comply with the specification.
Component damage.
All specifications for installation and removal must be observed.
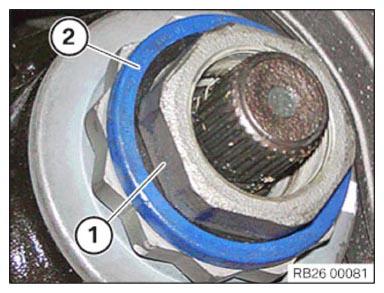
Release retaining ring (2).
Remove recessed nut (1) with the seal.
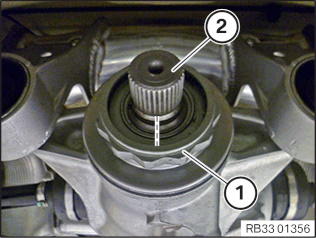
Mark the position of twelve-edge flange nut (1) for bevel drive pinion (2).
Heat twelve-edge flange nut (1) using a hot air blower.
Do not heat more than required to open twelve-edge flange nut (1)! Do not use open flames for heating!
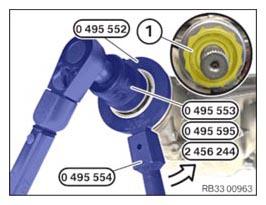
Release twelve-edge flange nut (1) in the arrow direction using special tools 0 495 552 (33 5 050) and 0 495 554 (33 5 070). Grip the bevel drive pinion using a 500 Nm torque wrench and suitable special tool 0 495 553 (33 5 060), 0 495 595 (33 5 090) or 2 456 244.
To prevent damage to the interior function elements, it is mandatory to set the torque wrench to the highest scale value (500 Nm) because the twelve-edge flange nut (1) has a very high release torque.
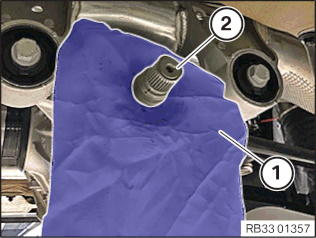
Cut a small hole in a cloth (1).
Slide cloth (1) over bevel drive pinion (2).
Use thread file (1) to remove the adhesive residue.
The correct thread pitch must be ensured!
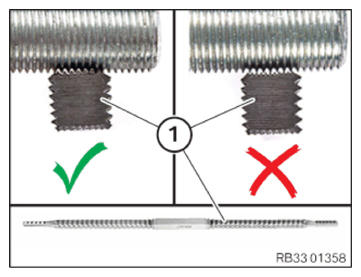
Set thread file (1) on the thread of bevel drive pinion (2).
Clean the thread by turning a rear wheel and remove the adhesive residue thoroughly.
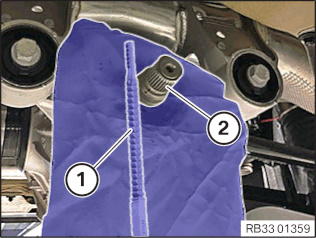
Remove cloth (1) from bevel drive pinion (2).
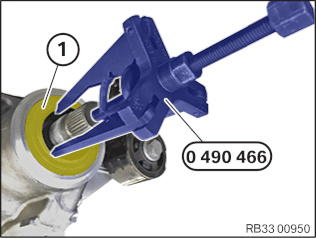
Pull out radial shaft seal (1) using special tool 0 490 466 (00 5 010).