Installing the radial shaft seal of the drive flange
RISK OF DAMAGE
Failure to comply with the specification.
Component damage.
All specifications for installation and removal must be observed.
TECHNICAL INFORMATION
Different variants may be installed depending on the vehicle equipment.
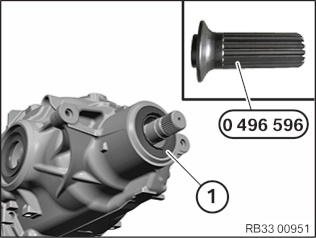
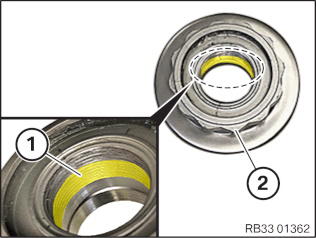
Version A:
Coat the sealing lip of the new radial shaft seal (1) and the sealing surface on the transmission housing with rear differential fluid.
Drive in radial shaft seal (1) using special tool 0 496 596 (33 0 150).
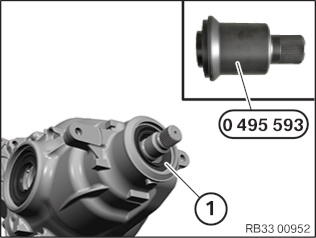
Version B:
Coat the sealing lip of the new radial shaft seal (1) and the sealing surface on the transmission housing with rear differential fluid.
Drive in radial shaft seal 1 using special tool 0 495 593 (33 5 080).
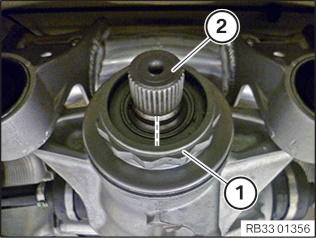
Check the dust plate for damage and, if necessary, renew it.
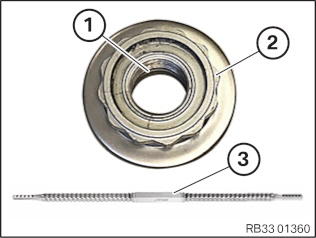
Clean thread 1 of twelve-edge flange nut 2 with thread file 3.
The thread pitch must be correct!
Clean twelve-edge flange nut 2 thoroughly to remove grease residue and adhesive residue.
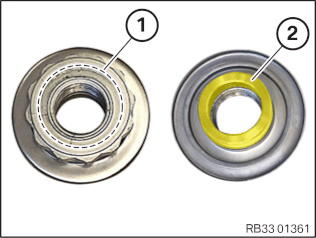
Top up recessed collar 1 of the twelve-edge flange nut with grease.
Apply a thin layer of grease to the surface 2 of the twelve-edge flange nut.
Lubricating grease: Optitemp HT 1 LF (50 g. tube, BMW part number 83230417754
Coat the 5 rear threads 1 of the twelve-edge flange nut 2 with adhesive.
Adhesive (anaerobic): Drei Bond 1385, 50 g. bottle, BMW part number 83190417376)
Tighten the twelve-edge flange nut 1 until the mark aligns with the bevel drive pinion 2.
The twelve-edge flange nut 1 must not be tightened beyond the mark!
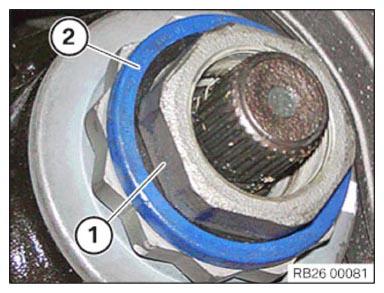
Use a new recessed nut 1, new seal, and new retaining ring 2.
Insert the recessed nut 1 with the seal into the recessed collar of the twelve-edge flange nut.
Mount retaining ring 2.
Follow-up work:
- Secure the PROPELLER SHAFT on the rear axle differential
- Install the HEAT SHIELD at the rear
- Install EXHAUST SYSTEM
- Check/top up OIL LEVEL in the rear axle differential