Preparing New Part
Further information is available.
NOTE:
TECHNICAL INFORMATION
Adhesive technology in the area of the outer skin (not for structural adhesion):
The bonding surfaces of the new parts may not sharpened or ground.
For more information see:BMW/MINI BONDING INSTRUCTIONS (530I 2017-2022, 530I XDRIVE 2017-2022, 530E PHEV 2018-2022, 530E XDRIVE PHEV 2018-2022, 540I 2017-2022, 540I XDRIVE 2017-2022, M550I XDRIVE 2018-2022) .
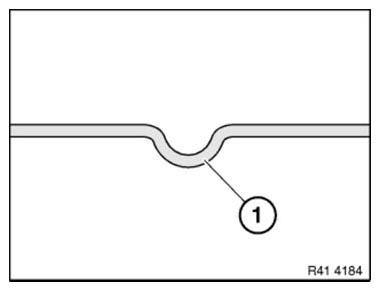
- Remove adhesive residue in the area (1) to 0.5 mm.
- Do not damage the primer applied surface when doing so.
Minor damage up to 5 mm or scratches can be ignored.
In the event of more significant damage to the base coat (exceeding 5 mm), proceed as follows:
- Pre-clean damaged area with cleaning agent R2.CONSUMABLE - CLEANING AGENT DESCRIPTION
Cleaning agent R2 500 ml 83190417324 - Clean damaged area with cleaning agent R1.CONSUMABLE - CLEANING AGENT DESCRIPTION
Cleaning agent R1 100 ml, Bottle 83192211217 - Apply adhesive K5 to the bare areas with a spatula or a brush. Apply a uniformly thin layer (maximum 0.5 mm). The roof outer skin can be bonded after a curing period of 24 hours at a low temperature value of 15°C. The adhesive flange area must not be painted over when the roof frame is being repaired or replaced.ADHESIVE DESCRIPTION
Body adhesive K5 50 ml 83192158654 - Remove the sound insulation (2) (expansion foam strip).
- Adjust new part roof outer skin.
- Adjust the tensioning tools prior to installation to adhere to the processing time of 15 min from the application of the adhesive.
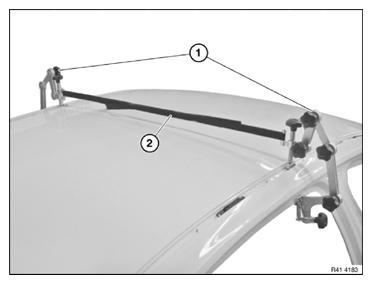
- Mount roof pliers (1) and fix with luggage strap (2).
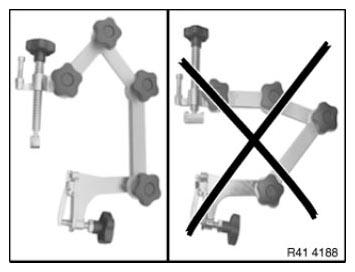
- Adjust roof pliers according to the schematic diagram.
- Position clamping tools only on stiffening embossings (1) in adhesive flange area of the roof outer skin. This guarantees correct distance and hence the correct amount of adhesive between the roof outer skin and the roof frame.
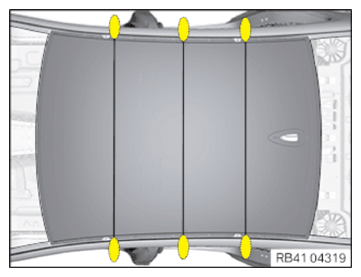
- Secure the roof outer skin in 3 areas with roof pliers and luggage straps as shown.
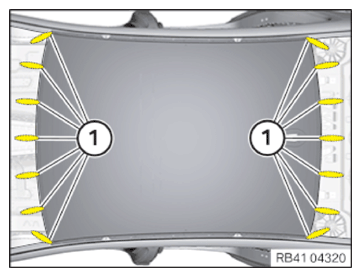
- Fix roof outer skin within the windshield area and the rear window area with fixing pliers (1).
- Release clamping tools and remove roof outer skin.