Installing The Roof Outer Skin
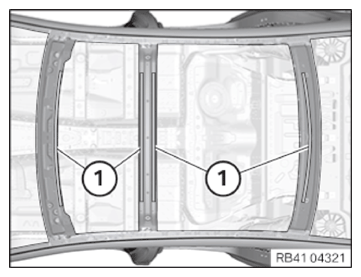
- Clean the bonding surfaces (1) on the body and on the new part with cleaning agent R1. Adhere to the air drying time of 2 min!CONSUMABLE - CLEANING AGENT DESCRIPTION
Cleaning agent R1 100 ml, Bottle 83192211217 - Fit the new sound insulation (expansion foam strips) in the areas (1).
- Lay out following parts ready:
- Adhesive in the adhesive gun and two further glue cartridges
- Rear window
- Roof trim strips
- Preset roof clamps with the retaining straps
- 7 locking pliers (windshield area)
- 7 fixing pliers (rear window area)
NOTE: TECHNICAL INFORMATION
Process the following steps within 15 minutes:- Apply adhesive.
- Position and secure the roof outer skin.
- Apply adhesive to the nodes on the A-pillar and C-pillar.
- Remove excess adhesive.
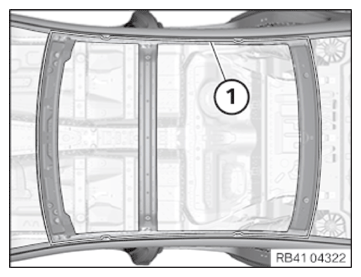
- Preclean the bonding surfaces (1) on the body and on the new part with cleaning agent R2.CONSUMABLE - CLEANING AGENT DESCRIPTION
Cleaning agent R2 500 ml 83190417324 - Clean the bonding surfaces (1) on the body and on the new part with cleaning agent R1. Adhere to the air drying time of 2 min!CONSUMABLE - CLEANING AGENT DESCRIPTION
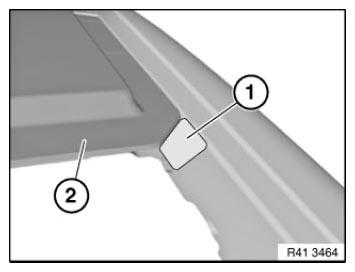
Cleaning agent R1 100 ml, Bottle 83192211217 - In the areas (1), top up and smoothen the flange outlets with adhesive K2 (bead width 5 - 8 mm).
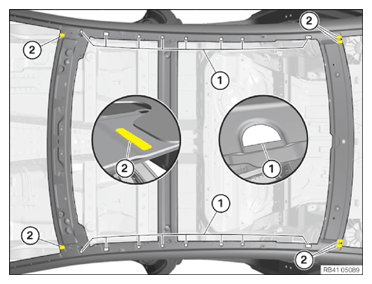
- In the areas (2), apply a 25 mm long adhesive bead with adhesive K2 (level compensation) and smoothen it.ADHESIVE DESCRIPTION
Body adhesive K2 2x290 ml 83192355849 - Apply adhesive K2 to the bonding surfaces (1).
- Guide the nozzle at a maximum angle of 60° on the adhesive flange.
The adhesive bead has a cross-section of approximately 5 ± 1 mm x 10 ± 1 mm.
- Coat the areas (1) slightly with adhesive K2.
- In area (2), apply a reference bead with an approximate 200 - 300 mm length for future inspection.
- Place roof outer skin with helpers evenly and centrally on vehicle.
- Fit the rear window and roof trim strips to check the correct installation position of roof outer skin.
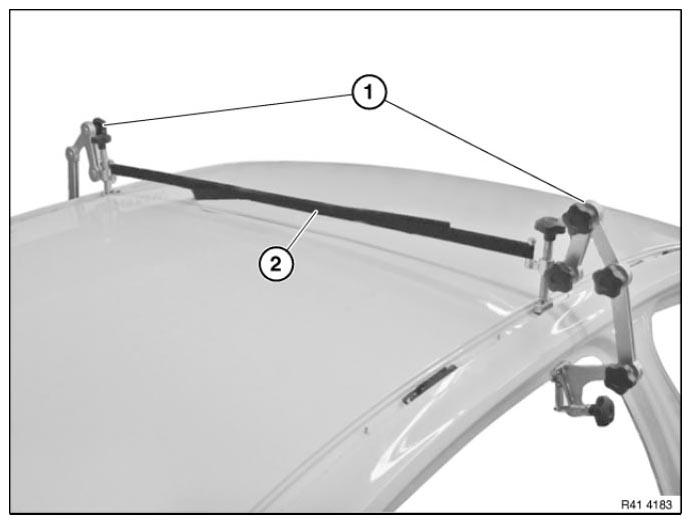
- Mount roof clamps (1) and fix with a retaining strap (2).
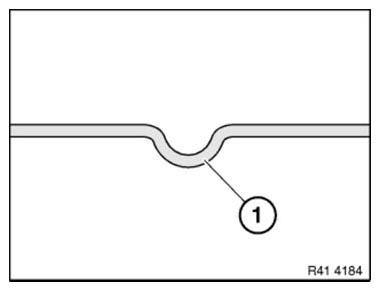
- Position clamping tools only on stiffening
embossings (1) in adhesive flange area of the roof outer skin. This guarantees the correct distance and hence the correct amount of adhesive between the roof outer skin and the roof frame.
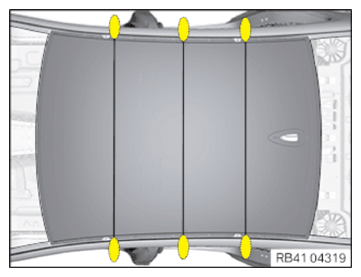
- Fasten the roof outer skin at 3 areas as shown with the roof clamps and retaining straps.NOTE: TECHNICAL INFORMATION
Clamping tools must remain on the vehicle for at least 1 hour.
Do not shift the vehicle during this period. Only then is it permitted to proceed with subsequent installation work.
Check whether the reference bead has hardened after 2 hours hardening time (15-38°C).
After bonding, the vehicle must remain parked for at least 12 hours at room temperature (15-38°C).
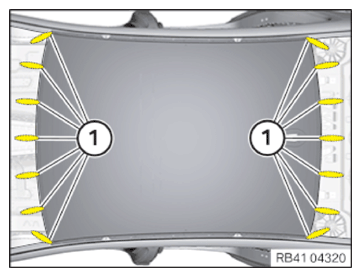
The vehicle is then ready for operation. - Fasten the roof outer skin within the windshield area and the rear window area with the locking pliers (1).
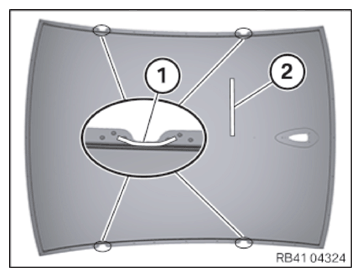
- Level out leaked adhesive in the area (1) at all 4 corners of the roof outer skin (2) by spreading.
Do not leave any sharp edges as this may compromise the tightness of the subsequent windshield and rear window bonding.
- Spread excess adhesive in roof trim strip channel. While doing so, the mounting surfaces of roof trim strip mounting elements may not be coated with adhesive.
- Remove excess adhesive. For that do not use any cleaning agent or solvent!
- Check the ground straps for damage and renew the ground straps, if necessary.
- Install ground strap (2) with the blind rivets (for ground strap) (1).
- Install all 4 ground straps.
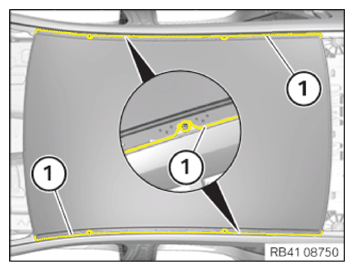
Sealing the roof outer skin
NOTE: Schematic diagram is for example purposes. Some parts may differ in certain details. - Seal the roof outer skin on both roof frames with sealant (1), in line with standard production.CONSUMABLE - SEALANT DESCRIPTION
Sealant D1 (seam sealing) 310ml 83422409985

Follow-up work
- Refer to ACTIVATE HIGH-VOLTAGE SYSTEM .
- Refer to INSTALL FLAP IN RIGHT LUGGAGE COMPARTMENT TRIM PANEL .