Installing The Tail Panel
Further information is available .
NOTE:
Perform the steps on the left and right side.
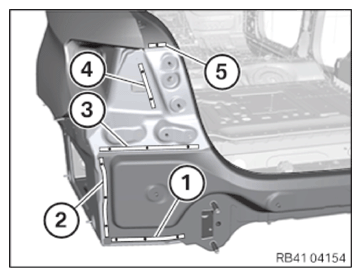
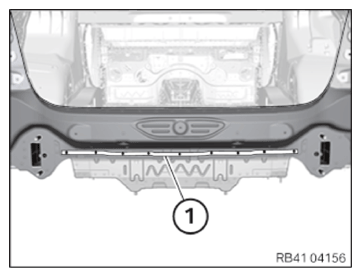
- Do not apply any adhesive in area (1).
- Pre-clean bonding surfaces on vehicle and on new part with cleaning agent R2.CONSUMABLE - CLEANING AGENT DESCRIPTION
Cleaning agent R2 500 ml 83190417324 - Clean bonding surfaces on vehicle and on new part with cleaning agent R1.CONSUMABLE - CLEANING AGENT DESCRIPTION
Cleaning agent R1 100 ml, Bottle 83192211217 - Apply adhesive K5 to bonding surfaces.ADHESIVE DESCRIPTION
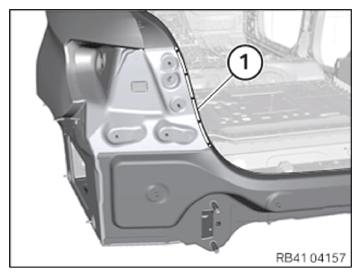
Body Adhesive K5 195 ml 83195A59935 - Install the rear trim panel in the areas (1) to (5) with blind rivets N3.
Consumable
Blind rivet N3
Ø 4 mm; clamping area 1-3 mm83190301421 - Use 9 punch rivets N4 in the area (1).CONSUMABLE - PUNCH RIVET DESCRIPTION
Punch rivet N4
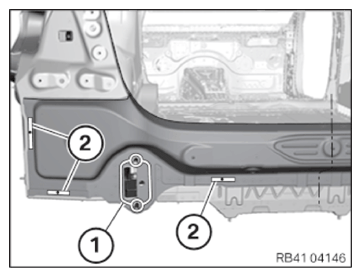
Ø 3 mm; 4 mm long83192457307 - Use 5 punch rivets N4 in the area (1).CONSUMABLE - PUNCH RIVET DESCRIPTION
Punch rivet N4
Ø 3 mm; 4 mm long83192457307 Install EMC screw
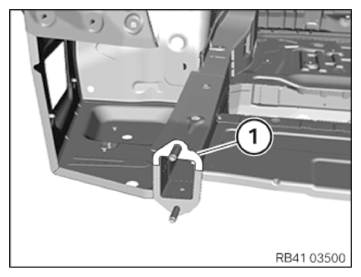
- Drill a 4.2 mm diameter hole after the adhesive has fully cured.
- Screw in the EMC screw.
- Seal the EMC screw with sealing compound. CONSUMABLE - SEALANT DESCRIPTION
Sealant D1 (seam sealing) 310 ml 83422409985
NOTE:
TECHNICAL INFORMATION
Avoid contact of the escaped adhesive with the support for the bumper cover. Do not use any cleaning agents containing solvents.
Avoid contact of the escaped adhesive with the support for the bumper cover. Do not use any cleaning agents containing solvents.
- Press in the tail cowling in area (1) and remove the emerging adhesive.
- Before the adhesive hardens, install the support for the bumper cover.
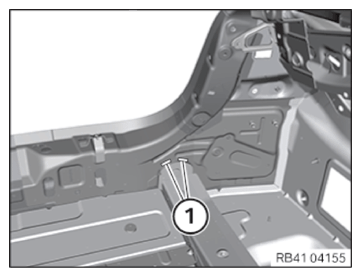
- After the adhesive has hardened, install 3 EMC screws in the areas (2) shown.
Consumable
screw
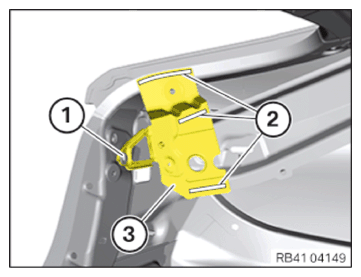
EMC screw, SF Plus, M5x1583190301639 - Install the support (3).
- Position and tighten the screw (1).
TIGHTENING TORQUES SPECIFICATION
| Support to tail panel | |
| Screw M6 | 8 Nm |