Replacing Bonnet
WARNING:
Working on 12 V vehicle electrical system.
Risk of short circuits! Risk of fire!
Risk of short circuits! Risk of fire!
- Make sure that no charger is connected to the jump start support point in the engine compartment.
- Detach battery earth lead from battery.
- With auxiliary batteries: Detach all battery earth leads from additional batteries.
Preliminary work
- Refer to DISCONNECTING ALL BATTERY EARTH LEADS .
- Refer to REMOVING THE EMBLEM .
- Refer to REMOVING THE NOZZLE CHAIN .
- refer to REMOVE BONNET .
Prerequisite
New part is painted.
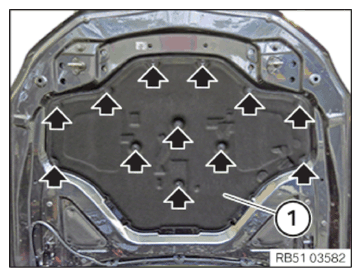
- Undo all clips using special tool 2 298 505.
- Remove damping material (1) and install on the new bonnet.
- Fit all clips.
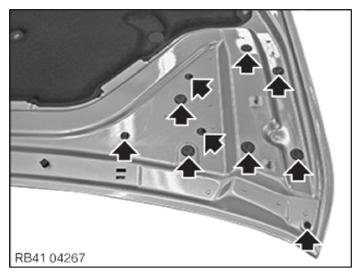
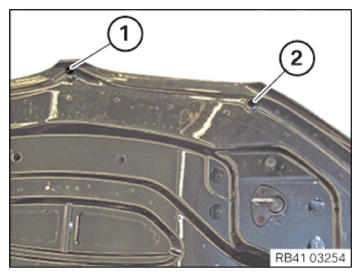
- Remove all seal plugs and install on the new bonnet.
- Remove clip (1) and install on the new bonnet.
- Replace faulty clips (1).
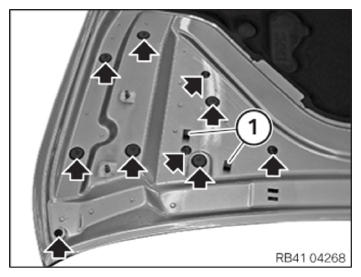
- Remove all seal plugs and install on the new bonnet.
- Remove clip (1) and install on the new bonnet.
- Replace faulty clips (1).
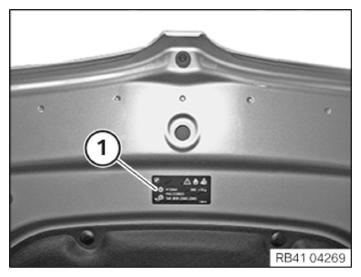
- Remove spacer (1) and install on the new bonnet.
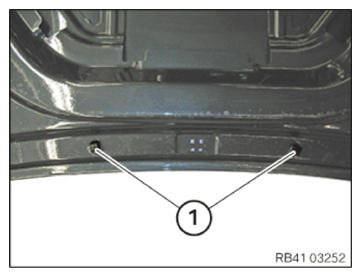
NOTE:
Perform the operations on the left and right side.
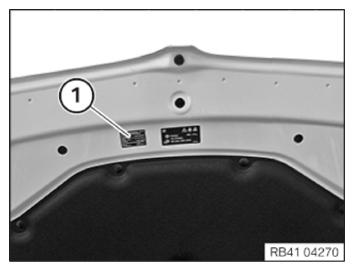
Paste auxiliary heater sign
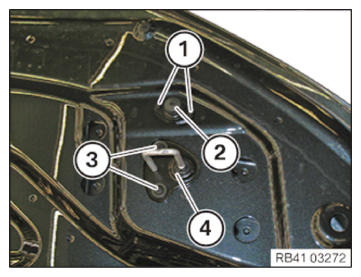
NOTE:
Perform the operations on the left and right side.
- Loosen the expanding rivet (1).
- Remove stop pad (2) and install on the new bonnet.
- Loosen screws (3).
- Remove striker (4) and install on the new bonnet.
- Tighten down screws (3).
Tightening torques
| Striker to bonnet | |
| Screw | Tightening torque 8 Nm |
Follow-up Work
- refer to INSTALL BONNET .
- Refer to INSTALLING THE NOZZLE CHAIN .
- refer to ADJUSTING BONNET .
- Refer to INSTALLING THE EMBLEM
- Refer to CONNECTING ALL BATTERY EARTH LEADS .