Installing the badge at the rear
NOTE:
TECHNICAL INFORMATION
Notes on component bonding using adhesive tape form the basis for these repair instructions and must be observed without fail.
For more information see: 51 00... NOTES on component bonding with adhesive tape
Notes on component bonding using adhesive tape form the basis for these repair instructions and must be observed without fail.
For more information see: 51 00... NOTES on component bonding with adhesive tape
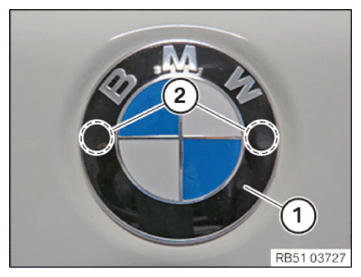
- Replace the badge.
Parts: Emblem
- Remove any adhesive residue from the body and clean the bonding surface (1).
EXPENDABLE MATERIALS - CLEANING AGENT DESCRIPTION
| Cleaning agent R2 | 500 ml | 83190417324 |
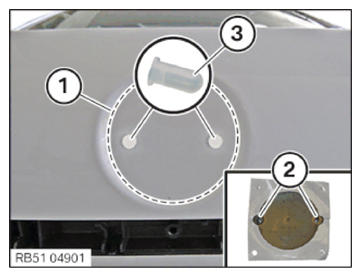
- Check the guide pins (2).
The guide pins (2) must not be damaged or missing.
- Replace the grommets (3).
Parts: Grommets
- Coat the guide pins (2) using lubricant.
ASSEMBLY AIDS - LUBRICANTS DESCRIPTION
| Lubricants G14 | 900 ml, Can | 83232360412 |
- Pull off the liner from the adhesive strip of the badge.
- Press the badge (1) onto the guide pins (2) and the adhesive strip.