Window glass removal with wire pull handle (530i 2017-2022, 530i xDrive 2017-2022, 530e PHEV 2018-2022, 530e xDrive PHEV 2018-2022, 540i 2017-2022, 540i xDrive 2017-2022, M550i xDrive 2018-2022)
Special tools required:
- 2 336 541
Always wear safety goggles and protective gloves for your own safety.
Protect inner and outer working area (body, trim panels, cables etc.) against damage.
Depending on the area of application, a SEPARATING CORD can also be used as an alternative to wire.
Using the separating cord prevents any damage to the body.
Do not pull the separating cord over any sharp edges (risk of tearing) !
Used tool:
- Wire pull handles
- Dashboard protection
- Line threader (special tool 2 336 541)
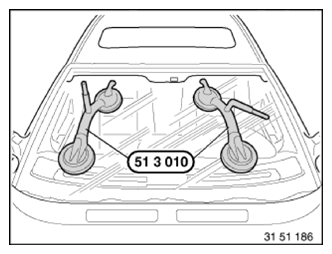
Use suction cups (51 3 010) to lift out the window glass.
Always keep both suction cups dry and clean to ensure their optimum adhesion on the windscreen.
Secure window glass (if necessary with adhesive tape) against falling out.
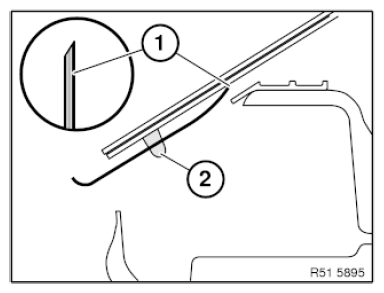
Pulling cutting wire into vehicle:
- Grip wire with pliers
(If access is difficult: using wire starter 2 336 541, feed wire through adhesive bead.)
- Wire end (1) must be bent towards window glass.
- Heat wire end (1) and use it to pierce adhesive bead (2).
- Pull approximately half of the wire into the passenger compartment
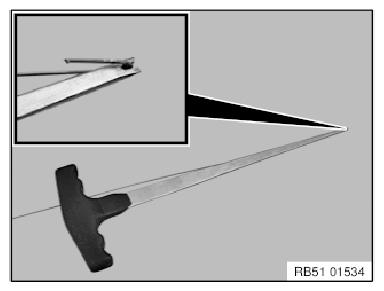
Using wire starter:
Bend wire end approx. 10 mm and insert in notched tip.
Pierce wire starter with uniform pressure through adhesive bead, wire end (bent part) must be positioned on window glass.
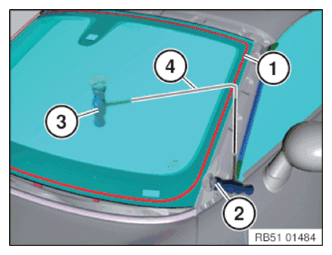
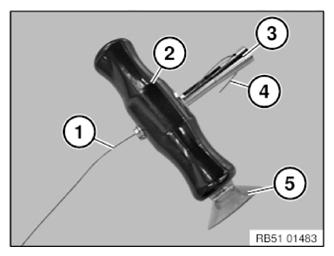
Attach wire pull handles:
Feed in cutting wire (1) in cutting handle (2) and clamping element (3) as illustrated.
Move back cutting handle (2) over clamping element (3) and trap wire end (4).
Danger of injury!
Wire end (4) must not protrude out of cutting handle (2).
Cutting handle (2) can be secured with suction cup (5) to the vehicle window or body during each of the work operations. This prevents damage to the paint.
Fit second wire pull handle to other wire end.
Perform repair work with the aid of a second person.
Cutting wire (4) must be guided in cutting direction at an angle that is as acute as possible (>45°) to adhesive bead (1).
Cut through adhesive bead (1) by pulling cutting handle (2) and at the same time providing counter support with cutting handle (3).
Pull back cutting wire (4) with cutting handle (3) and make sure that cutting wire (4) is always held under tension.
Cut through remaining adhesive bead in the same way.