Remove the electric wastegate valve actuator
WARNING:
High-voltage system.
The high-voltage system operates on the basis of hazardous, electrical voltage and high currents. Mortal hazard through electric shock!
The high-voltage system operates on the basis of hazardous, electrical voltage and high currents. Mortal hazard through electric shock!
- All work on the high-voltage system may only be carried out by specially trained and technically experienced personnel.
- For additional information see:
- For additional Information see:
Preliminary work
- Refer to REMOVING THE ACOUSTIC COVER .
- Refer to REMOVING RESONATOR .
- Refer to REMOVING CLEAN AIR PIPE .
Electrical wastegate valve actuator
WARNING:
Hot surfaces.
Risk of burning!
Risk of burning!
- Perform all work only on components that have cooled down.
NOTE:
RISK OF DAMAGE
Electrostatic discharge.
Damage to or destruction of electrical components.
Electrostatic discharge.
Damage to or destruction of electrical components.
- Leave the electrical components in their original packaging until they are being installed. Only use the original packaging for returning the product. Always package removed components straight away.
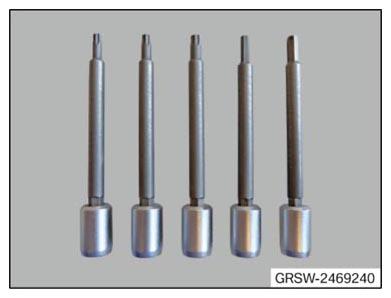
- Read and comply with user information on using the associated special tool 12 7 060.
- Only tap the housings of electrical components. Do not tap pins or multi-pin connectors directly.
- Wear electrically conductive clothing and antistatic shoes (with ESD symbol).
- For additional information see: NOTES ON ESD (ELECTROSTATIC DISCHARGE) PROTECTION .
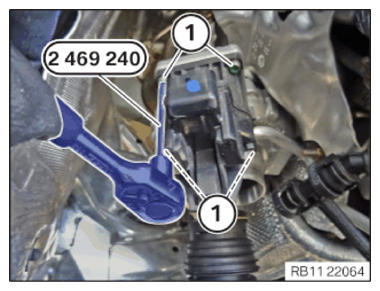
- Have the special tool 2 469 240
ready.
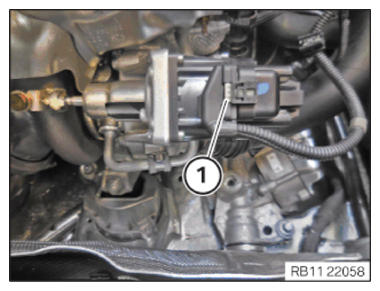
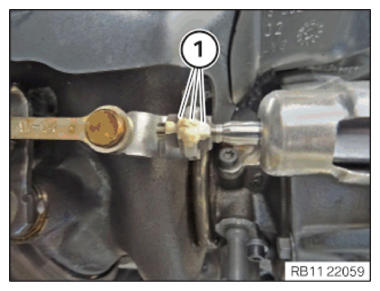
- Unlock plug connection (1) and disconnect.
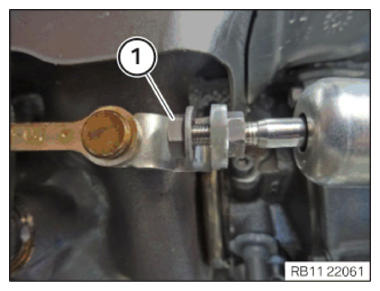
- Remove color (1) with commercially available tool.
NOTE:
TECHNICAL INFORMATION
The adjustment nuts must be locked using 2 open-end wrenches. If only one open-end wrench is used, there is a risk of the electrical controller drive being damaged.
The adjustment nuts must be locked using 2 open-end wrenches. If only one open-end wrench is used, there is a risk of the electrical controller drive being damaged.
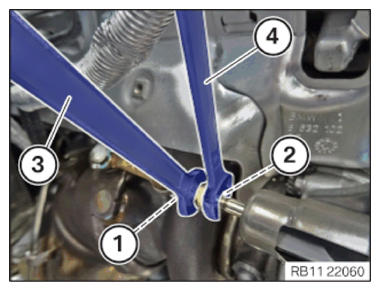
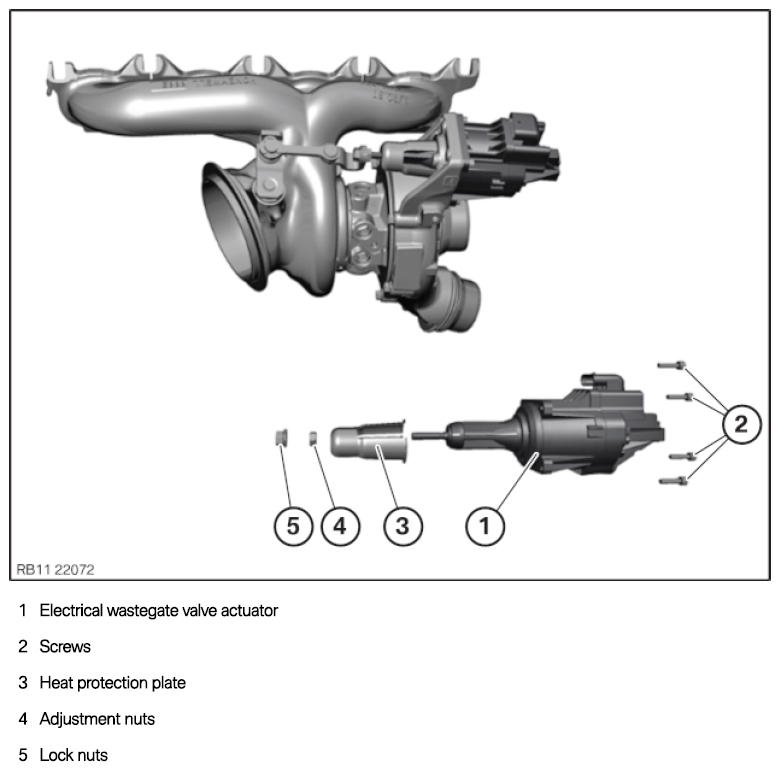
- Counter-hold the nut (2) with a commercially available open-end spanner (4).
- Release the nut (1) with a commercially available open-end spanner (3).
- Thread out the nut (1) and remove.
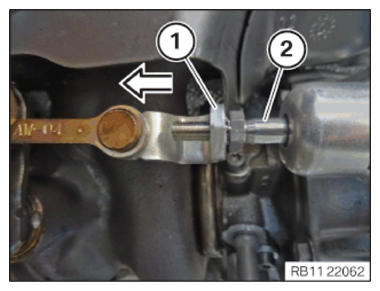
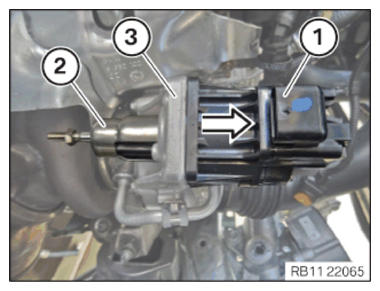
- Thread out the lever (1) of the wastegate valve carefully
in the direction of the arrow from the control rod (2) of the electric wastegate valve controller and set aside.
Avoid any kind of lateral force impact on the control rod (2) of the electric wastegate valve controller.
- Release screws (1) with the special tool 2 469 240.
- Thread out the electric wastegate valve controller (1) with the heat shield (2) in the direction of the arrow carefully
from the bore of the compressor housing (3) and remove.
- Loosen nut (1).
- Thread out the heat shield (2) in the direction of the arrow and remove.