Install clean air pipe
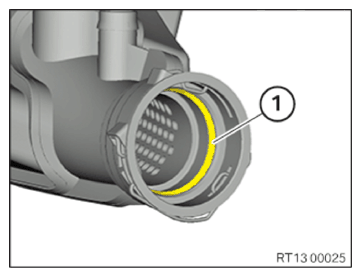
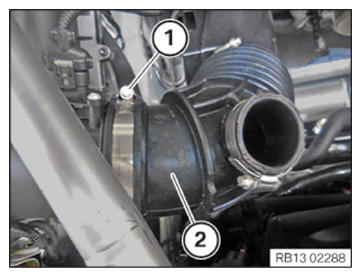
- Check the seal (1) for damage and replace if necessary.
Replacing the damaged seal
NOTE:
TECHNICAL INFORMATION
Use of sharp or pointy tools for installation or removal is prohibited.
Use of sharp or pointy tools for installation or removal is prohibited.
- Remove damaged seal.
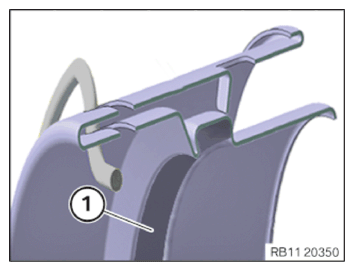
- Clean the gasket groove (1) with a dry cloth.
The gasket groove (1) must be clean.
- Replace gasket.
Parts: Gasket
- Install the seal dry without lubricant or mounting agent.NOTE: TECHNICAL INFORMATION
Incorrect assembly is possible. Ensure correct installation position. - Thread in seal and install.
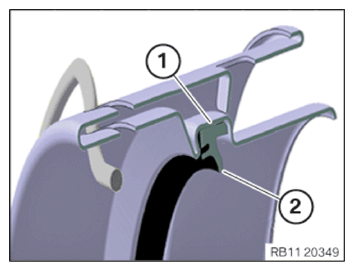
- Make sure that the seal is installed correctly in the gasket groove (1).
- Make sure that the sealing lip (2) is directed to the inside as shown.
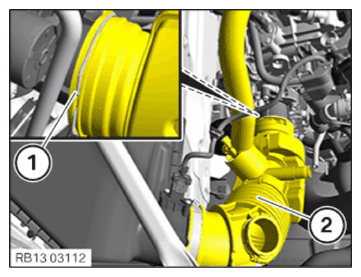
- Version A:
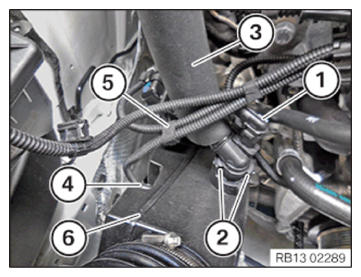
- Feed in clean air pipe (6) and install.
Clamp (5) must engage audibly.
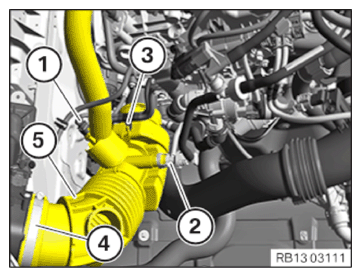
- Insert and install the tank vent line (1).
The tank vent line (1) must engage audibly.
- Insert and install the engine ventilation line (3).
The locks (2) must engage audibly.
- Secure clamps (4).
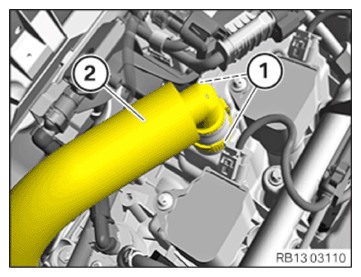
- Feed in clean air pipe (2) and install.
- Tighten clamp (1).TIGHTENING TORQUES SPECIFICATION
Clean air pipe to upper section of intake filter housing cl. Tightening torque 3 Nm - Version B:
- Guide in and install clean air pipe (2).
- Lock clamp (1).
Clamp (1) must engage audibly.
- Feed in top clean air pipe (5) and install.
- Tighten clamp (4).TIGHTENING TORQUES SPECIFICATION
Clean air pipe to upper section of intake filter housing cl. Tightening torque 3 Nm - Secure the clamp (3).
- Connect line (2).
Line (2) must engage audibly.
- Connect connectors (1) and lock.
The connector (1) must engage audibly.
- Connect engine ventilation line (2).
The locks (1) must engage audibly.
Follow-up work
- Refer to INSTALL RESONATOR .
- Refer to INSTALL ACOUSTIC COVER .