Installing the fuel filler pipe with cover housing
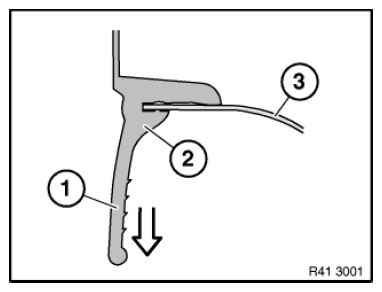
- Position the fuel filler pipe (2).
- Push the fuel filler pipe (2) in the direction of the fuel tank as far as it will go.
- Do not tighten the hose clamp (1) yet.
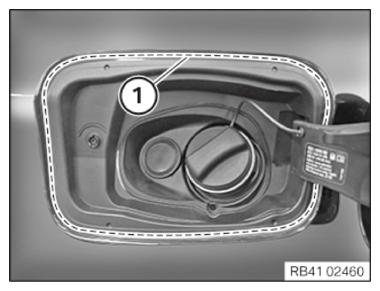
- Replace the cover housing.
Parts : fuel filler neck h.
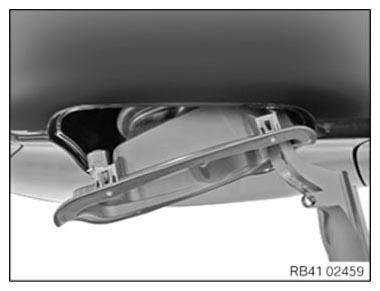
Push the cover housing towards the front at an angle into the side panel.
- Push sealing cup over fuel filler pipe.
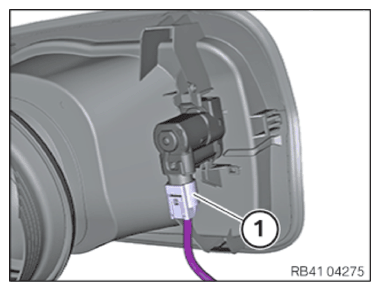
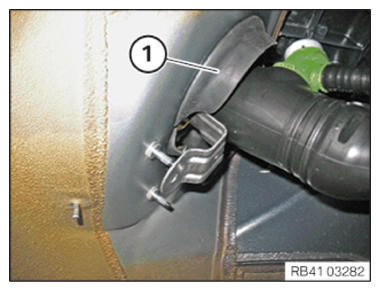
- Connect the plug connection (1).
- Open fuel filler flap.
- Clip in the cover housing (1) into the side panel. The detents (2) must engage audibly.
- Using the installation aid (1), pull the sealing lip (2) over the sheet metal flange of the wheel arch (3).
Check
- Check the sealing lip (1) is positioned correctly.
Result
» Sealing lip (1) does not have uniform contact with the rear quarter panel.
Measure
- Check flange (1) on rear quarter panel for damage.
Straighten flange if necessary.
Check
- Check the sealing lip (1) is positioned correctly.
Result
» The sealing lip (1) is not evenly in contact with the wheel arch.
Measure
- Connect the sealing lip (1) to the wheel arch.
- Check flange (1) on rear quarter panel for damage.
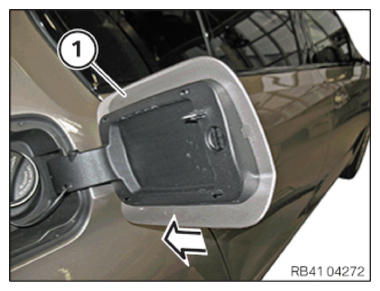
- Slide the fuel filler flap (1) onto the hinge in the direction of the arrow.
Lock must audibly engage.
- Close the fuel filler flap (1).
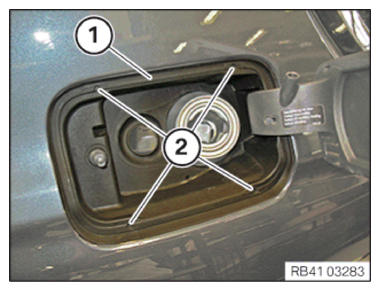
- Position the fuel filler pipe in the correct installation position.
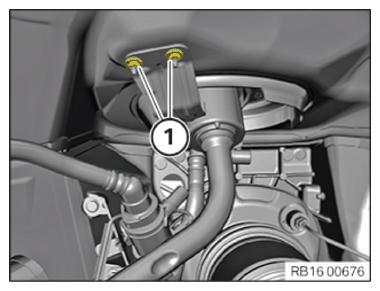
- Replace nuts (1).
Parts: Nuts
- Install the nuts (1) and tighten.TIGHTENING TORQUES SPECIFICATION
Fuel filler pipe on upper body Nut M6
Replace nut.Tightening torque 8 Nm - Position the fuel filler pipe (1) in the correct installation position.
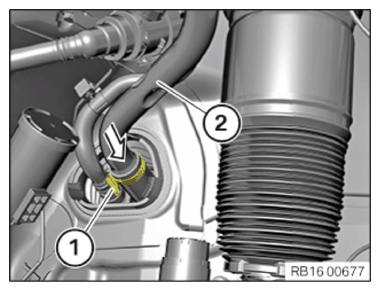
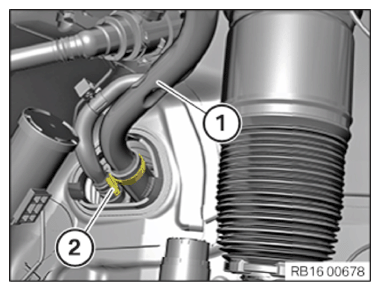
- Replace the hose clamp (2).
Parts: Hose clamp
- Position hose clamp (2) and tighten.TIGHTENING TORQUES SPECIFICATION
Filling hose on fuel tank Hose clamp
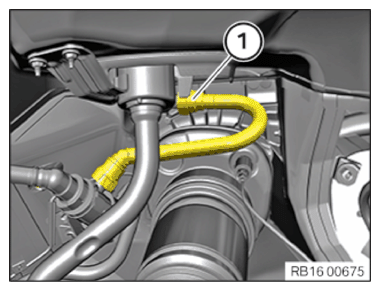
Replace hose clamp.Tightening torque 4 Nm - Position snap fastener (1) and lock.
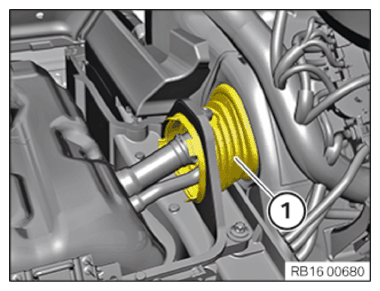
- Install bellows (1).
- Position vapor recovery shut-off valve.
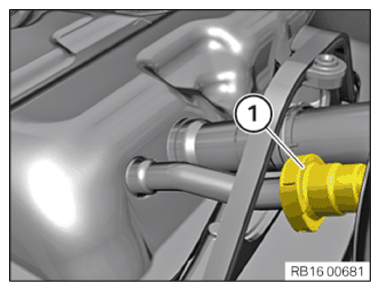
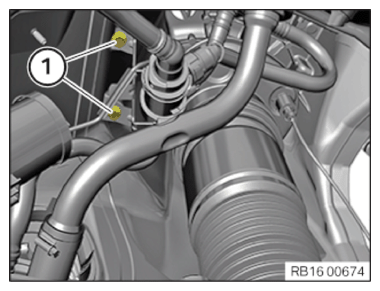
- Replace screws (1).
Parts: screw
- Insert screws (1) and tighten them.TIGHTENING TORQUES SPECIFICATION
Vapor recovery shut-off valve on body M6
Replace screws.Tightening torque 8 Nm - Position snap fastener (1) and lock.
Follow-up work
- Refer to INSTALLING THE HOUSING COVER FOR THE FUEL TANK .
- Refer to INSTALLING THE REAR WHEEL ARCH COVER .
- Refer to MOUNTING THE REAR RIGHT WHEEL .
- Refer to INSTALLING THE LUGGAGE COMPARTMENT WHEEL ARCH TRIM PANEL ON THE RIGHT .
- Refer to INSTALL LUGGAGE COMPARTMENT WHEEL ARCH TRIM PANEL AT LEFT .
- Refer to INSTALLING LOADING EDGE TRIM .
- Refer to INSTALLING FRONT LUGGAGE COMPARTMENT FLOOR COVERING .
- Refer to INSTALL THE REAR LUGGAGE COMPARTMENT FLOOR COVERING .
- Refer to INSTALL REAR SEAT BACKREST
- Refer to INSTALLING THE REAR SEAT BENCH .
- Refer to INSTALL BACKREST SIDE SECTION, LEFT .
- Refer to FILL FUEL TANK .