Installing the oil coolant heat exchanger
NOTE:
TECHNICAL INFORMATION
Clean all threaded belt connections with micro-encapsulated outer and internal threads.
Shavings or other debris must not remain in the components.
If a microencapsulated screw is reused, it must be coated with the following screw locking agent: Loctite 243, medium strength .
The screw connection must be completed within 10 minutes as hardening begins after this period.
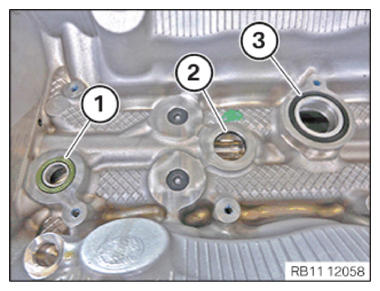
- Replace sealing ring (1).
Parts : Sealing ring
- Clean the sealing surface (2) at the crankcase with the special tool 0 495 102 (11 4 470) .
- Replace sealing ring (3).
Parts: Sealing ring
- Clean and recut the threads in the engine block.
- Replace screws.
Parts : screw
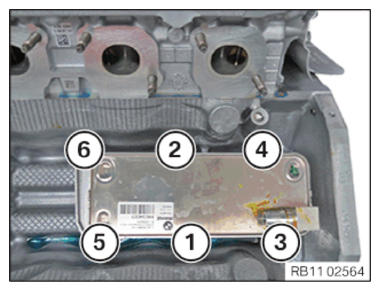
- Position oil coolant heat exchanger and tighten screws in the order of (1) to (6).
TIGHTENING TORQUES SPECIFICATION
| Oil-coolant heat exchanger on crankcase | ||
|---|---|---|
| M6x14 | Tightening torque | 12 Nm |