Prepare New Parts
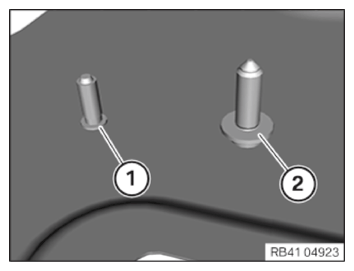
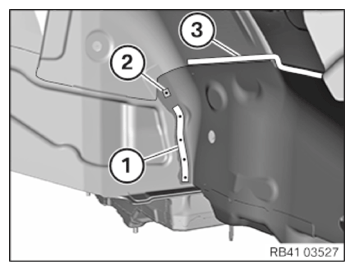
Replace coarse thread studs and threaded welding studs, steel surface
NOTE:
Schematic diagram is for example purposes. Some parts may differ in certain details.
- Refer to the number and position of the component to be replaced or the attachments.
- Replace coarse thread bolt (1) and threaded welding bolt (2).
Parts: Coarse threaded studs (1), threaded weld studs (2)
- Weld the coarse threaded bolt (1) and threaded welding bolt (2) onto the new part.
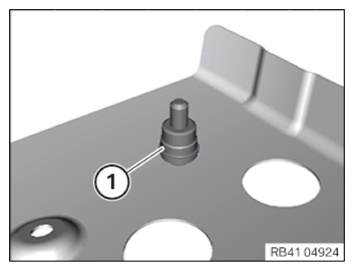
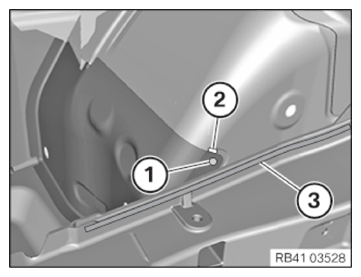
Check ground pins and replace if necessary
Check ground pins and replace if necessary
NOTE: Schematic diagram is for example purposes. Some parts may differ in certain details.Check the ground pins (1) for stability and renew if necessary.
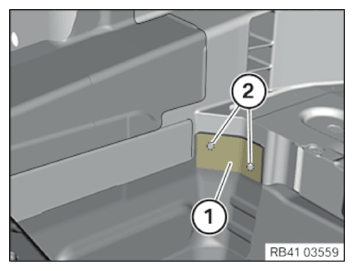
Prepare new parts, left side rail
Further information is available.
NOTE: TECHNICAL INFORMATION
Structural adhesive bonding.
Observe preparation of bonding surfaces.
For additional information see: BMW/MINI BONDING INSTRUCTIONS (530I 2017-2022, 530I XDRIVE 2017-2022, 530E PHEV 2018-2022, 530E XDRIVE PHEV 2018-2022, 540I 2017-2022, 540I XDRIVE 2017-2022, M550I XDRIVE 2018-2022) . - Adjust new parts to fit with alignment bracket or universal mount and secure.
- Prepare areas (1) and (2) for structural adhesive bonding of steel to aluminum.
- Assign the positions of the bores already present in areas (1) and (2) of the vehicle to the new part. Place bores in areas (1) and (2) ø 6.8 mm for blind rivet.
- Prepare area (1) for structural adhesive bonding of steel to aluminum.
- Assign the positions of the bores already present in area (1) of the vehicle to the new part. Place bores in area (1) ø 6.8 mm for blind rivet.
- Prepare area (1) for structural adhesive bonding of steel to aluminum.
- Assign the positions of the bores already present in area (1) of the vehicle to the new part. Place bore in area (1) ø 6.8 mm for blind rivet.
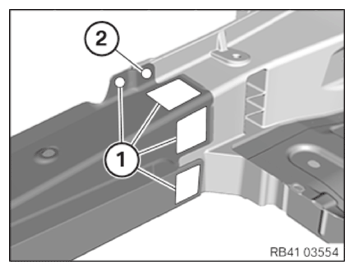
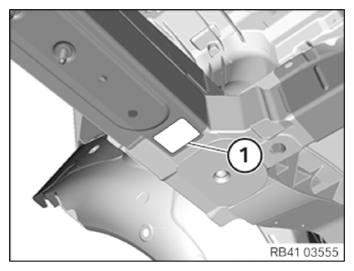
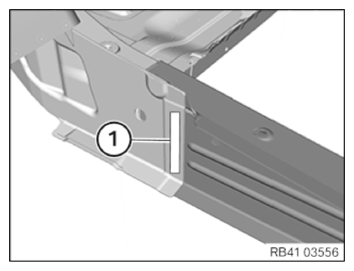
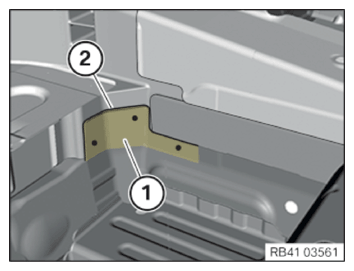
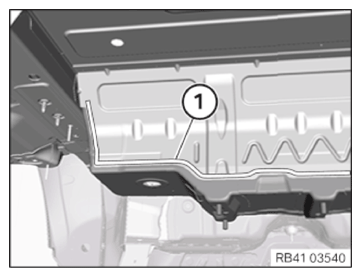
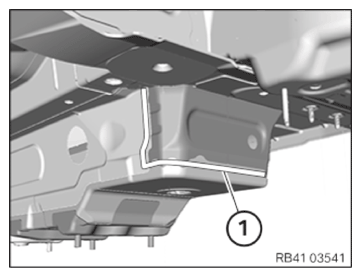
- Prepare areas (1) for joining by welding.
- Prepare areas (1) for joining by welding.
Prepare new parts, left side rail
Further information is available.
NOTE: TECHNICAL INFORMATION
Adhesive technology in the area of the outer skin (not for structural adhesion):
The bonding surfaces of the new parts may not sharpened or ground.
For more information see: BMW/MINI BONDING INSTRUCTIONS (530I 2017-2022, 530I XDRIVE 2017-2022, 530E PHEV 2018-2022, 530E XDRIVE PHEV 2018-2022, 540I 2017-2022, 540I XDRIVE 2017-2022, M550I XDRIVE 2018-2022) . - Adjust new parts to fit and secure.
- Prepare areas (1) for joining by welding. Ensure sufficient distance to the adhesive area in doing so.
- Prepare area (2) for joining using the rivet-and-bonding method. Do not grind bonding surfaces down or off.
- In area (2), assign the two bores present in the side member to the new part.
- Drill out holes to dia. 6.8 mm.
- Prepare areas (1) and (2) for joining with the glue rivet technique. Do not grind bonding surfaces down or off.
- In areas (1) and (2), assign the bores already present to the new part.
- Drill out holes to dia. 6.8 mm.
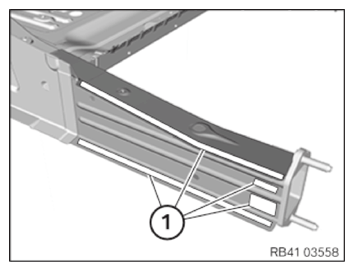
- Prepare areas (3) for joining by welding.
- Replace series of welded connection (1) by MAG-weld seam (2). Prepare in area (2), a MAG-weld seam of length 10 mm. Ensure sufficient distance to the bonded rivet connection (3).
- Remove new parts.
- Deburr bores.
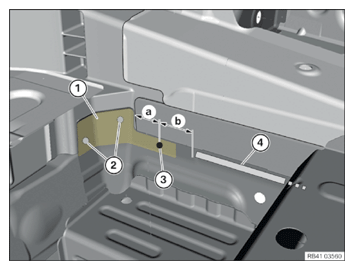
Prepare new part, middle luggage compartment floor
Further information is available.
NOTE: TECHNICAL INFORMATION
Structural adhesive bonding.
Observe preparation of bonding surfaces.
For additional information see: BMW/MINI BONDING INSTRUCTIONS (530I 2017-2022, 530I XDRIVE 2017-2022, 530E PHEV 2018-2022, 530E XDRIVE PHEV 2018-2022, 540I 2017-2022, 540I XDRIVE 2017-2022, M550I XDRIVE 2018-2022) . - Adjust new parts to fit and secure.
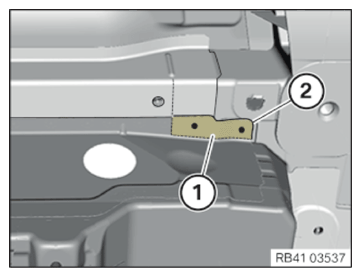
- Prepare area (1) for structural adhesive bonding of steel to aluminum.
- Assign the positions of the holes already present in area (2) of the vehicle to the new part. Set holes (2) ø 6.8 mm for blind rivet.
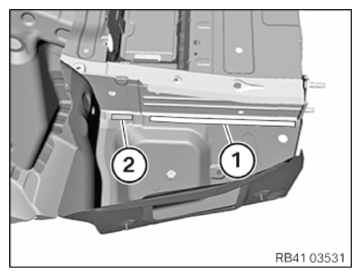
- Mark area (1) for later adhesive application.
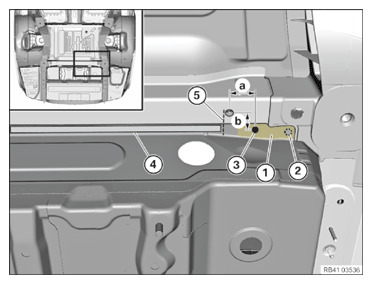
- Prepare area (1) for structural adhesive bonding of steel to steel and aluminum.
- Assign the positions of the holes already present in area (2) of the vehicle to the new part. Set holes (2) ø 6.8 mm for blind rivet.
- Set hole (3) ø 6.8 mm according to dimension b. Dimension b = 30 mm from component edge.
- Prepare area (4) according to dimension a for joining by welding. Dimension a = 40 mm.
- (2) Mark area (1) for later adhesive application.NOTE: Perform the steps on the left and right side.
- Adjust the new parts in combination with the tail panel to fit and secure.
- Prepare area (1) for structural adhesive bonding of steel to steel and aluminum.
- Transfer the position of the hole (2) that resulted from the removal on the vehicle to the new part. Set hole (2) ø 6.8 mm for blind rivet.
- Set the new hole (3) ø 6.8 mm according to the specified dimensions.
Dimension a = 40 mm from hole ø 12 mm.
Dimension b = 24 mm of hole ø 12 mm.
- Prepare area (4) from the reference line (5) for joining by welding.
- (2) Mark area (1) for later adhesive application.
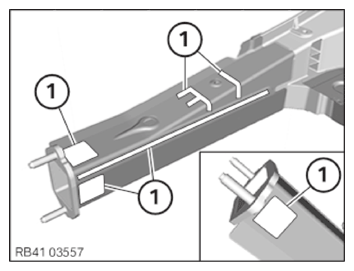
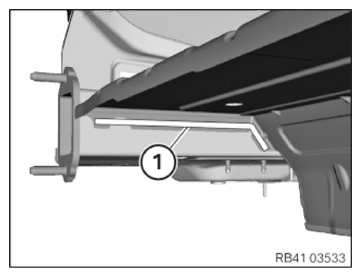
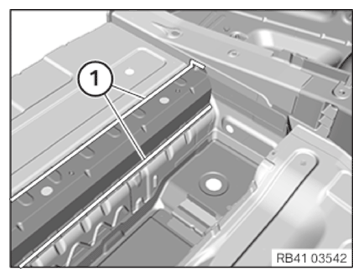
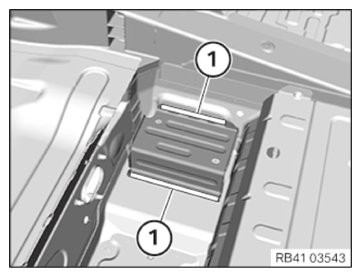
- Prepare areas (1) for joining by welding.
- Prepare areas (1) for joining by welding.
- Prepare areas (1) for joining by welding.
- Prepare areas (1) for joining by welding.
- Prepare areas (1) for joining by welding.
- Remove new part and deburr holes.