Install A-Pillar Reinforcement
Further information is available.
NOTE:
TECHNICAL INFORMATION
Use only approved spot welder for repair.
Use only approved spot welder for repair.
For additional information see: WORKSHOP EQUIPMENT (BMW AND MINI VEHICLES) - (530I 2017-2022, 530I XDRIVE 2017-2022, 530E PHEV 2018-2022, 530E XDRIVE PHEV 2018-2022, 540I 2017-2022, 540I XDRIVE 2017-2022, M550I XDRIVE 2018-2022) .
NOTE:
TECHNICAL INFORMATION
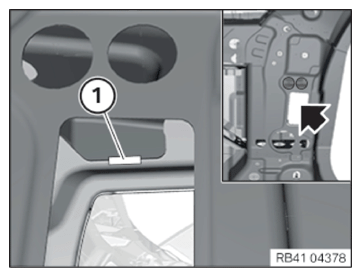
For additional information see: INSTALLING CAVITY SEALING (NOT EXPANDED) (530I 2017-2022, 530I XDRIVE 2017-2022, 530E PHEV 2018-2022, 530E XDRIVE PHEV 2018-2022, 540I 2017-2022, 540I XDRIVE 2017-2022, M550I XDRIVE 2018-2022) .
For additional information see: INSTALLING CAVITY SEALING (NOT EXPANDED) (530I 2017-2022, 530I XDRIVE 2017-2022, 530E PHEV 2018-2022, 530E XDRIVE PHEV 2018-2022, 540I 2017-2022, 540I XDRIVE 2017-2022, M550I XDRIVE 2018-2022) .
- Apply sealant D1 to cavity sealing (1).CONSUMABLE - SEALANT DESCRIPTION
Sealant D1 (seam sealing) 310 ml 83422409985 - Insert the cavity sealing (1) in the new part.
- Apply sealant D1 to cavity sealing (1).CONSUMABLE - SEALANT DESCRIPTION
Sealant D1 (seam sealing) 310 ml 83422409985 - Install the new part and reinforcement plate with an alignment bracket or universal fixture and secure.
- Weld the new part and the reinforcement plate in the area (2).
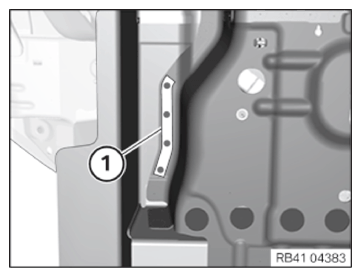
- Weld the new part in areas (1) to (3) as per the new part preparation.
- Weld new part in areas (1) and (2) as per new part preparation processes.
- Weld the new part in the area (1) by MAG welding.NOTE: To provide a better overview: Schematic diagram with partially hidden components.
- Weld new part in areas (1) and (2) as per new part preparation processes.
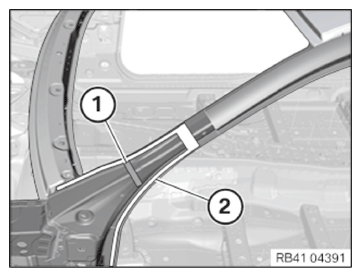
For better clarity, the joint plate (3) is not shown.
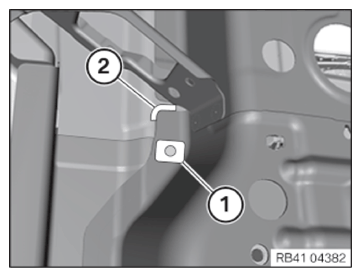
- Set the repair spot-weld (2) to the production spot-weld on the vehicle.
- Weld new part in areas (1) and (2) as per new part preparation processes.
- In the area (2), set the repair welding points on the series welding points on the vehicle.
- Weld the new part in the areas (1) and (2). Avoid excessive heat input on the adjacent adhesive areas.
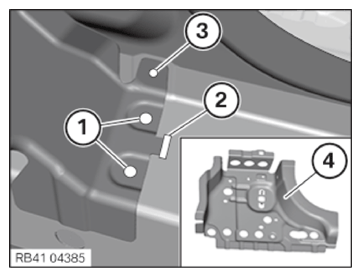
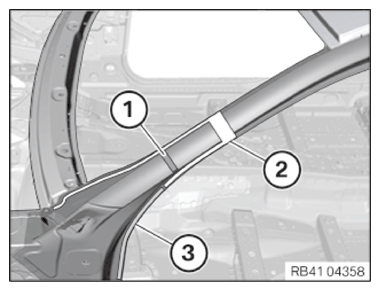
- Set the repair spot-weld (1) to the production spot-weld on the vehicle.
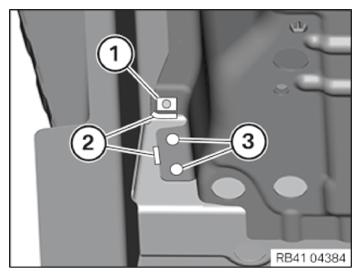
- In area (2), set a MAG weld seam with a length of 15 mm.
- Weld the new part in areas (1) according to the new part preparation process. Avoid excessive heat input on the adjacent adhesive areas.
- Weld the new part in areas (1) to (3) as per the new part preparation. Avoid excessive application of heat to adhesive areas.
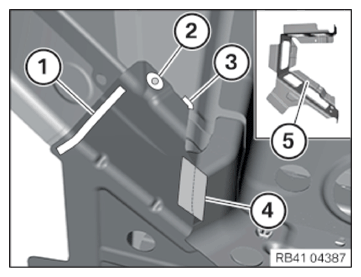
- Set the repair spot-weld (1) to the production spot-weld on the vehicle.
- In areas (2), set a MAG weld seam with a length of 15 mm.NOTE: To provide a better overview: Schematic diagram with partially hidden components.
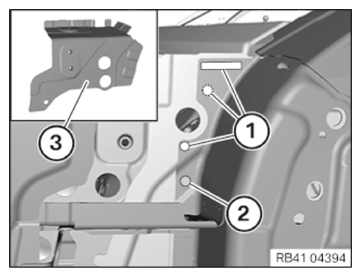
- Weld the new part in areas (1) to (3) as per the new part preparation.
Reinforcement plate (4) not shown for better reference.
- Weld through existing openings in the reinforcement plate (4).
- Set the repair spot-weld (3) to the production spot-weld on the vehicle.
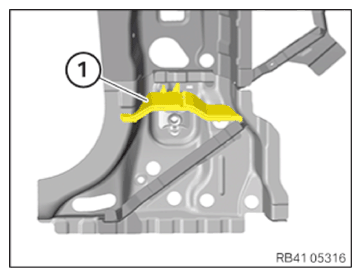
- Install new part crash reinforcement (1) and weld it in areas (2) and (3) as per new part preparation processes.NOTE: To provide a better overview: Schematic diagram with partially hidden components.
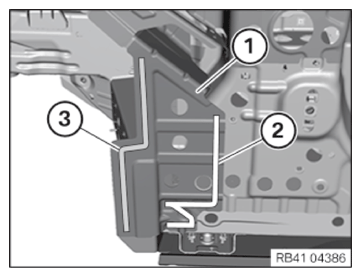
- Weld the new part in areas (1) to (3) as per the new part preparation. Avoid excessive heat input on the adjacent adhesive area in the process.
For better clarity, the bulkhead (5) is not shown.
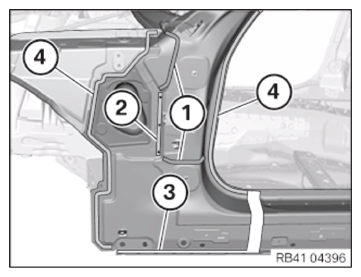
- Set the repair spot-weld (2) to the production spot-weld on the vehicle.
- In area (3), set a MAG weld seam with a length of 10 mm.
- Weld the separating cut and the reinforcement plate (4).
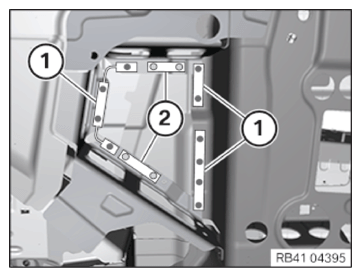
- Apply sealant D1 to all new cavity sealings (1) and install.
- Preclean bonded rivet area (2) on the new part and on the vehicle with cleaning agent R2.CONSUMABLE - CLEANING AGENT DESCRIPTION
Cleaning agent R2 500 ml 83190417324 - Clean bonded rivet area (2) on the new part and on the vehicle with cleaning agent R1.CONSUMABLE - CLEANING AGENT DESCRIPTION
Cleaning agent R1 100 ml, Bottle 83192211217 - Apply adhesive K5 to bonded rivet connection (2).ADHESIVE DESCRIPTION
Body adhesive K5 50 ml 83192158654 - Install the new part and the reinforcement plate.
- Set the blind rivet N7 in the area (2).CONSUMABLE - BLIND RIVET DESCRIPTION
Blind rivet N7
Ø 6.5 mm; clamping area 1.5 - 3.5 mm83192240352 - Weld the new part and the reinforcement plates in the areas (3) and (4) according to the new part preparation process.
- Weld the new part and reinforcement plate in areas (2) and (3) as per new part preparation process.
Avoid excessive heat input to the cavity sealing (1) in the process.


Follow-up work
- Refer to ACTIVATE HIGH-VOLTAGE SYSTEM .
- Refer to INSTALL FLAP IN RIGHT LUGGAGE COMPARTMENT TRIM PANEL .