Installing the rear window
NOTE:
TECHNICAL INFORMATION
The seal on the rear window at the bottom is deleted. A damaged seal must be removed.
The rear window is installed without the seal .
The seal on the rear window at the bottom is deleted. A damaged seal must be removed.
The rear window is installed without the seal .
- Clean the bonding surfaces on the body and on the rear window.
- Keep 2 glue cartridges ready.
- Prepare one of the glue cartridges with the standard nozzle C.
- Apply bead joint in area (1).
- Apply adhesive bead within the mark (2) on the rear window.
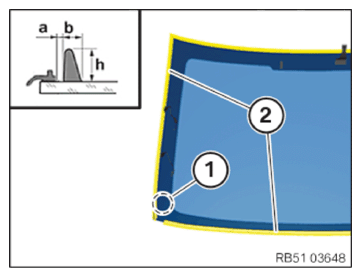
TECHNICAL DATA - ADHESIVE BEAD SPECIFICATION
| Adhesive bead | |
|---|---|
| a = Distance to the rubber frame | 1 mm... 3 mm |
| b = Width | 7 mm... 9 mm |
| h = Height | 11 mm... 13 mm |
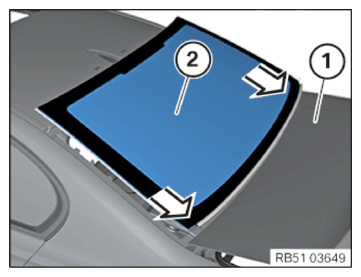
- Open tailgate (1) approx. 1/3 and secure in this position.
- Carefully guide the rear window (2) with the suction lifters parallel to the C-pillar and feed in below the tailgate.
- Carefully position the rear window (2) with the suction lifters on the top and align it sideways at the same time.
- Carefully push up the rear window (2) with the suction lifters upwards until the sealing rests evenly on the roof.
- Carefully push the rear window (2) with the suction lifters all around and adjust the gap dimensions.
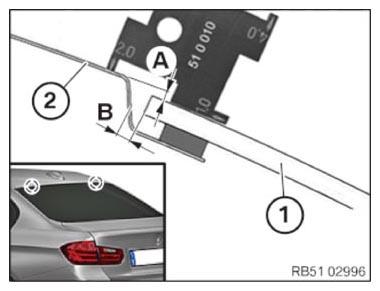
TECHNICAL DATA - GAP DIMENSION SPECIFICATION
| Gap dimension of rear window for body | ||
|---|---|---|
| Short length A | 1.3 mm... 3.9 mm | |
| Gap dimension B | 2.7 mm... 5.3 mm | |
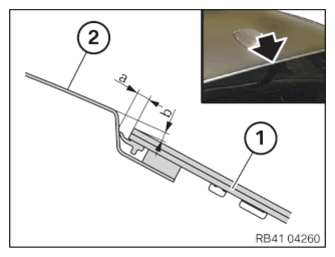
TECHNICAL DATA - GAP DIMENSION SPECIFICATION
| Gap dimension rear window to roof outer skin | ||
|---|---|---|
| 1 rear window; 2 roof outer skin | a | 4.0 +1.3-1.3 mm |
| b | 2.6 +1.3-1.3 mm | |
- Measure short length (A) of the rear window (1) to the roof outer skin (2) with the special tool 0 495 259 (51 0 010) .
- Measure the gap dimension (B) with special tool 0 496 076 (00 9 470).
- Secure rear window (1) with adhesive tap on the roof.
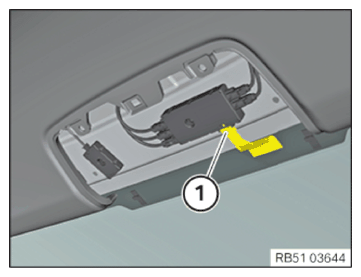
- Connect connector (1).
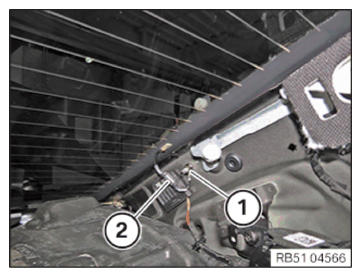
- Secure the cable (2) onto the attachment point with the nut (1).
- Loosen cable (2) from the rear window.
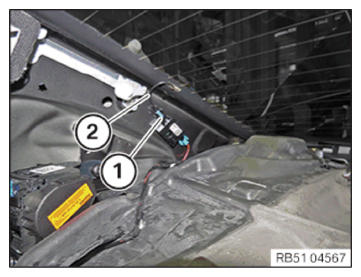
- Connect connector (1).
Follow-up Work
- Install the auxiliary STOP LAMP .
- Insert additional brake light TRIM
- Install both c-pillar TRIM PANELS .
- Install the rear left and right water channel TRIM PANEL .