Assemble exterior mirror
Assemble exterior mirror
NOTE:
TECHNICAL INFORMATION
The training video illustrates the methodology for assembling and disassembling the exterior mirror.
The training video does not replace the repair instructions.
The training video is not subject to the update service.
The training video illustrates the methodology for assembling and disassembling the exterior mirror.
The training video does not replace the repair instructions.
The training video is not subject to the update service.
- Follow repair instructions!
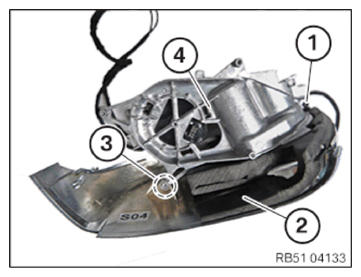
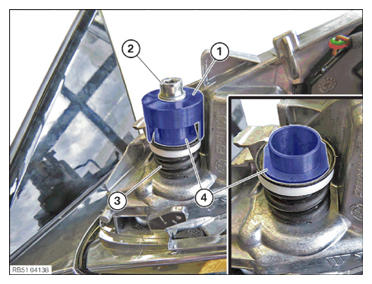
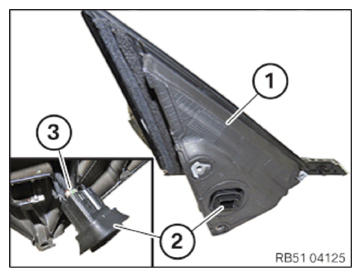
- Thread in cover (2) into the mirror housing (4) and attach in area (3).
- Tighten down screw (1).
TIGHTENING TORQUES SPECIFICATION
| Housing to exterior mirror | ||
| Tightening torque | 0.85 Nm | |
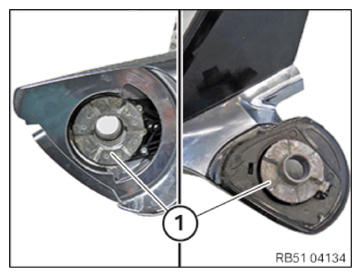
- Clean the exterior rearview mirror contact surfaces (1).
There must not be any swarf on the contact surfaces (1).
- Coat the contact surfaces (1) with grease.
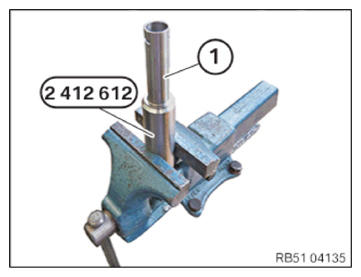
- Replace the sleeve (1).
Parts: Holding sleeve
- Fit the sleeve (1) on the special tool 2 412 612
.
- Fit lower section (1) and the upper section (2) of the exterior rearview mirror.

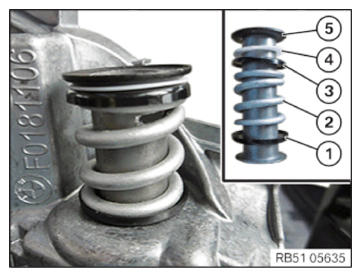
- Follow the installation sequence of the subsequent parts and only use new parts from the repair kit.
- Position the cup wheel (blue plastic) (1) with the outline facing up.
- Set up spring (2).
- Position the cup wheel (blue plastic) (3) with the outline facing down.
- Attach the Teflon washer (4).
- Position the cup wheel (metal) (5) with the outline facing up.
- Set up the fitting aid (1) and fasten with the hexagon socket screw (2).
- Spring (3) with the fitting aid (1) can be relaxed till snap ring (4) can be used.
- Use snap ring (4) and remove fitting aid (1).
- Note the correct fit of the snap ring (4).
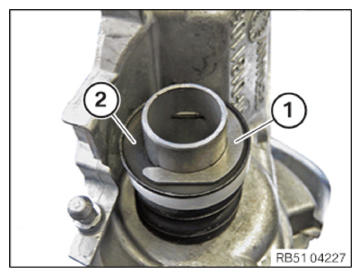
- Ensure that the snap ring (1) lies correctly in the cup washer (2).
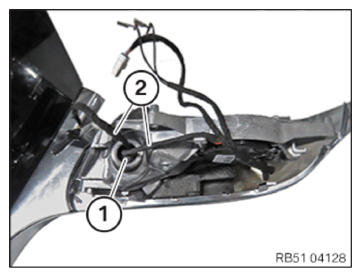
- Thread in cable (2) into the exterior rearview mirror.
The pins on the cables (2) must not be damaged.
The number of cables (2) varies depending on the equipment.
- Use foam inserts (1).
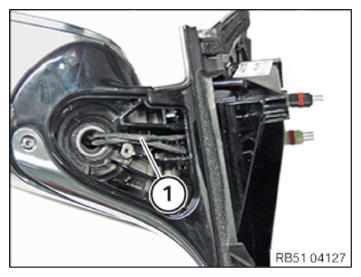
- Feed in cable (1).
Install cover on the mirror base
- Mount cover (1) and slide it in the direction of the arrow.

- Pin connector (3) into the connector housing (2).
- Use connector housing (2).
- Use sound insulation (1).
Follow-up Work
- Fit exterior MIRROR .
- Install the mirror triangle COVER .
- Install the top view CAMERA .
- Install the exterior rearview mirror RETAINING RING .
- Install the exterior mirror ADJUSTMENT DRIVE .
- Install the exterior mirror PROTECTIVE CAP .
- Install the mirror GLASS .
- Calibrate the top view CAMERA .
- Check the functions of the exterior REARVIEW MIRROR