Prepare new part
Further information is available.
- Mark and carry out a separating cut on the new part of the outer wheel arch section as per the separating cut on the vehicle and add 15 mm of material to this separating cut.
- Remove adhesive residue on the vehicle flange surfaces.
- Adjust the new part outer wheel arch section.
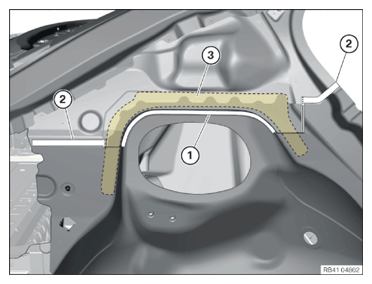
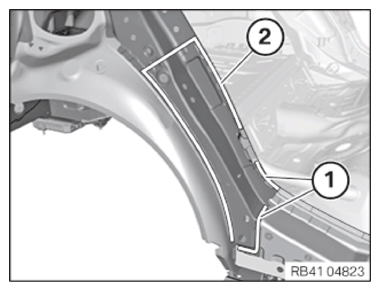
- Prepare area (1) for joining by overlapping.
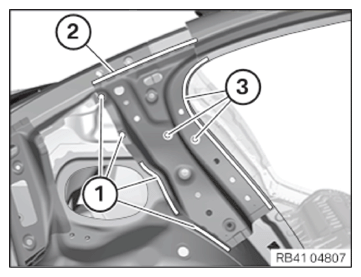
- Prepare the new part in areas (1) and (2) for joining by welding.
Ensure sufficient distance to the bonded rivet connection (3).
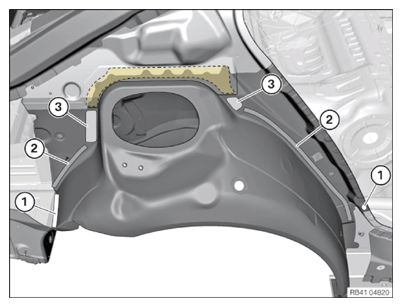
- Prepare the new part in areas (1) and (2) for joining by welding.
During this process, make sure that there is sufficient distance to the bonded rivet connections (3).
NOTE: TECHNICAL INFORMATION
For additional information see: 41 00...
Spot-weld bonding steel components - In the areas (2), observe the procedure for replacing spot-welded adhesive joints for the series.NOTE: TECHNICAL INFORMATION
Structural adhesive bonding.
Observe preparation of bonding surfaces.
For additional information see: BMW/MINI BONDING INSTRUCTIONS (530I 2017-2022, 530I XDRIVE 2017-2022, 530E PHEV 2018-2022, 530E XDRIVE PHEV 2018-2022, 540I 2017-2022, 540I XDRIVE 2017-2022, M550I XDRIVE 2018-2022) . - Prepare the areas (3) for joining by bonded rivet connection.
- Transfer the holes for the punch rivets that were opened during the removal to the new part and drill with Ø (3) 6.8 mm.
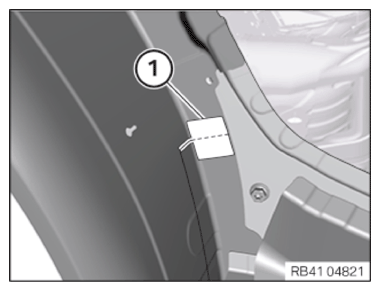
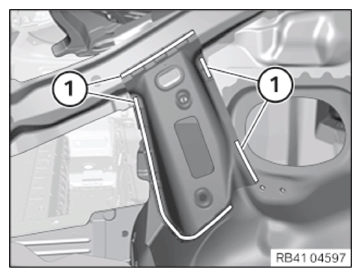
- Prepare a reinforcement plate (1) for the separating cut.
- Prepare the new part in area (1) for joining by welding.
- Prepare area (1) for joining by overlapping.
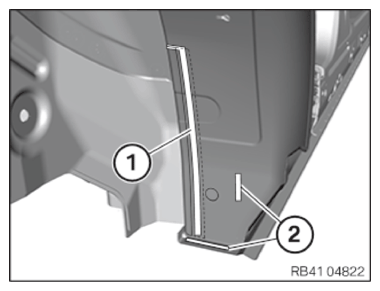
- Prepare the new part in areas (1) and (2) for joining by welding.
- Fit in the new part tension strap.
- Prepare the new part for joining by welding in these areas (1).
- Prepare new parts C-pillar reinforcement (1) and C-pillar insert (2) for joining by welding.
Refer to the removed components for exact positions.
- Adjust the new part C-pillar reinforcement and prepare in the areas (1) to (3) for joining by welding.
- Adjust the new part C-pillar support and prepare the areas (1) and (2) for joining by welding.
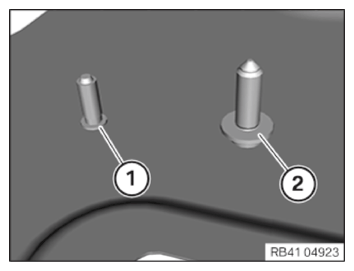
Replacing the coarse thread bolts and threaded weld bolts, surface steel
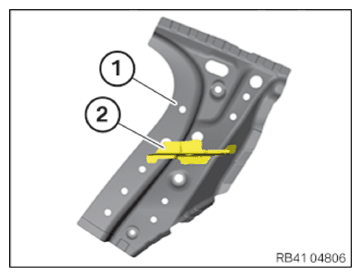
NOTE: Schematic diagram is for example purposes. Some parts may differ in certain details. - Take the number and position from the component to be replaced or the installed parts.
- Renew the coarse thread bolt (1) and the threaded weld bolt (2).
Parts: Coarse thread bolt (1), threaded weld bolt (2)
- Weld the coarse thread bolt (1) and threaded weld bolt (2) onto the new part.