Replace the front axle support
NOTE:
Schematic diagram is for example purposes. Some parts may differ in certain details.
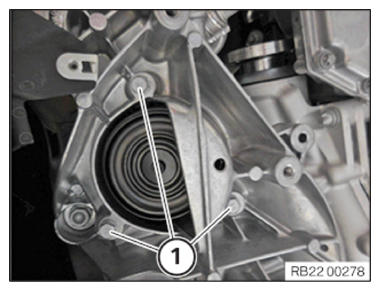
Remove the left engine mount
- Loosen screws (1).
- Remove engine mount.
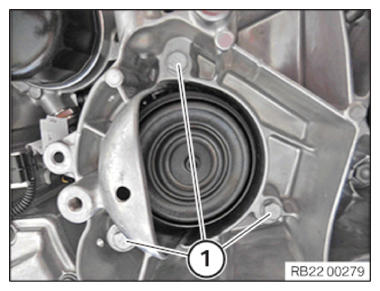
Removing the right engine mount
- Loosen screws (1).
- Remove engine mount.NOTE: The following step(s) must be performed if the listed component(s) is/are installed.
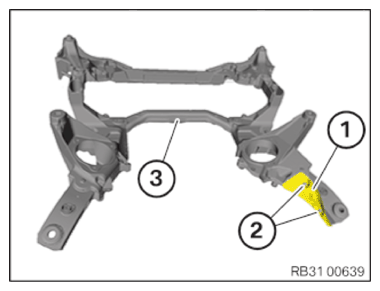
- Loosen screws (2).
- Remove the heat shield (1) from the front subframe (3).
Release all existing installed parts from the previous front subframe.
NOTE: TECHNICAL INFORMATION
Conduct the following operation with the assistance of a second person. - Loosen tensioning strap.
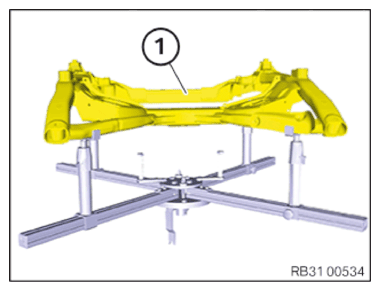
- Lift the front subframe (1) from the special tool.
- Replace front subframe (1).
Parts: front subframe
- Position the new front axle support (1) on the special tool.
- Secure the front subframe (1) with a luggage strap.NOTE: The following step(s) must be performed if the listed component(s) is/are installed.
- Position the heat shield (1) on the front subframe (3).
- Tighten down screws (2).
Fasten all existing installed parts to the new front subframe.
TIGHTENING TORQUES SPECIFICATIONStandard screw connection M6 M6 Tightening torque 8 Nm TIGHTENING TORQUES SPECIFICATIONStandard screw connectionM8 M8 Tightening torque 19 Nm Installing the engine mount on the left
- Install engine mount.
- Tighten the screws (1).TIGHTENING TORQUES SPECIFICATION
Engine mount to front axle support M8 tightening torque 19 Nm Installing the right engine mount
- Install engine mount.
- Tighten the screws (1).
TIGHTENING TORQUES SPECIFICATION
| Engine mount to front axle support | ||
| M8 | tightening torque | 19 Nm |