Installing the spring strut shock absorber
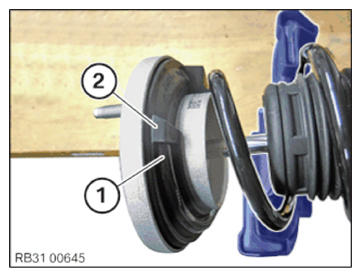
- Check the auxiliary damper (1) and the spring pad (2) and replace where required.
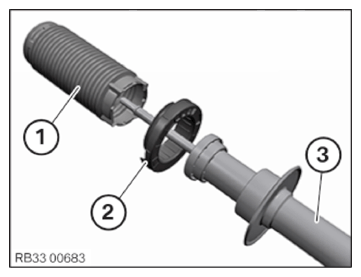
Parts: Auxiliary damper and spring pad
- Slide the auxiliary damper (1) and the spring pad (2) onto spring strut shock absorber (3).
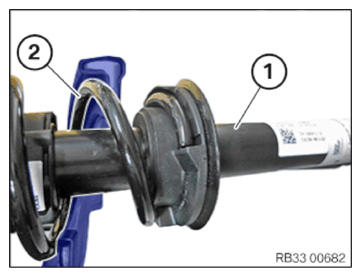
- Guide in spring strut shock absorber (1) with spring pad and auxiliary damper into tensioned coil spring (2).
- Check the spring pad (1) and replace as needed.
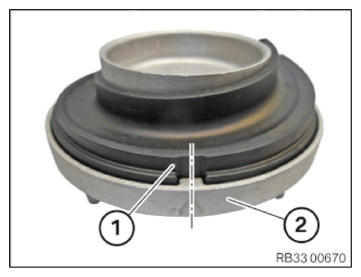
Parts: Spring pad
- Position the spring pad (1) based on the recess to the spring strut support bearing (2).
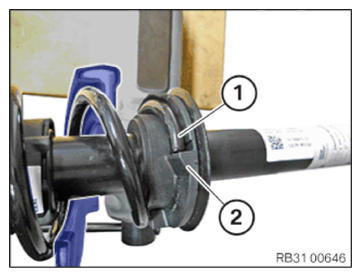
- Align the coil spring end (1) at the spring pad (2) to the limit position.
- Slide the spring strut support bearing with the spring pad (2) onto the piston rod of the spring strut shock absorber.
- Align the coil spring end (1) at the spring pad (2) to the limit position.NOTE: TECHNICAL INFORMATION
Releasing and tightening the nut on the support bearing or strut mount with an impact screwdriver is prohibited. - Replace nut.
Parts: Nut
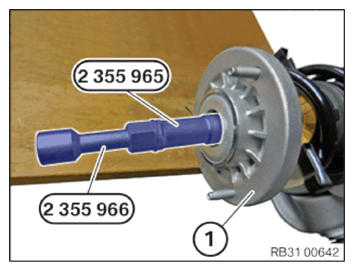
- Tighten the nut of the spring strut support bearing (1) with the special tools 2 355 965
and 2 355 966
.TIGHTENING TORQUES SPECIFICATION
Rear spring strut support bearing to spring strut shock absorber M10
Replace nut.Tightening torque 28 Nm
Follow-up Work
- Relieve tension on COIL SPRING
- Install the rear spring strut SHOCK ABSORBER .
- Position SOUNDPROOFING MAT .
- Install rear upper SEAT BELT .
- Install the storage shelf TRIM PANEL .
- Remove the rear wheel arch COVER .
- Install the camber control arm COVER .
- Install rear left or right WHEEL .
- Connect all battery EARTH LEADS .
- Activate the 48 v ELECTRICAL SYSTEM .