Replacing the bellows of the joint on the transmission end
NOTE:
TECHNICAL INFORMATION
Observe the notes on the disassembly and installation of low profile hose clamps!
For additional information see: NOTES ON THE DISASSEMBLY AND INSTALLATION OF LOW PROFILE HOSE CLAMPS .
Observe the notes on the disassembly and installation of low profile hose clamps!
For additional information see: NOTES ON THE DISASSEMBLY AND INSTALLATION OF LOW PROFILE HOSE CLAMPS .
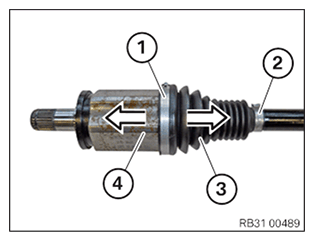
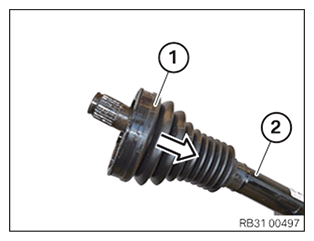
- Loosen the low profile clip (1).
- Cut ear hose clamp (2) open transversely to ear and remove.
- Pull back the bellows (3).
- Detach the joint housing (4).
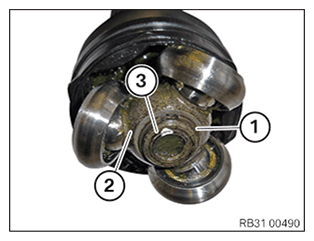
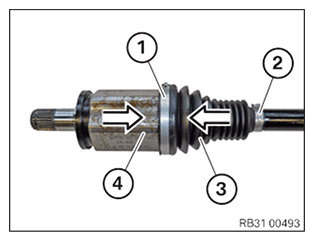
- Loosen the circlip (1) for the tripod (2) from the output shaft (3).
- Seal bore of output shaft with screw (2).
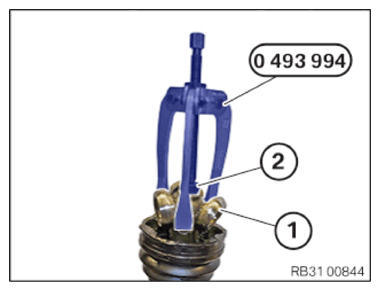
- Detach tripod (1) with special tool 0 493 994 (11 8 310).
- Clean the tripod (1).
- Remove all traces of previous lubricant.
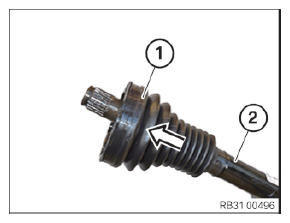
- Detach the bellows (1) off the output shaft (2).
- Replace bellows.
Parts: gaiter
- Slide the bellows (1) onto the output shaft (2).
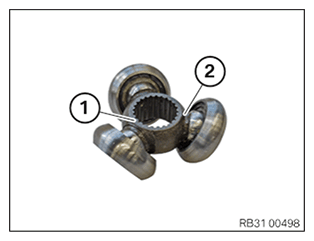
- Mount the tripod (2) on the output shaft so that the flat side (1) points towards the circlip.
- Replace the circlip (1).
Parts: Circlip
- Mount the circlip (1) for the tripod (2) on the output shaft (3).
- Grease tripod and joint housing with lubricant "One Lube Improved".
- Mount the joint housing (4) on the tripod.
- Mount the bellows (3) on the joint housing (4).
- Replace low profile hose clamp (1) and ear hose clamp (2).
Parts: Low profile hose clamp and ear hose clamp
- Fasten bellows (3) with low profile hose clamp (1) and ear hose clamp (2).
Align low profile hose clamp (1) such that the hook fastener is on the flattened side of joint housing (4).
TECHNICAL DATA - GAP DIMENSION SPECIFICATION
| Ear hose clamp gap dimension | ||
| Dimension [A] | max. 1 mm | |
