Removing the flexible disc for the rear prop shaft
Preliminary work
- Remove rear UNDERBODY PROTECTION .
- Remove the UNDERBODY PLANKING of the transmission on the side
- Remove the CONNECTING SUPPORT from the tunnel.
- If installed: remove the right and left TORSION STRUT where required.
- Remove complete EXHAUST SYSTEM .
- Remove the HEAT SHIELDS .
NOTE:
TECHNICAL INFORMATION
To protect universal joints, tie back prop shaft in area of central mount.
To protect universal joints, tie back prop shaft in area of central mount.
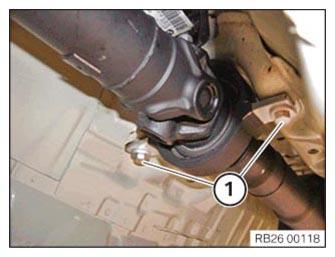
- Loosen screws (1).
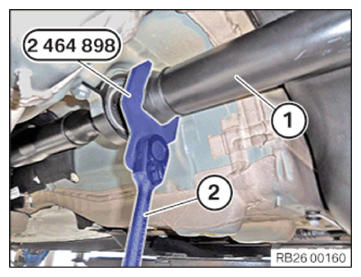
- Vehicles with narrow universal joint:
Use special tool 2 464 898 and a suitable tool (1) to protect the prop shaft (2) on the central universal joint from twisting.
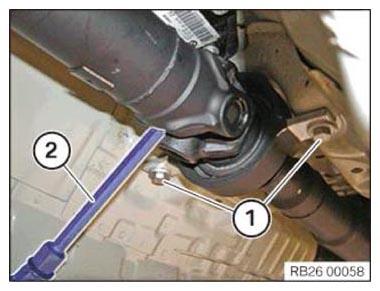
- Vehicles with wide universal joint:
Secure the juncture shaft on the center universal joint with a suitable tool (2) to protect it from twisting.
Do not remove the screws (1) completely until the screws on the three-hole flange have been loosened.
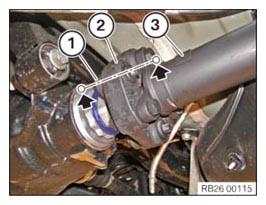
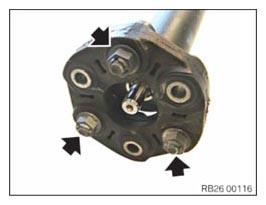
- Mark the installation position of the three-hole flange (1), the flexible joint disk (2) and the prop shaft (3) in a plane (arrows).
The marking makes it possible to install the three-hole flange and the prop shaft in the same position. This ensures that the three-hole flange for the rear axle differential is balanced with the prop shaft again after installation.
- Release the prop shaft (3) on the three-hole flange (1) and at the central mount.
- Release screws (arrows) and remove flexible disc from the prop shaft.