Cutting to length and stripping insulation from cables (530i 2017-2022, 530i xDrive 2017-2022, 530e PHEV 2018-2022, 530e xDrive PHEV 2018-2022, 540i 2017-2022, 540i xDrive 2017-2022, M550i xDrive 2018-2022)
Special tools required:
- 12 1 080
- 12 1 081
- 12 1 083
- 221 122
- 0 494 159
- 0 496 849
- 0 496 833
- 407 379
- 61 4 320
- 61 4 340
- 61 0 210
- 61 0 220
- 61 0 230
Spare parts for vehicle electronics (housing and contacts):
Use insulation strippers to cut and strip insulation of cables 2 221 122 .
Stripped length:
| Wire cross-section (mm2 ) | Stripped length (mm) |
|---|---|
| 0.35... 0.50 | 4.0 |
| 0.75... 1.00 | 4.5 |
| 1.00...2.50 | 5.0 |
- Crimping of NanoMQS stops (only G11; G12)
Crimping of NanoMQS contacts (MQS).
- Special tool handle 0 494 159 or 0 496 849
- Special tool matrix 0 496 833
- Stripping tool 2 407 379
- Crimping of stops up to 2.5 mm 2
Crimping Micro Quadlock System contacts (MQS).
- Special tool 61 4 320
Crimping Micro Power Quadlock contacts (MPQ).
- Special tool 61 4 320
Crimping miscellaneous stops up to 2.5 mm2
- Special tool 61 4 340
- Crimping of stops from 2.5 mm 2
Crimping load current contacts (LSK 8).
- Special tool 61 0 210
Crimping load current contact 2.8.
- Special tool 61 0 220
Crimping double spring contact (DFK 40)
Crimping MAK8
- Special tool 61 0 230
- Crimping butt connectors and contact sleeves for comb connectors up to 2.5 mm 2
- Crimping butt connectors and contact sleeves for comb connectors larger than 2.5 mm 2
- Crimping contact sleeves for 4 mm 2
comb connectors and ignition cable contacts
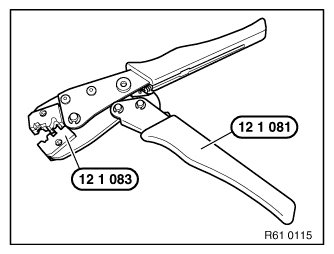
For connecting the ignition cable contacts and for crimping the 4 mm2 contact sleeves for comb connectors, the special tool set 12 1 080 is used.
- 12 1 081 (hand pliers)
- 12 1 083 (nest)
See REPAIR INSTRUCTIONS Special tools for wiring harness repairs.
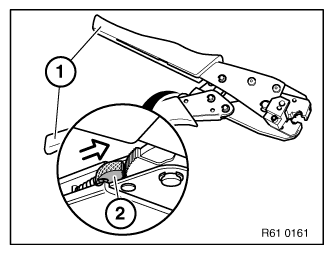
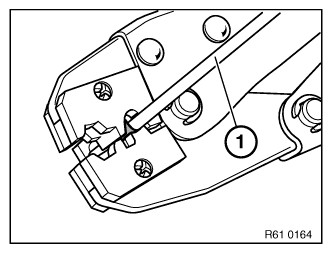
Unlock special tool 12 1 081 :
Squeeze grips (1) lightly and push release lever (2) in direction of arrow.
Or:
Compress handles until limit position, hand pliers unlock automatically.
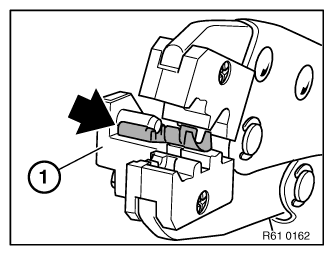
Place 4 mm2 contact sleeve in nest with anti-twist lock (1) up to the limit position.
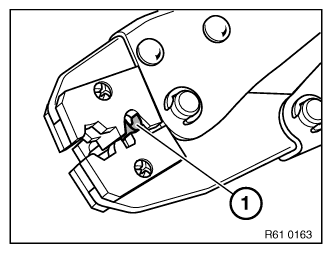
Preload contact by squeezing matrix in crimping tool. Grip contact (1) firmly only, do not crimp.
NOTE: Follow procedure for cutting and stripping insulation from cables.Insert stripped end of wire (7) in the contact. Ensure that the insulation and strip insulation wire end are correctly laid in contact.
Compress crimping tool to limit position.
Crimping tool unlocks automatically
Take contact out of crimping tool.
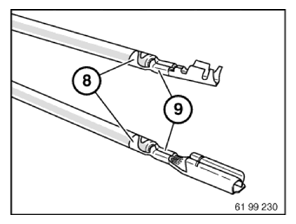
- Checking crimping
Check insulation crimping (8) and wire crimp (9) against following illustrations to ensure crimps are correctly located.
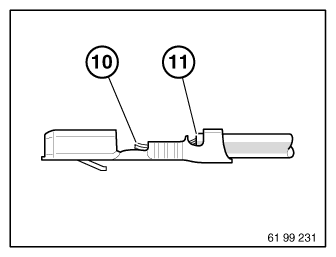
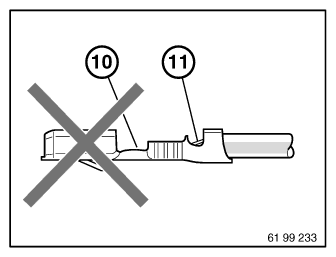
NOTE: Illustration shows butt connectors and contact sleeves for comb connectors knocked on one side. The crimping procedure is identical here.Correct crimping:
Visible conductor end (10).
Visible insulation end (11).
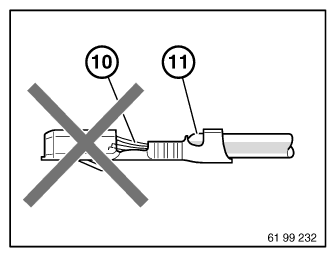
Incorrect crimping:
Conductor end (10) inserted too far.
Insulation end (11) in wire crimp.
If necessary, repeat crimping with a new contact.
Incorrect crimping:
Conductor end (10) not visible.
Insulation end (11) not visible.
If necessary, repeat crimping with a new contact.
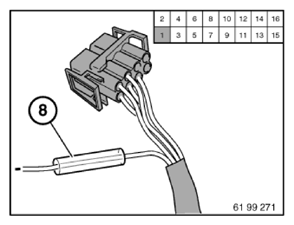
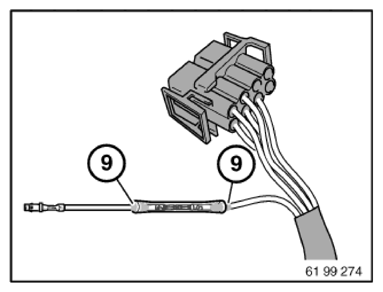
- Insulating the crimp point with the heat-shrink tubing
Push the heat-shrink tubing (8) onto the free wire end before crimping.
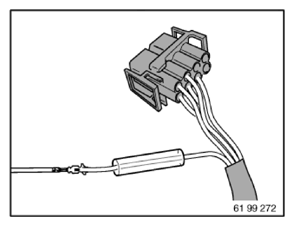
Crimp unused wire end using butt connector.
Position the heat-shrink tubing centrally over the butt connector.
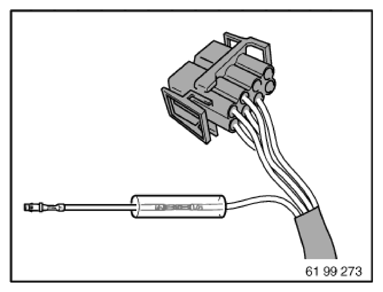
CAUTION: Do not burn shrink-on sleeve.Mount the soldering shrink reflector on the hot air blower.
Using a hot air blower, shrink the heat-shrink tubing at 400°C until adhesive visibly escapes uniformly at both sides (9) of the heat-shrink tubing.