Installing the positive battery cable for the starter generator with remote positive terminal
NOTE:
TECHNICAL INFORMATION
Make sure the cable is routed and attached correctly.
Make sure the cable is routed and attached correctly.
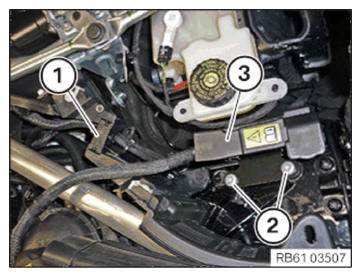
- Install the positive battery cable for the starter generator with remote positive terminal (3) and all the associated lines.
- Tighten the screws (2).TIGHTENING TORQUES SPECIFICATION
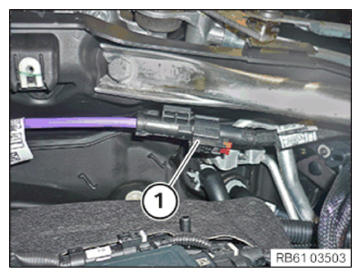
Remote positive terminal to the spring strut dome M8 screw Tightening torque 28 Nm - Position the cable duct (1) and install it downwards.
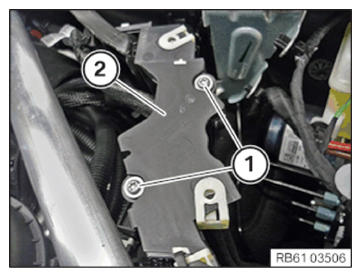
- Position the sealing frame (2) and tighten the screws (1).TIGHTENING TORQUES SPECIFICATION
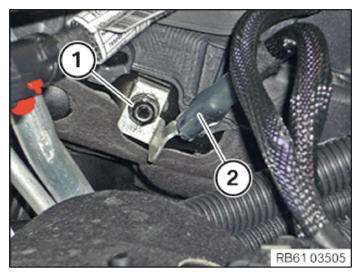
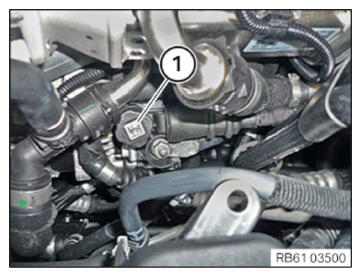
Sealing frame of remote positive terminal at the front left 5x25 screw Tightening torque 2.5 Nm - Position the line (2) and tighten the nut (1).TIGHTENING TORQUES SPECIFICATION
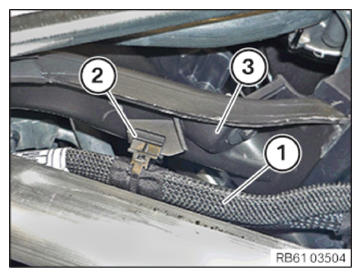
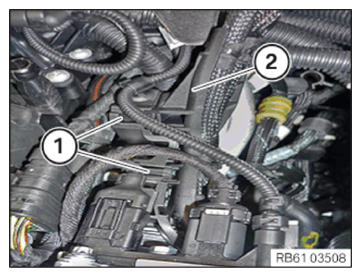
Ground cable to body Flange Nut M8 Tightening torque 19 Nm - Position the line (1) with the cable clip (2) and secure to the trim (3).
- Connect connectors (1) and lock.
- Position the cable clip (2) and engage it into latch mechanisms (1).
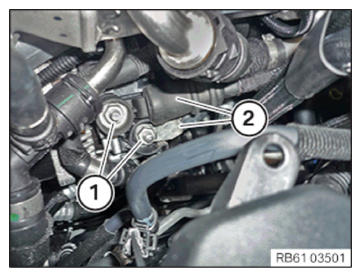
- Position the lines (2) and tighten the nuts (1).TIGHTENING TORQUES SPECIFICATION
Lines to starter generator Flange Nut M8 Tightening torque 19 Nm - Secure the positive pole cover (1).
Follow-up Work
- Install the upper part center FIREWALL .
- Connect 48-v battery positive battery CABLE .
- Install cowl panel COVER .
- Install left and right WIPER ARM .
- Install the rear left engine compartment COVER .
- Connect all battery EARTH LEADS .
- Activate the 48 v ELECTRICAL SYSTEM .