Unlocking and disconnecting different plug connections (530i 2017-2022, 530i xDrive 2017-2022, 530e PHEV 2018-2022, 530e xDrive PHEV 2018-2022, 540i 2017-2022, 540i xDrive 2017-2022, M550i xDrive 2018-2022)
Differences in the details of the size and shape of the plug connections are possible.
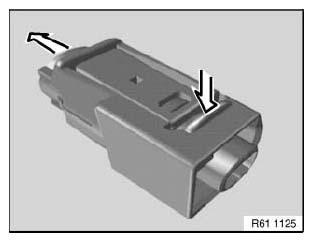
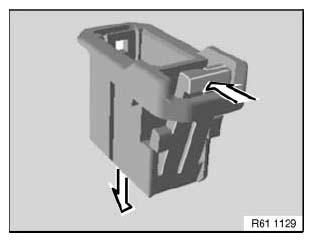
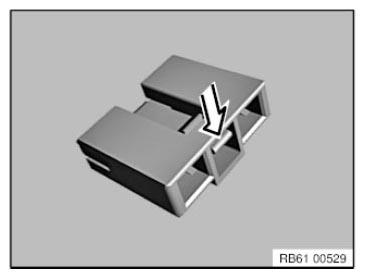
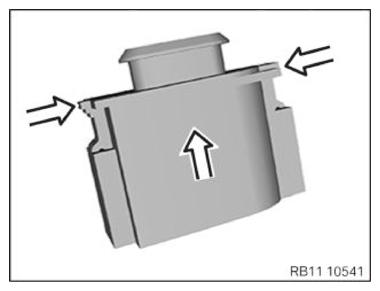
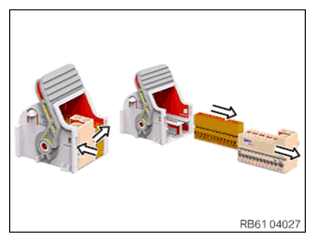
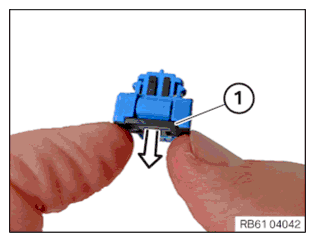
- Press lock and open release clip in direction of arrow.
Disconnect plug connection.
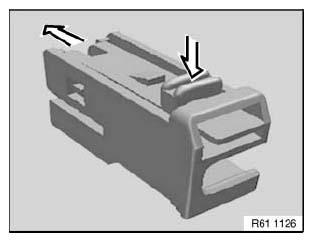
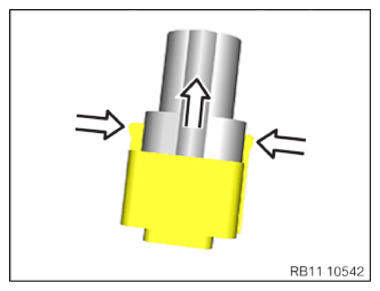
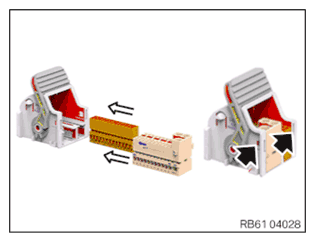
- Press lock and open release clip in direction of arrow.
Disconnect plug connection.
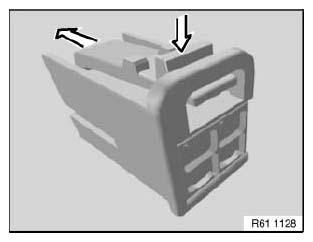
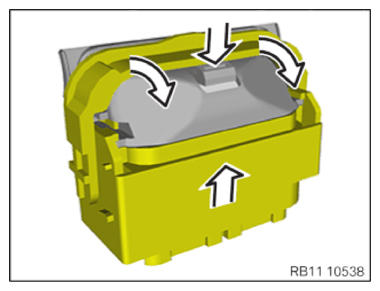
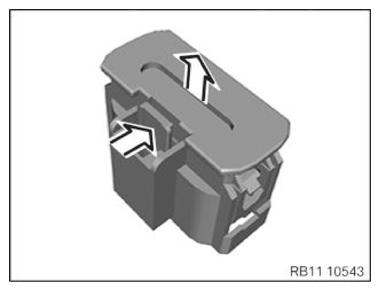
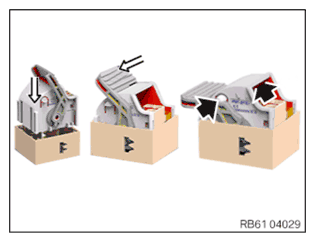
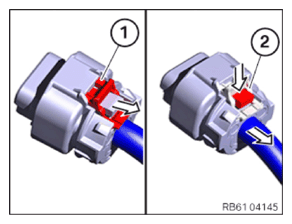
- Open release clip in direction of arrow and disconnect plug connection in direction of arrow.
- Press lock and disconnect plug connection in direction of arrow.
- Press lock and disconnect plug connection in direction of arrow.
- Press lock and disconnect plug connection in direction of arrow.
- Press lock and disconnect plug connection in direction of arrow.
- Press lock and disconnect plug connection in direction of arrow.
- Press lock and disconnect plug connection in direction of arrow.
- Press the lock and detach plug connection.
- Press the lock and detach plug connection.
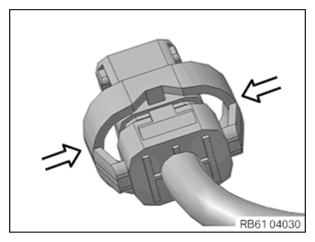
- Press the lock on both sides and detach plug connection.
- Press the lock and detach plug connection.
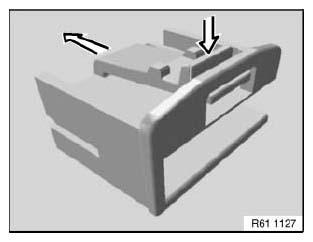
- Press lock and open release clip in direction of arrow.
Disconnect plug connection.
- Press the lock and detach plug connection.
- Pull out lock and press.
Disconnect plug connection.
- Press the lock and detach plug connection.
- Press the lock and detach plug connection.
- Press the lock and detach plug connection.
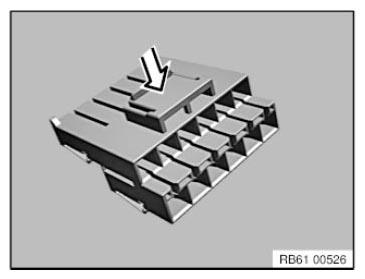
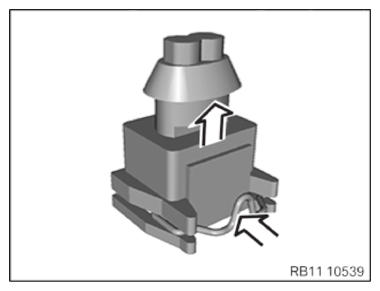
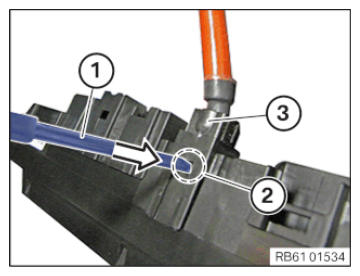
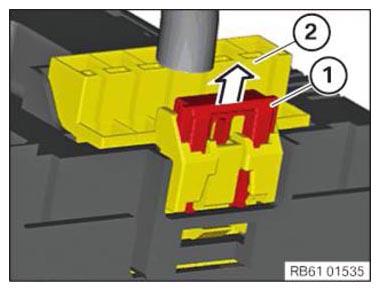
- Plug connection, e.g. on the power distribution box:
Press into the opening (2) using a suitable tool (1).
Pull off plug connection (3) upwards.
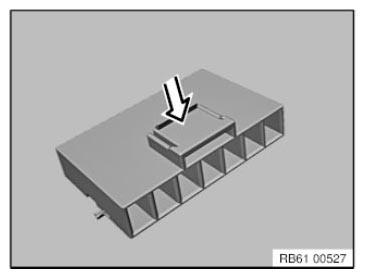
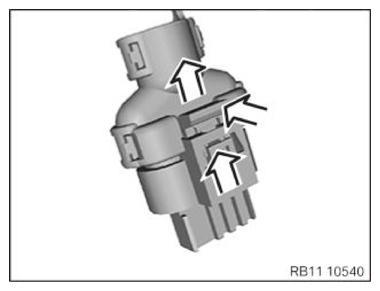
- Plug connection, e.g. on the power distribution box:
Lift lock (1) with a suitable tool.
Pull off plug connection (2) upwards.
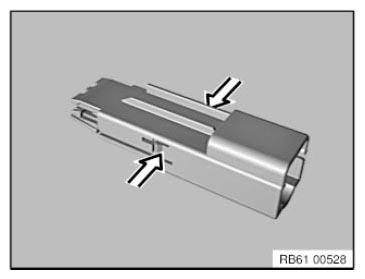
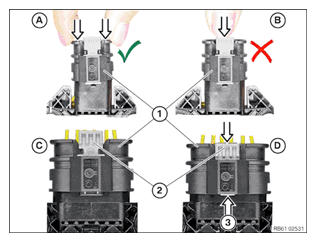
- Vibration resistant high power engine contacts: CAUTION: For this connector type, increased forces come into play when disconnecting and closing.
Disconnect:
Pull out lock (1) downward in direction of arrow first.
Then press lock (1) down in direction of arrow and pull off connector.
- Close:
- Press the connector (1) down at the points indicated by the arrow until it reaches the end position
- Do not press the connector (1) further than the lock
- Connector (1) is in the end position, but lock (2) is not yet locked
- Press lock (2) down in the direction of the arrow until the tip of lock (2) is visible at point (3)
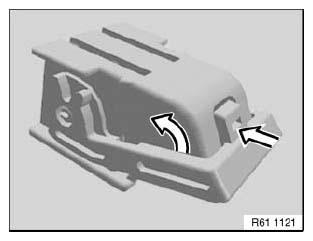
Unlock/lock front light combination plug connection & replace housing after damage:
- Press in locking lever at both sides until the lever is unlocked and can be moved.
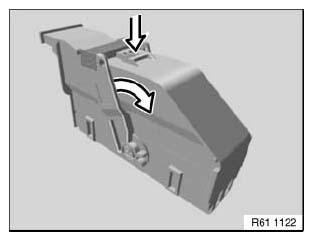
Move lever upwards until it latches into place in the end position.
Once the lever is locked in the end position, remove plug connection upwards.
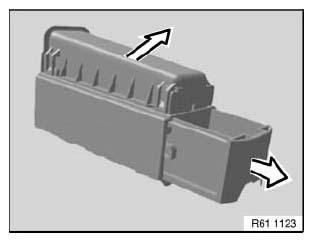
Unlock socket housing by lifting up each of the locking tabs.
Slide out after unlocking the socket housing.
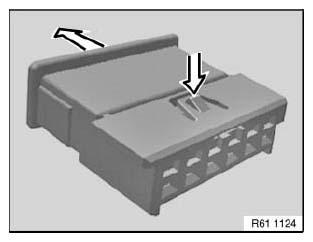
Slide in socket housing up to limit position.
Lock socket housing into place in end position.
Sliding in up to limit position.
Activate plug-inn procedure by moving lever downwards.
IMPORTANT: The latch mechanism on both sides only works for a completed plug-in procedure. - Rosenberger D4S20G-400A5-Y
Press to unlock on both sides.
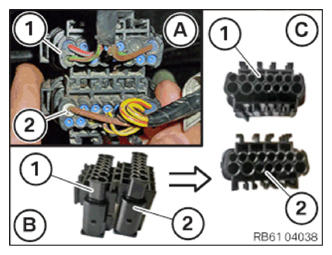
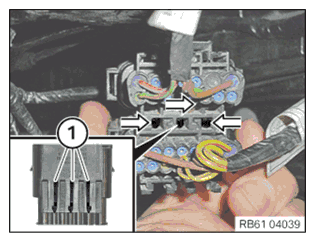
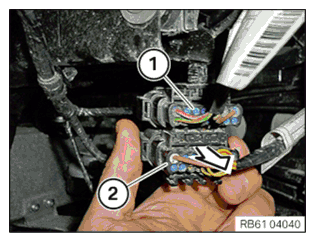
- Pin housing, 15-pin MLK1
- (A) & (B). To avoid any damage to individual connectors, the given connector assembly consisting of several individual connectors (1) & (2) must be released before disconnecting the plug connection.
- (C): released connector assembly
Disconnecting connector assembly:
Release retaining hooks (1) in direction of arrow (detail image shows retaining hooks of individual connector).
Release connector (2) in direction of arrow from connector (1).
- Airbag ignition circuit connectorWARNING: NOTE the safety information for working on vehicles with airbag systems prior to disconnecting the plug connection.
Pull the cap (1) in the direction of the arrow to unlock
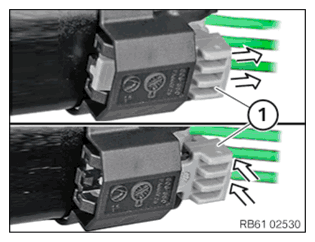
- Connector e.g. on front and rear lighting unit
Open safety catch (1) in direction of arrow using appropriate tool.
Push safety catch (2) in direction of arrow and disconnect plug connection.
- Plug, e.g. in airbag ignition circuits
Press the lock (1) and pull out the connector (2) up to initial engagement position.
Pull off connector (2).