Installing cell module 6
CAUTION:
Cell module collapses.
Injury hazard! Risk of accident!
Injury hazard! Risk of accident!
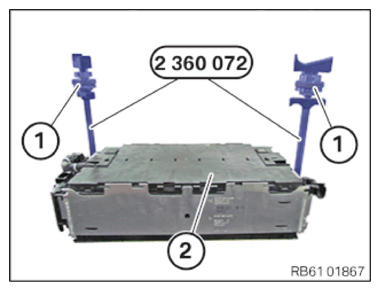
- Do not oil or grease special tool 2 360 072 (lifting device for cell module) as the holding force is no longer present.
- Observe Service Information of special tool 06 06 14 (134).
Carrying out the replacement module service function
- When replacing a cell module, the test module must be: "Document serial number of cell modules" must be performed.
- The service function can be found at the following location in BMW's ISTA: Vehicle management/service function/drive/hybrid vehicle (only for PHEV)/high-voltage battery unit/high-voltage battery unit: Document serial number of cell modules.
- The following procedure must be followed here:
- Enter the 10-digit serial number of the high-voltage battery unit or scan the 31-digit data matrix code of the high-voltage battery unit.
- For all replaced cell modules: Enter or scan the 28-digit serial number of the previously installed cell module (old), enter or scan the 28-digit serial number of the newly installed cell module (new).
- For a functional description, see also: ADDITIONAL INFORMATION!
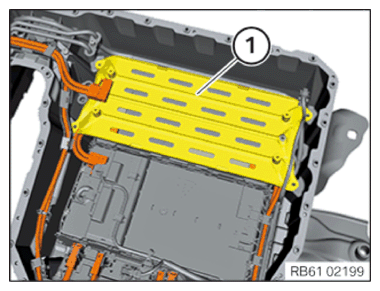
Insert the cell module into the high-voltage battery unit
- Carefully position the cell module (2) with the special tool 2 360 072
in the high-voltage battery unit.
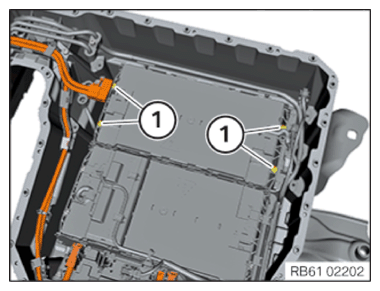
- Tighten screws (1) cell module.TIGHTENING TORQUES SPECIFICATION
Module screw connection M6x85 replace screw. Tightening torque 14 Nm - Connect connector (1) at cell monitoring electronics.
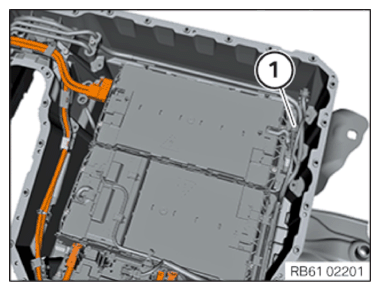
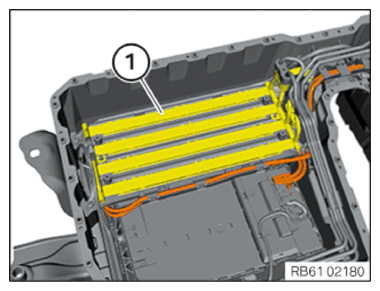
- Connect high-voltage cable (1).
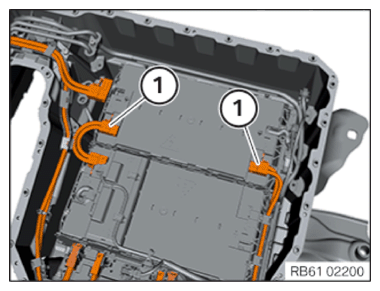
- Insert the removable panel (1).
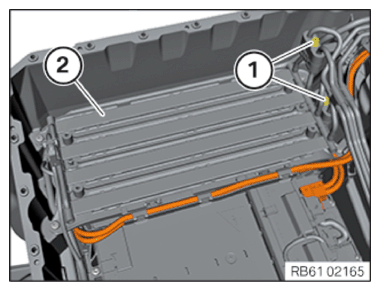
- Turn the thumbwheels (1) to the left up to the stop.
- Carefully remove the special tool 2 360 072
from the cell module (2).
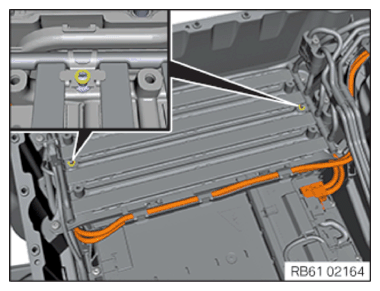
- Tighten the screws (1) the removable panel.TIGHTENING TORQUES SPECIFICATION
Removable panel on housing M6x16 replace screw. Tightening torque 13 Nm Installing top radiator

NOTE:
TECHNICAL INFORMATION
The radiator must not be damaged. If the radiator is damaged or has dents/kinks, replace the radiator.
Faulty positioning pins must be replaced. Exchange the venting unit if the radiator is leaking.
If the radiator is only removed and reinstalled, replace the sealing rings on the flange of the radiator.
- Insert radiator (1) carefully and clip in to cooler pin.
- Hand-tighten the bolts (1) on the radiator (2).
- Attach the plastic washers to the radiator pin.
Follow-up work
- Install top RADIATOR .
- Install CELL MODULE 4 .
- Tighten RADIATOR .
- Install the high-voltage battery unit LID .
- Perform EOS TEST