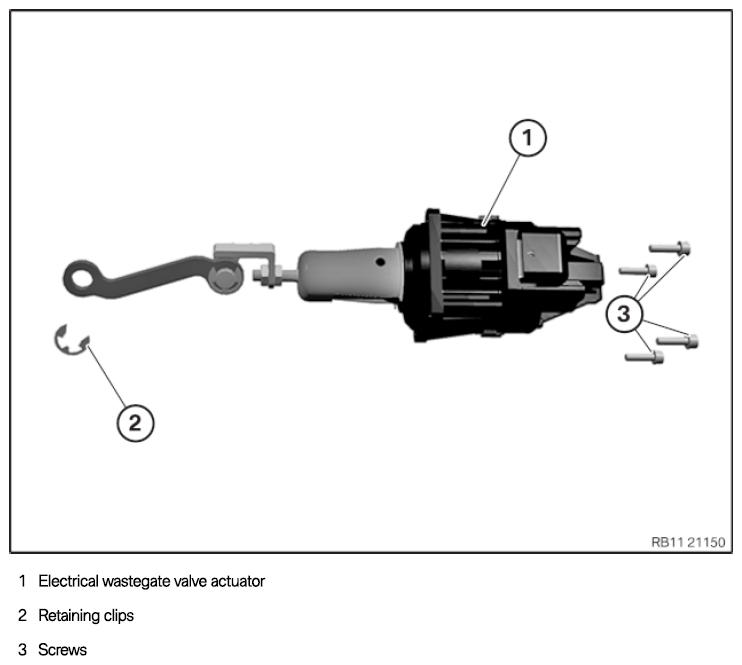
Install electric wastegate valve actuator
Repair kit for the electrical wastegate valve controller
NOTE:
RISK OF DAMAGE
Damage to the electrical controller drive and the mechanical connection.
Improper handling of the electrical controller drive can lead to malfunctions or failure of the electrical controller drive.
Damage to the electrical controller drive and the mechanical connection.
Improper handling of the electrical controller drive can lead to malfunctions or failure of the electrical controller drive.
- Do not release the screw connection between the wastegate linkage and the control rod on the wastegate valve controller and do not twist it.
- Avoid exposure of lateral forces to the control rod of the electrical controller drive.
- Remove all the screws on the electrical controller drive before the control rod on the wastegate linkage is detached.
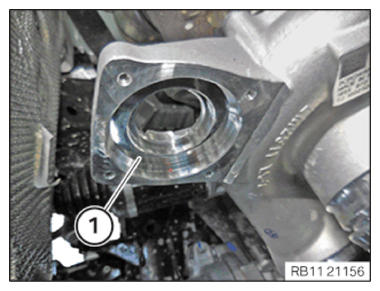
- Check the contact surface (1) at the exhaust turbocharger for contamination and clean if necessary.
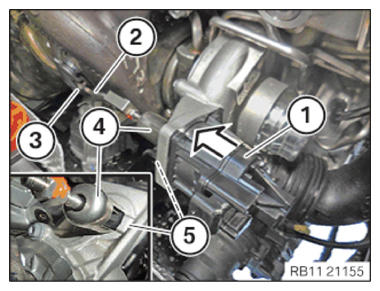
- Thread the electrical wastegate valve controller (1) into the bore of the compressor housing (5) in the direction of the arrow and position.
- Ensure that the heat shield (4) is correctly positioned at the compressor housing (5).
- Mount the control rod (2) of the electric wastegate valve controller (1) carefully
on the lever of the wastegate valve (3).
In the process, any effect of transverse force on the control rack (2) is to be avoided.
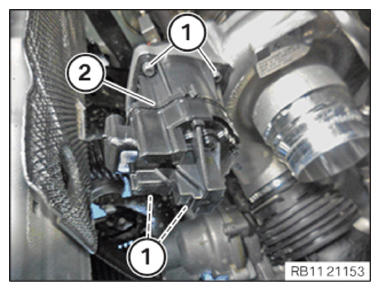
- Replace screws (1).
Parts: screw
The screws are included in the repair kit.
- Hand-tighten the screws (1) at the electrical wastegate valve controller (2).
- Tighten the screws (1) crosswise on the electrical wastegate valve controller (2).TIGHTENING TORQUES SPECIFICATION
Electrical controller drive to exhaust turbocharger Replace screws.
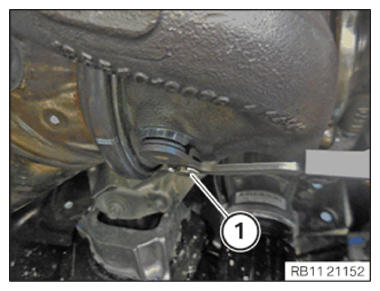
Tighten screws crosswise.Tightening torque 3 ± 0.5 Nm - Replace the retaining clip (1).
Parts: Retaining clip
The retaining clip is included in the repair kit.
- Mount the retaining clip (1).
- Make sure the retaining clip (1) engages audibly.
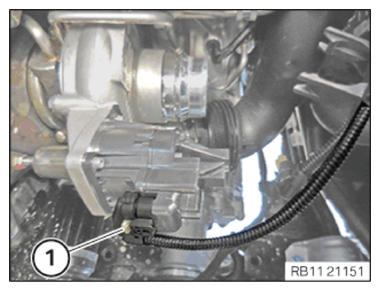
- Connect and lock the connector (1).
- Make sure the connector (1) engages audibly.