Checking low-temperature cooling system for watertightness
WARNING:
Hot surfaces.
Risk of burning!
Risk of burning!
- Perform all work only on components that have cooled down.
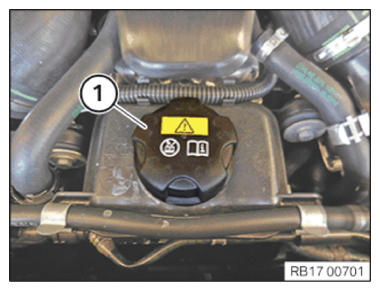
- Loosen sealing cap on coolant expansion tank for the low-temperature cooling system.
Check
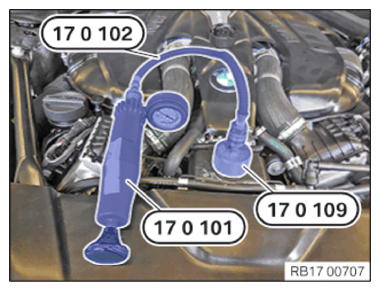
- Mount the special tool 0 494 418 (17 0 101) with 0 494 419 (17 0 102) and 0 494 426 (17 0 109) from the set of special tools 0 494 417 (17 0 100) on the coolant expansion tank.
- Use the special tool 0 494 418 (17 0 101) to build pressure in the cooling system to 1.5 bar.
Desired state
- The pressure of 1.5 bar must be maintained for 2 min.
Result
» Pressure in the cooling system drops.
Measure
- Find and fix leak in cooling system.
Check
NOTE:
TECHNICAL INFORMATION
If the described test step is not completed successfully: repeat test step twice. Only replace the sealing cap after three tests with an incorrect opening pressure.
When driving at high ambient temperatures, the design may cause the pressure relief valve in the sealing cap to open slightly and air to leakage together with dissolved coolant. This coolant vapor condenses on the surface of the coolant expansion tank and leaves traces of coolant when the vehicle has cooled down. These traces of coolant do not indicate whether the sealing cap is defective or not.
Leakage coolant vapors when the vehicle is at standstill may cause the pressure relief valve to stick to the sealing cap. This may cause an incorrect opening pressure.
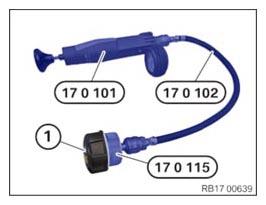
- Screw on sealing cap on special tool 0 495 889 (17 0 115) from the set of special tools 0 494 417 (17 0 100) .
- Build up the pressure with special tool 0 494 418 (17 0 101) and 0 494 419 (17 0 102) from special tool set 0 494 417 (17 0 100) .
- Observe the pressure tester to see when the opening pressure is reached.
Desired state
- Opening pressure of the sealing cap is 1, 4 bar.
Result
» Sealing cap opens before or after 1, 4 bar.
Measure
- Replace sealing cap.